
THE ARTIST TRIO - HOW TO TRAIN YOUR DRAGON VILLAGE
Maria, Anna and Marina teamed up to create the Viking Village scene, inspired by How to Train Your Dragon. In this masterful breakdown, we dive into their structure as a trio and how they planned their approach, as well as looking at how they established the art style of their scene, creation of the assets and overall world building. Learn everything you need below, and be inspired to work as a team.
Introduction
In our team there are 3 of us:
Maria Puchkova (Art Lead + 3D Artist)
Anna Kirilenko (Tech Lead + 3D Artist)
Marina Сhekhovskhih (Concept Artist)
It was our second year at Scream School, when we met each other and decided to make a diploma project together within the framework of diploma cooperation between different faculties (Concept Art and Game Graphics). We knew right away that we wanted to work together. We have much in common – similar views, ambitious plans and an endless desire to work hard and constantly learn new things. This was a strong basis for our effective partnership and project development. Then we decided on the main topic and idea of our future project and the work began.
We are going to talk mainly about the 3D part of our Viking Village scene. However, it is worth saying that Marina's work in our project as a Concept Artist cannot be underestimated. Her concepts for houses and props played a huge role in the whole project.


Working as a Team
None of us had experience working in a team project and also for all the team members it was the first big environmental scene and the first stylized project. As you can see, it's really strange that we ended up doing quite well in the end and had decent work. We strongly believe that we managed to do it due to our strong management work.
One of the strongest features of our project was a clearly established division of duties. In a team project, people usually underestimate the meaning of the management and zones of responsibilities.
In such work no matter how large is the group there always should be a hierarchy for the main art decisions. Two people (even with similar interests and views) always have two different visions for the stylization or building appearance of even a simple prop like a barrel. That’s why it is crucial to have only one person who will take the responsibilities of an Art Lead as well as vision holder.
In our team, one of us was fully responsible for the art decisions (Maria Puchkova), whereas Anna Kirilenko was in charge of the technical part of the project. Such segregation of duties is necessary for effective work, but it is always important to listen to the team and respect your partners, especially if your decision differs a lot from the collective opinion.
Below is a scheme of our duties and responsibilities for the project:

How to Train Your Dragon
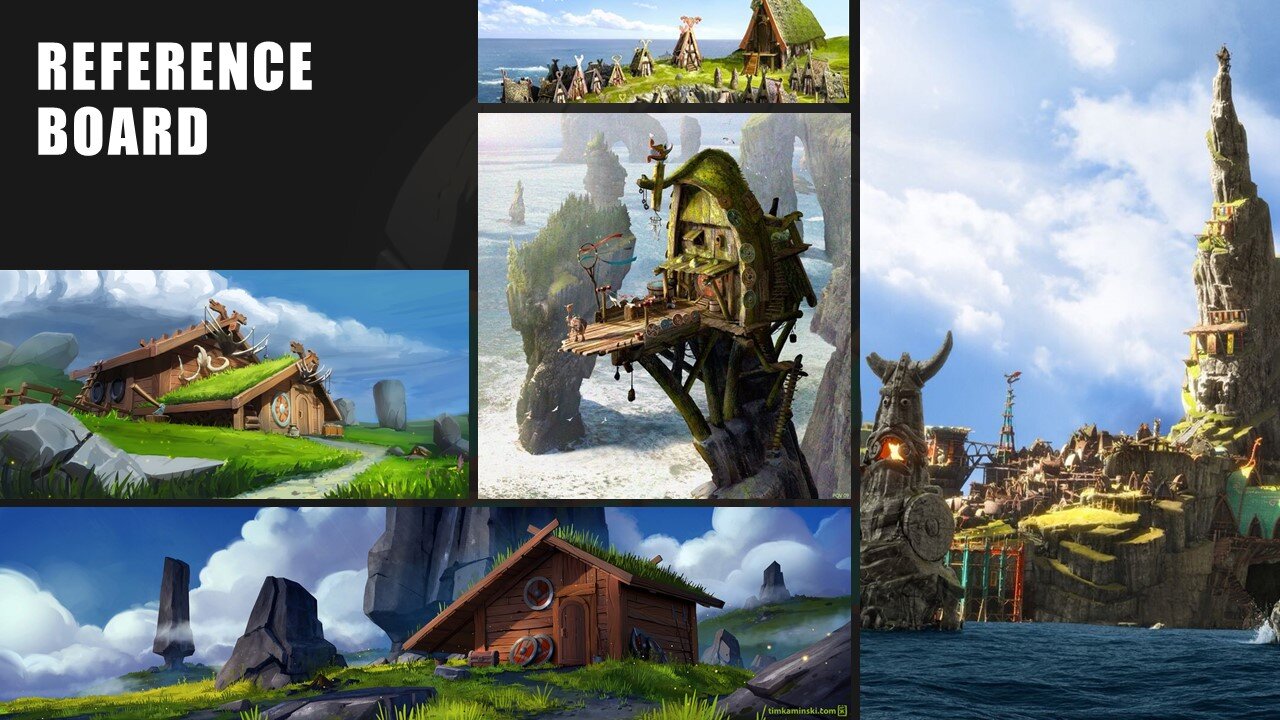
The trilogy “How to Train Your Dragon” was our main inspiration source. We had spent many hours collecting different concepts for it, digging deeper into its clever design and distinctive stylization.
Apart from this, we had many references from different games, movies, and just various artists for each prop, decorative or environmental element. Among them are games such as Rime, Spyro (Reignited Trilogy), Heroes of the Storm and Nords: Heroes of the North.
Pinterest was the best tool to set everything together and sort things out. Also, we would recommend PureRef which is very handy.
Workflow Pipeline & Consistent Quality
Before the real work started, we tried to organize the process of work somehow, we searched for the right tools for appropriate planning. Below you can see the very first plan of our viking village. Of course, with such approach we would not be able to run a large group project, so our methods and tools were later improved and changed to suit our needs.

For task management, we highly recommend Trello as it was extremely helpful for us throughout the whole project.
With this exceptionally useful tool, you can create separate task lists, assign responsibilities and set deadlines, break down by priorities and roles, as well as to track the performed and future work. We used Trello throughout the whole project and it solved a lot of organisational tasks and saved us plenty of time.

Planning at the beginning of our project took a lot of time until we had a mentor who just wouldn't let us sit on the same task for a long time (thanks to him for that!).
We would like to point out that a small documentation was written for our project which helped our team to work smoothly and effectively. It contained this basic information:
Resolution of textures
Texel Density
Texture packing (by channel)
Naming
Project folder structure
We also highly recommend you to clean up the folders within your project and maintain a strict and clear hierarchy to avoid future problems. Below you can see a folder hierarchy in our project.

We talked mainly about maintaining the quality of the project, but what about the style? We are going to talk about it next. It turned out to be the biggest challenge for all of us. The key objects in the village were houses, trees, stones and moss. As they were the main elements in the scene for us, we spent a lot of time developing their design and searching for interesting artistic solutions in pursuit of a “perfect result”.
Asset Creation | World Building | Set Dressing

Our pipeline in terms of game model creation was quite standard:
Creating the reference board
Modelling the basic forms (drafts) in Maya
Adding details in ZBrush
Creating low poly and UV layout in Maya
Texturing in Substance Painter
The first step was to search for references for the objects, and then on their basis the drafts were already modelled. Drafts were used for two purposes at once:
Defining the shape and size of the object
Creating a "cut" on the stage
On each stage of our project, each object was placed in the scene in a so-called "slice". Each slice represented our project progress and helped us a lot to decide on the necessity of each object in the scene. Also it allowed us to evaluate to what extent it fits into the style of our village. If the model didn't fit, the process started from the beginning, especially with the architectural part.
In such processes it is very important to create lots of variations in a short time to find the best solution and develop it further. We would recommend experimenting as much as you can, even if the result is weird sometimes. We learned a lot from it and it turned out to be a very precious experience that helps us in our personal and professional projects. Such experiments should be very fast and cheap – when you are searching for the right design, you can work with drafts or high poly models or you can automatically re-topo and texture them. The main thing is to create a big variety as fast as you can. As soon as you find the right forms and colours you can redo it properly and optimise for the engine.

If the object fitted to the scene, it would be moved to ZBrush, where it would then be developed into a high poly model.

To maintain the same style and colour scheme, we used two smart materials created in Substance Painter.

This allowed us not to worry about colour and tonal mixing of objects, and these materials helped us to speed up the texture process a lot.
Distinct Style | Signature Elements
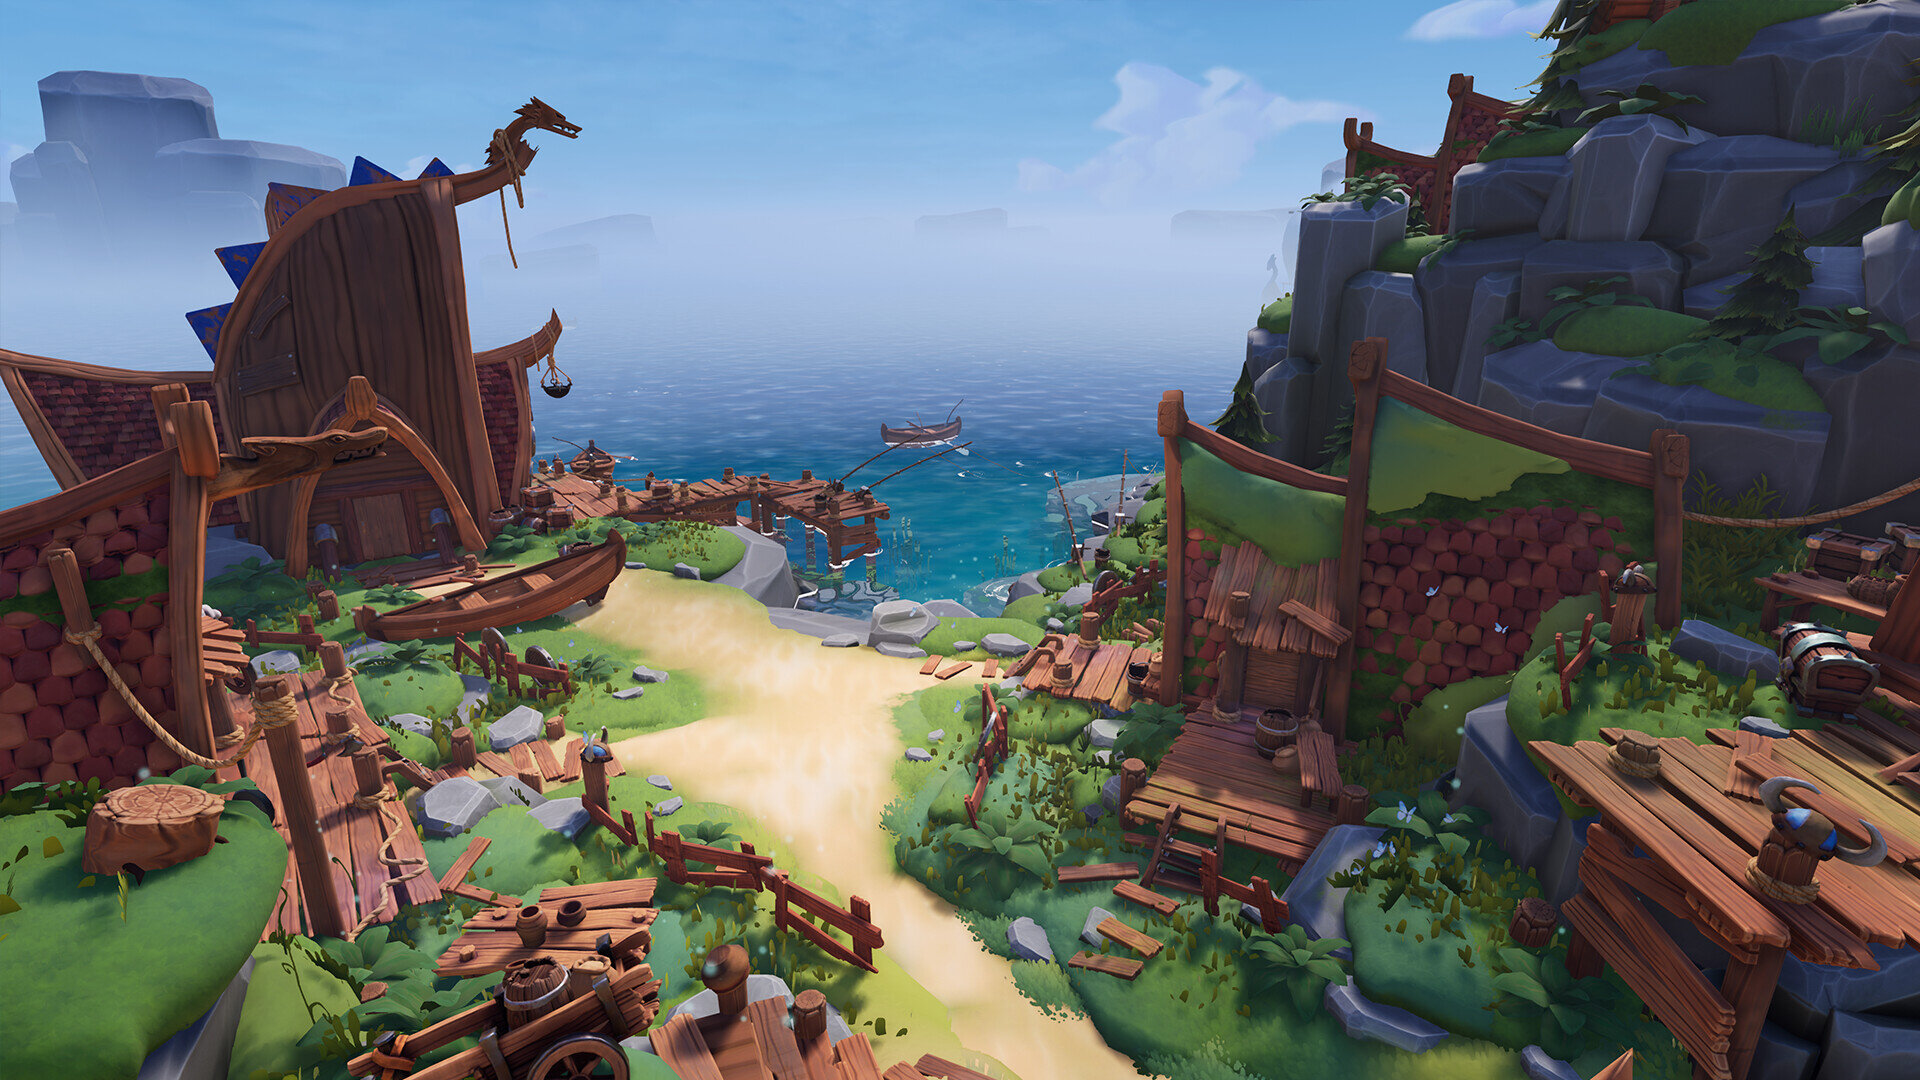
Now we can hardly say which specific elements and key details we have used to give the environmental elements a unique character and distinctive look. However, it is not so important, because one should always look at the overall picture. In general, we wanted to get the feeling of a cosy and festive island - soft and fluffy mosses. So, it determined the main forms of landscape and architecture - soft, gentle and smooth.
Colour work is also very important in the stylization - it is necessary to follow smooth gradients and various colour stretching in every single detail. This approach will make any element more attractive and interesting - the main thing is to keep it soft and gentle. For example, you can't make all grass one colour, it will be the most boring grass in your life. Instead, each leaf can be given a smooth gradient from dark emerald colour to light salad. Moreover, the entire grass field can have a soft gradient from dark to light, depending on the points of interest in the location. To make the grass even more interesting, you can add some soft colour variations that look like different spots. The same thing you can do with roughness.
One of our strategic decisions was to create a set of planks. For this task, our main reference was Heroes of the Storm. These assets were reused many times in different ways. Firstly, they helped a lot with props like barrels, benches, and chests that are mainly made of wood. Secondly, they were used as props themselves and were very useful in detailing the road and some of the Viking houses. Thirdly, such wooded constructions as bridges or house basements were also made of these planks. And finally, some of the tileable wood textures were made using the plank set. Below you can find the set itself and examples of assets using it.

There are several rules (techniques) in creating stylized graphics:
The form language and the silhouette
Exaggerated shapes
Gradients
By following these simple rules we acquired the result you can see. From the very beginning of the work, we gathered a large number of references not only for the overall composition of the map, but also for props, and selected what we want to achieve. Thus, we had the same vision of our goal.
Since we wanted to create the atmosphere of a warm, cosy village, we were mainly focused on warm colours.

To give some cartoonish and flexible feeling to the objects, we exaggerated some of the shapes and made it a little bit curvy.

Another little trick of ours: we intentionally reduced the FOV in UE4 to 60. It's important to do this at the blockout stage, because the scene takes on a completely different vibe and mood: the objects appear to be larger, the frame becomes more cinematic. On this stage we also searched for the right composition for the foreground and the background.
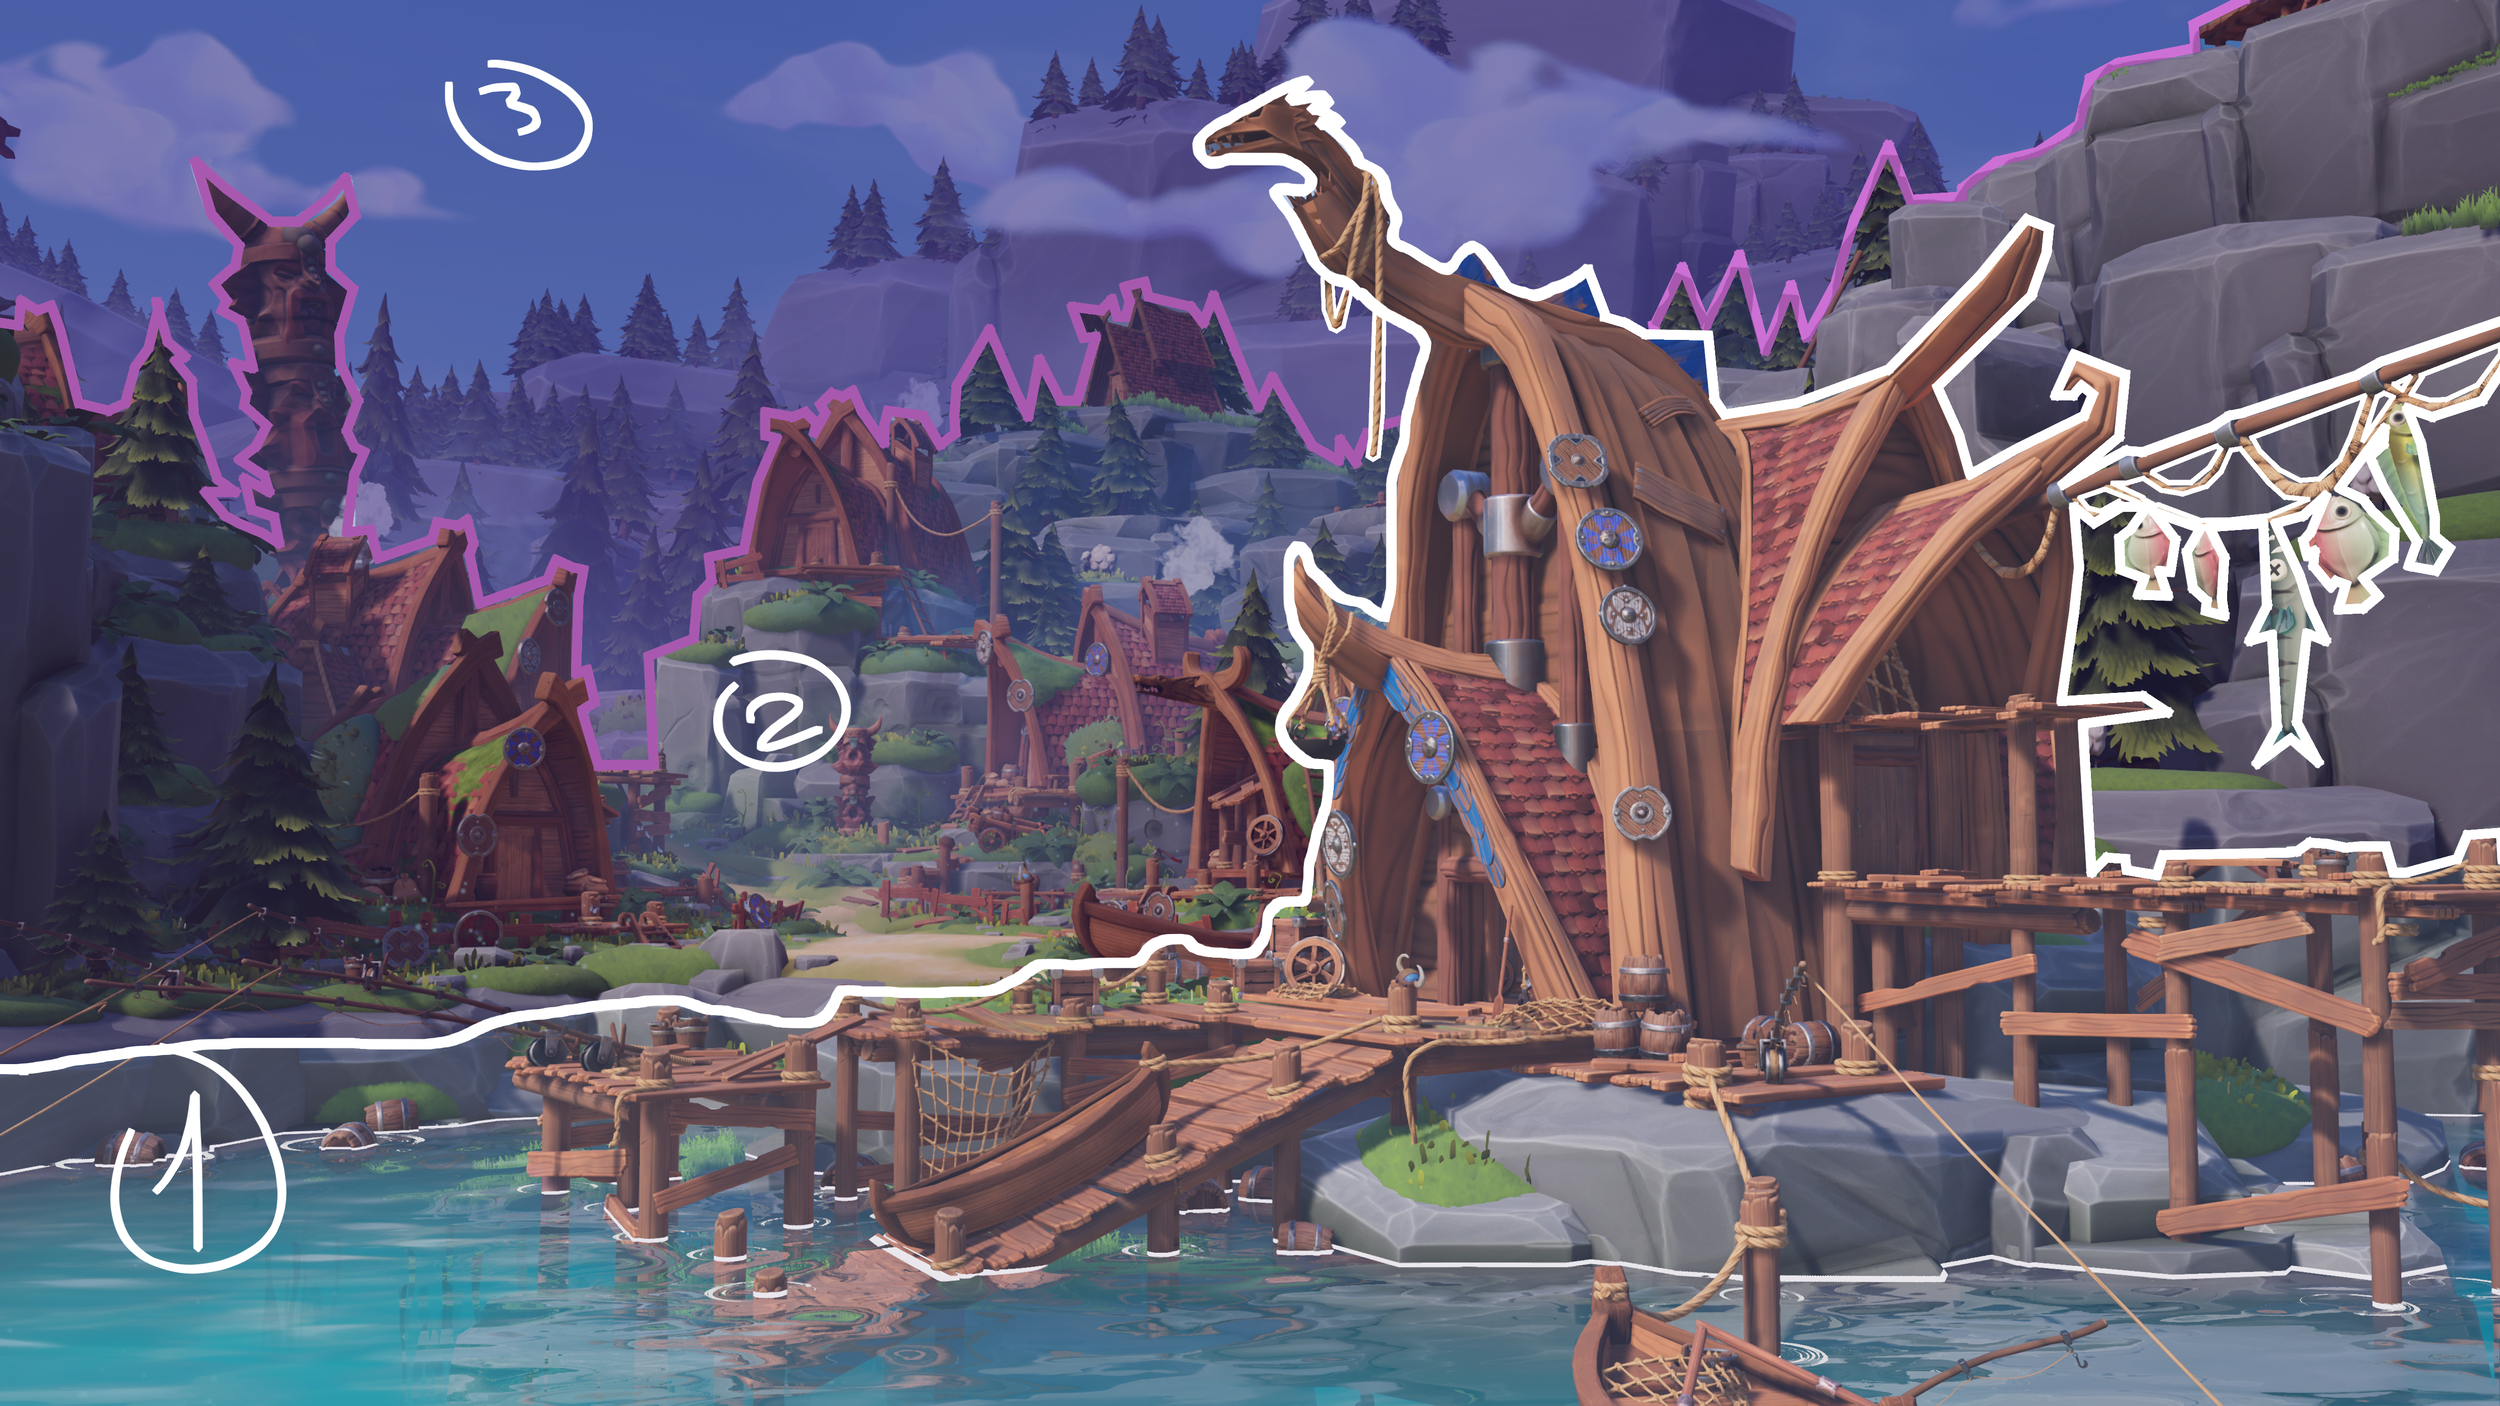
Modular Environment | Buildings
There are two types of buildings in the Viking Village:
The basic, small houses that fill the scene
A large fishing house

As for the fishing house, it is not modular - it consists of unique parts with tileable textures. We decided to make it a unique object in the scene because it is the main point of interest that attracts the most attention. We wanted to give it a slightly different shape and mood so that it would be the most impressive point in our project.
Together with our concept artist we developed the house design for a very long time.

We were searching for the right shape and mood. Some of these questions were:
Is it supposed to be a smooth corner or a sharp corner on the roof?
Should there be two-storey houses?

On the one hand, the acute angle allowed to diversify the shape of the base houses and separate them from the main fishing house, and on the other hand, there was a conflict of shapes and moods in the scene (the acute angle was associated with something dangerous and formidable, and our village had to be light and cosy).
Our module system was quite simple and we didn't want to add extra noise to the map which was already full of variety: the arches, the chimney, annexes.

All the elements of our houses served different purposes. With the help of arches we wanted to give each house its own identity and tell a little more about its inhabitants, thus adding stories to the village. For example, an arch with a wolf tells us that the village head lives in this house. The chimney with the smoke coming out of it tells us that there are still life and inhabitants in the village, and the additional annexes in the form of a porch and a small annex to the side of the house visually separate them from each other.
In technical terms, the houses used a standard set of requirements: texel density of 512px/m per texture size 2048*2048, tile and trim textures.
Advice for Team Projects
The main advice is to distribute the responsibilities and to make them clear. This must be the starting point in order to avoid different conflicts and unnecessary debates in the future. Without a clear understanding of the areas of responsibility, you risk not only losing friends and colleagues in the work process, but also getting caught up in endless arguments about each decision. All of it will obviously have a negative impact on the effectiveness of the teamwork.
Carefully consider people you choose for the team. It is difficult to overestimate the importance of responsible and hard-working teammates for a group project. Your colleagues should be proven people who will take their responsibilities and deadlines seriously.
Make sure that everyone in the team has a clear understanding of the project's purpose and its final result and final “picture”. It often happens that some of the teammates do not clearly understand what they will eventually be able to present in their portfolio and what part of the work they will contribute. When the project comes to an end it always leads to a disappointment and unnecessary arguments.
Work with those you respect as professionals. You should like his or her work (technically or artistically) and also his or her approach to the work and the pipeline itself. Without this important condition, it will not be possible to delegate responsibilities to someone and achieve the efficient teamwork.

In fact, teamwork can be compared to a large powder keg, sometimes the slightest conflict can cause a failure in teamwork and, conversely, a good criticism of each other is a good incentive to work.
It is always necessary to be clear and concise in communicating your idea to the team - to make it as clear as possible for all team members (especially in setting tasks).
Try to automate the processes as much as possible: create smart materials in Substance Painter, basic materials in the engine that can be used and understood by everyone in the team, etc.
Creating a unified naming system and a clear hierarchy of objects in the scene might be a very good idea. A single system of names and hierarchy in the outliner (folder system) is necessary to avoid chaos and mess in your scene.
In order not to download a huge project each time, to have control over the versions, you can use SVN or a simpler and more intuitive cloud service with the ability to create a repository on your PC like Google Drive.
Challenges
There were tons of difficult and ambiguous moments from the very beginning of the work to its very end. And several factors made the process even more complicated:
It was our first scene that we designed and modelled by ourselves.
We always had trouble arranging a time for this work because of our full-time jobs.
Difficulties in pipeline arrangements - we gave too much time for several stages of the project.
Strict time frames of our diploma project. On some tasks, on the contrary, we were rushing too much because of deadlines.
At some point, we realised that our scene became overloaded with details that were completely useless for visual storytelling.
During the whole project, we were wondering how to create the sky, moss and water that will fit out style. We were searching for the right solutions not only from the artistic approach but also from technical optimisation..
In the beginning, we were too ambitious - we wanted to create the whole island (something similar to Berk from How to Train Your Dragon). But in a short time, we realised that it was too much for us, so we started to reduce the scope of our project. In the end, it was just a small pier with a hint of continuation.
The first four were results of the lack of experience. We learned how to handle them as we went along. By trial and error, we figured out what schedule is the most comfortable for us and optimised the process a little bit. For instance, we started to use the Trello. It allowed us to systemize and control the time frames of the tasks. We also came up with creating the technical documentation that we needed for our workflow.
Creating the shaders was quite challenging as we had no experience in it. We created the water shader with the help of Unreal Engine documentation and several tutorials. It took some time, but actually, anybody could make the water shader like this. The moss shader was created in the last week before the deadline. We can’t say that our moss shader is the most optimised, but with such time restrictions it was our best try.

Advice | Tips
Spend enough time on the blockout. This is the most important part of the work and its final result dramatically depends directly on the stage of the blockout. At this stage it is necessary to approve the final map topology, the main composition, the light and, preferably, the colour solution for the whole scene. Do not be afraid to use ready-made assets, high poly models or even planes with pictures for this stage.
If you have time and desire, then look for your own design solutions - spend your time and effort to make your project distinctive so that it could attract more attention.
Accept the fact that some things you have to remake several times before you achieve the desirable result. If you are looking for your own style and visual solutions - it is quite normal. The main thing is to do it quickly and efficiently. Always take it into account and consider to add 20-30 percent of the time on it
You should always check how your objects look on the scene with lighting that is close to the final one. It is important to see if it fits the big picture. It's necessary to understand whether shape, colour or textures fit with each other and with the lighting. Very often it happens that in the engine textures look very different (especially with metalness). That's why it is important to fix everything at the beginning of the work and to take into account all the adjustments with the continues work;
If you don't know how to do something whether it is an element, shader, or an effect, don't replace it immediately with more simple solutions. Today, the internet is filled with a huge number of tutorials and people who can advise on how to solve this problem. A difficult task is always a challenge and a chance to develop your skills.

Outro
The Viking Village project was not an easy task for us, working as a team and it was our final exam from Scream School. The scene took us almost every evening after full working days and also all weekends. However, with better planning it could have been avoided and done more effectively. Also it took quite a long time, as our work included style research and many experiments (forms, textures, shaders and etc.)
We are very grateful to our curators for all their help and support during this challenging project. Don’t hesitate to ask for help, especially if you are not so good at this area. Everything comes with experience and diligence, and hints from more experienced people helped us a lot to manage all problems faster and better.
At the beginning of our project, we thought that we could move mountains and do any amount of work, but in fact we overestimated our strength. Our small team often stumbled on the path with many little issues and we often doubted if we could make it to the end. And this is probably the most important advice – don’t be afraid! New complex tasks will broaden your horizons and extremely raise your skills!
Thank you very much for reading our article! We may have missed something, so feel free to contact us if you have any questions.
Wish you all good luck with your projects!