
cosy little hideout - working from concept
Andreas Lohse talked about the way he approaches new projects, working from concept, the tools he used to create the Hideout scene and more.

Introduction
My name is Andreas Lohse and I’m 24 years old, living in Copenhagen, Denmark. I’m a 3D Environment Artist currently looking for new opportunities. I was first introduced to 3D 4 years ago during my Bachelor in Medialogy at Aalborg University in Copenhagen. It was mainly an introduction to 3D modeling and rendering, but it woke my interest for 3D and I started learning more on my own.
So 2 years ago I found an online school called Game School Online, where they had introduction classes on 3D modeling and lighting for games. This is where things really took off and for the first time I started learning the principles of 3D and lighting. It was also through that school I first was introduced to the concept of 3D Environment Art. I have since then taken 3D courses from CGMA, took mentorships and joined the DiNusty Discord community, all of who helped me grow tremendously.
I’m currently looking for my first job in the industry, so the only projects I have worked on as a 3D Environment Artist were group projects we had during my bachelor, and my latest project Hideout.

Hideout: Concept Art by Lee B

Hideout: 3D Environment
New Projects, Gathering References and Blockout Stage
The Hideout scene actually started out during a mentorship with Jeremy Estrellado. I wanted to make a small scene where I could create a lot of props to train my baking skills and happened to come across the concept “Secret Hideout” by Lee B. It was really just a coincidence that I ended up creating this scene, haha.
When starting a new project I usually gather a lot of reference, both for props and to get inspiration on how I want to do the layout of the scene. I also gather references for how I could do lighting and what quality I want to aim for. Then from all this I start by creating a blockout, iterating on that and when I’m happy with the blockout I start building all the assets.
No matter how I start a new project, I always make sure that I can tell a story from it and that it’s a subject I’m passionate about. If I’m not passionate about my projects it will not be as good or I will eventually burn out.

Hideout: Blockout
Set Dressing, Working from Concept & Making it your own
Set dressing the scene was fairly straight forward in the beginning of the project since I had a concept to work from. The concept gave me all the models I needed to create. Set dressing for me was all about sticking to the concept, working from one angle to make sure that everything was aligned properly and according to the concept. That all changed the more I worked on the scene. I quickly found out that I wanted the scene to be shown from several angles and then I realized how some areas would look very empty.

Hideout: Adding more props
This is where I started to diverge from the concept and made the scene my own. I started working on a second blockout, creating pieces that would fit in the setting to help the story of the scene and at the same time fill up the scene. If I were to give any advice, and this might be easier said than done, I would try to figure out what camera angles you may end up with and work from that. Also don’t rush through your blockout as it’s very essential to figure out what assets you will need or if there will be spots you can make more interesting.
I only worked from one angle at first and I ended up doing a bunch of extra props. It was more of an annoyance that I had to spend extra time on more props when I thought I was done with that stage.
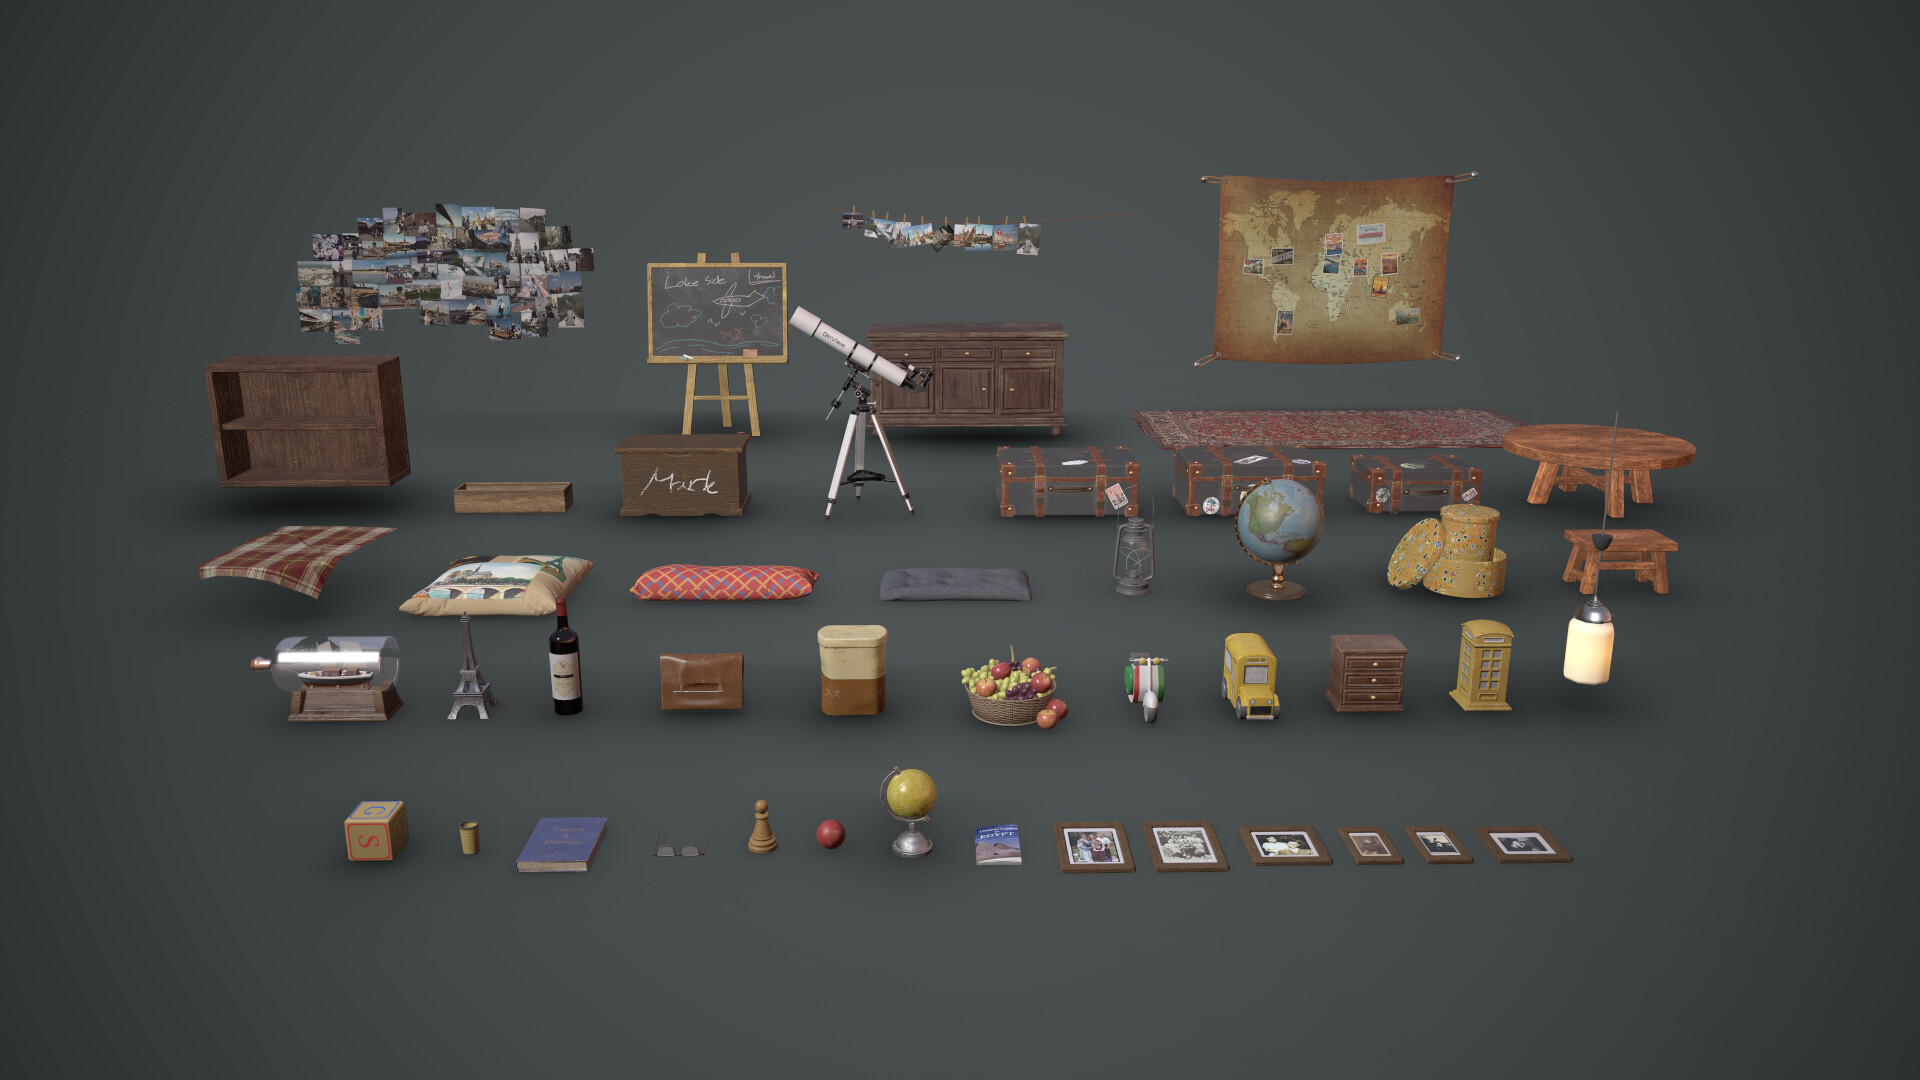
Hideout: Props Asset Sheet
Tools & Workflow
The start of the project was a bit different than how I would normally go about making a new scene. At first I just wanted some modelling practice and came across the Secret Hideout concept piece. It had a lot of very different props and I just decided to make a few of them. After I had made 4 pieces I decided to do the entire scene and that is where the actual blockout of the scene started. From here on I modeled all the different pieces, textured them and made them fit into the scene in terms of colour and value.
I wanted to try out some new software as well. My go to for modelling and texturing is always: Maya, ZBrush and Substance Painter. Now I had a wood texture I needed to do for the walls, ceiling and floor, so I thought what better way than to really get into Substance Designer.

Substance Designer: Wood Graph

Substance Designer: Wood Result
Besides getting more into Substance Designer, I also tried Marvelous Designer for the first time. I struggled a bit with the cloth sim in Maya and I wanted something a bit faster than sculpting in ZBrush, so I ended up giving Marvelous a go and boy do I not regret that decision! Marvelous is very fast to work with and can give a very natural look to cloth very quickly. It has a lot of settings and presets that makes cloth behave in different ways and you’re sure to find something that will suit your needs.
As a whole working from a concept was fun, but there were also some pitfalls which I could have avoided if I had given it some thought at the time. When working with concepts I would suggest to figure out if you want to make a scene based specifically on the concept or whether you want to make it your own and deviate from it a bit. The sooner you find out, preferably during blockout, the better. It will give you more control over your scene and you know precisely where you want to take it and what you want to convey.

Hideout: Various Props
Creating lots of Props
My workflow for creating props is very simple. For props where I have a lot of small detail I would create a high poly model and bake it down to a low poly model and then texture it in Painter. For the props that wouldn’t need a bake I would bevel them and use Face Weighted Normals to make it look more high poly than it actually is. The Face Weighted Normals technique was new to me and Hideout was the first project where I used it. Face Weighted Normals is essentially a technique where you edit the vertex normals to face in the direction of larger flat faces. If you haven’t heard about the technique, I would heavily suggest you look into it as it is a really fast way of working and your models will still look really good.
I found a video that explained the concept to me very well: https://www.youtube.com/watch?v=JT24Hd-5Vg8
It will be different to set up depending on which modelling package you use. Here are some resources on this technique:
The only models that didn’t follow those two workflows was all the cloth and pillows in the scene. I created all of those in Marvelous Designer, took them into ZBrush for cleanup and refining the shapes and then to Maya for UV’s.
Lighting

Hideout: Lighting Setup
My approach to the lighting in the scene was very simple. I would start by taking a directional light and sky light, tweak the settings and then bake the lighting. From those two lights I would get a great base in terms of reflections and bounce light. Once I was happy with that I would add a light in the back where I had my light source, adjust radius and intensity until I was happy with warm look the light was to produce. I then added fill lights to the rest of the scene to get rid off completely black areas, as the skylight couldn’t resolve this. The lightmass settings are where I would solve most of my issues with lighting and shadows. You can check my settings in the image below and also make sure to check out Unreal’s Masterclass on Lighting as they give a way better explanation than I ever would!

Hideout: Lightmass Settings
My 3 lights in the back had light simulated by one point light as described in the section above, but what really made the lights shine was the material on the lamps.
I used an emissive material with a fresnel shader. The fresnel really helped creating a lot of depth in the lamps and it would not contrast with the rest of the scene as much.

UE4 Fresnal Shader Graph

UE4 Fresnal Shader Material
Challenges
Lighting for sure was one of the biggest challenges in the scene. Even though the setup is very simple, getting the reflections and even the lighting correct was more difficult than I initially thought. The lighting I had at first would either be too bright or too dim in certain areas and the way it was set up would attract attention to places where I didn’t intend for it to be the focus. Getting it balanced sure was difficult at first.
Working from a concept also had it’s fair share of challenges. I blindly worked from concept without giving much thought to story or how the scene would take shape or turn out. That was not until the last few weeks that really hit me. But that eye opener really helped and that made the scene so much better in the end!
And then there was time! Time was one of the things I never took into consideration when doing this piece. The last 2 weeks of the project I spent all day making the piece with no real breaks in between and that burned me out a bit once I finished the scene. So time management guys! Remember to take a break once in a while, it’s more healthy than you think.

Hideout: 3D Environment
Tips & Advice
Working with a concept might seem very simple, but can actually prove to be really challenging!
Make sure to do your homework, gather lots of references, plan out your scene and really think about what you want to do with it. There’s no shame in replicating the concept completely, but if you know you want to change things up and add your own twists or even make it completely different, just make sure you do it in the beginning of the project. That will save you a lot of trouble and headaches. The closer to the end you get, the more difficult it will get to make changes without having to redo a lot of work.
Also do lighting passes throughout your production cycle, not just by the end. If you get some good lighting going in the scene during the blockout, once you get to the texturing you will quickly get an idea of how the objects and textures will look in your final piece and will save you of the trouble of having to redo textures, because it may look different or worse if you change your lighting drastically.
Also, make sure to check out the DiNusty Empire! The guys in this discord community have been giving me amazing critique and I have learned so much from them and I will be forever grateful for that!