
Building an epic Skyrim inspired Environment in UE4
Jonathan (Jonjo) Hemmens talked about the way he created his Skyrim inspired environment and explains his approach on Set Dressing, Lighting, Cinematics and more.
Introduction
Hey everyone, my name is Jonathan (Jonjo) Hemmens and I’m from Cornwall in the United Kingdom. Whilst studying Games Development Art at University, I interned at Antimatter Games and worked on Rising Storm 2: Vietnam. Now that I’ve graduated, I’m working as an environment artist at The Creative Assembly working on the Total War franchise.
Gaming and art have been the two passions I’ve been able to hold onto since I was a kid and I was fortunate to get the right guidance through college and university to be able to work on my portfolio to get me into the industry.
Light the Path
Project and Inspirations
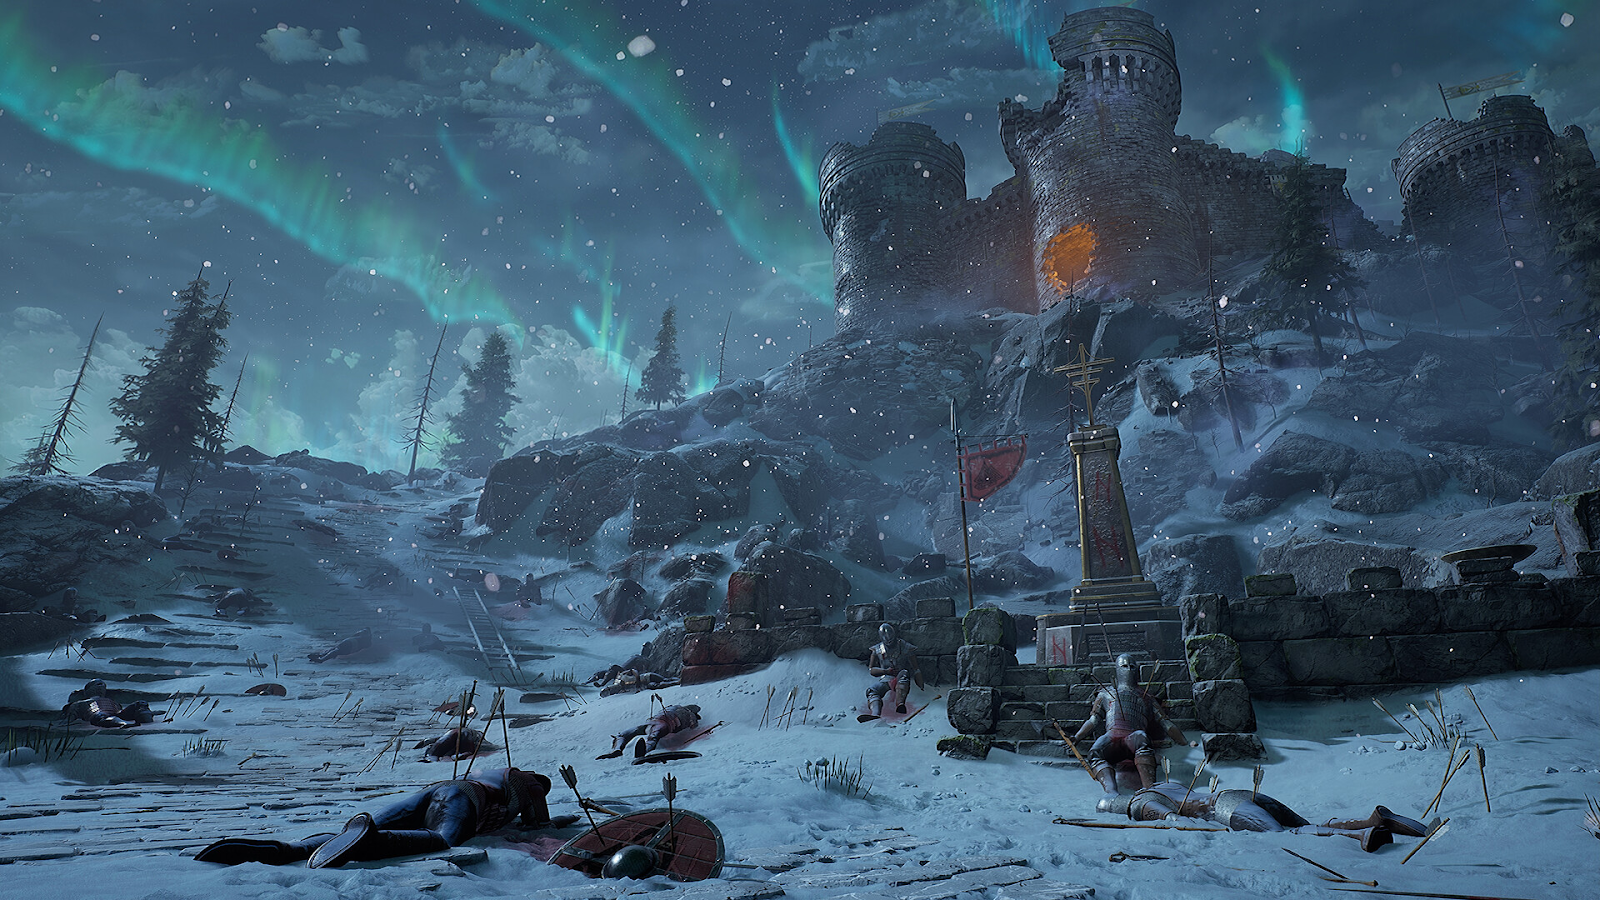
Light the Path, portrays the final throes of a defeated civilisation. After a lengthy siege, a viking warband finally break into its neighbouring kingdom. A harsh winter falls upon the land, and a path has been lit to guide those left in this bleak wasteland into more fertile lands. I was heavily inspired by the work of Sergey Zabelin. His piece, “Castle in a snowy forest” was the foundation for the setting and mood. I loved the idea of an abandoned castle sitting on a hill.

Castle in a snowy forest by Sergey Zabelin
I was about 14 when Skyrim was released and picked it up as soon as I could afford it. I didn’t leave my PC for days as I played it throughout the Christmas holidays and immersed myself in it’s wonderful atmosphere and mood. One of my favourite routes to walk was from Helgen to Riften through a perilous mountain pass. The combination of the ambient blizzard winds, beautiful orchestral track, and the incredible environment came together perfectly here. Although I deviated from this slightly, this mood was something I really wanted to try and recapture in my work.
Landscape and Blocking out
Before this project, I hadn’t created an exterior environment with a terrain or much foliage before, so I started by jumping into some tutorials to get a better idea of how to start creating a landscape material. I came across Jacob Norris’ Forest Snow Ground tutorial which goes through the process of creating some snow materials in Substance Designer, then creating a landscape material in UE4. He also covers a lot of useful technical knowledge and variables to consider when making your own material. His tutorial is free, but you’re welcome to donate some cash his way if you find it useful!

Light the Path: Blockout
After this, I began sculpting some basic forms in Unreal on my new landscape. I set up a camera in a similar position to the one in Sergey’s piece, and tried to match his composition. I struggled to get the right shapes for my hill, so I jumped into Gaea (which had just been released at the time) and created the hill in the foreground as well as some mountains in the distance. The tool will be very easy to pick up if you have experience with other node-based tools like Houdini, Substance Designer or Worldmachine.
Once the mountains were in, I blocked out a very basic castle modular kit which deviated from the concept. At this point, my story of a besieged castle acting as a border between two opposing civilisations began to take shape.
Set Dressing

Light the Path
Set dressing for exterior environments, especially large ones, can be very time consuming. I didn’t go into this project to learn procedural tools, so I mainly relied on UE4’s super robust foliage painting tool. I used it to scatter most of my props such as; trees, rocks, twigs, dead bushes, bricks from the castle, weapons, shields, and arrow clusters. UE4 gives you control over random rotation, random scale, asset orientation, placement density, and much more. This makes it very easy to place exactly as much as you want and to give the assets plenty of variety.
Lighting and Aurora Effects
After I had developed my mood and story, proper lighting could start taking shape. This is one of my favourite parts of the environment pipeline and I feel like it’s the most important part of creating mood. With the amount of assets and foliage in this scene, static lighting wasn’t viable on my feeble computer, so dynamic was the way forward.
Getting a light direction that supported all of my shots was really difficult. It’s incredibly surprising how the direction of light can change mood and composition instantly. Once I’d fine-tuned the directional light, I began working on adding the torches which would contrast again the cold colour temperature. This would help lead the eye, build storytelling, and support the composition.

Auroras

Aurora Texture
To create the auroras, I used a couple of different resources. I got the idea of how to approach the process from an 80 level article by Luiza Tanaka who created some great aurora effects for SMITE. I altered her workflow very slightly for the auroras I wanted to create.
To create the base textures, I watched a tutorial by PHLEARN which showed a quick way to generate an aurora effect in Photoshop for photography. Rather than generate the colours in Photoshop, I created grayscale alphas and created an RGBA texture with the R, G, and B channels all controlling the colour of the different parts of the aurora.

Aurora Material
In the material, I split the RGB channels and multiplied them with instanced colours. I then lerped them back together and fed the final result into the emissive colour channel. This gave me full control over the colours of each element of the aurora. For some of my materials, I combined the different channels with panning UV’s to have the aurora shift and move, but couldn’t get it to look right, so took this out for the final cinematic.

Master Material
Building a better understanding of the UE4 Material graph was one of my learning goals for this project. To create realistic snow buildup on my assets, I needed to have snow accumulating on the top (snowfall) and around the base to help it sit in the snow. During my research, I came across a tutorial by Mind Games Interactive where, they demonstrate how they implemented world aligned moss to their assets. It was pretty straightforward to adapt their workflows for snow instead of moss.
The workflow in the tutorial shows you how to create a shader that dynamically applies snow to top of the model and updates automatically when you rotate.It also blends with the normal map, appearing to fill in the crevices of the model. I did a little demo of this on some of the free Quixel assets. You can see how the snow layers itself on all the subtle surfaces even when completely upright.

Dynamic Snow Shader
The second issue I had was seams on my meshes when intersecting them with the terrain. To solve this, I found this free material on gumroad by “orikmcfly” to allow for blending between your assets and your landscape textures. It works with distance fields to calculate the distance to the nearest surface and blends the landscape material where the mesh blends with the landscape.

Mesh Terrain Blending
The downside of this is that you will need to prevent your assets from affecting the distance field lighting. This could make it incompatible with other workflows using distance field.
I paired this technique up with some pixel depth offset which blurs the pixels where assets intersect based on screen space. Sounds complicated, but it’s super simple to set up.

Depth Fade Effect
The whole master material only took a day or so to put together and includes additional features, such as; detail mapping, various hueshifts, alpha and emissive masks and SSS controls. These can all be disabled or enabled in the material instances by using static switches. This makes it very easy to control what’s active in each material and meant I didn’t have to create unique materials for every individual prop or tiling texture.
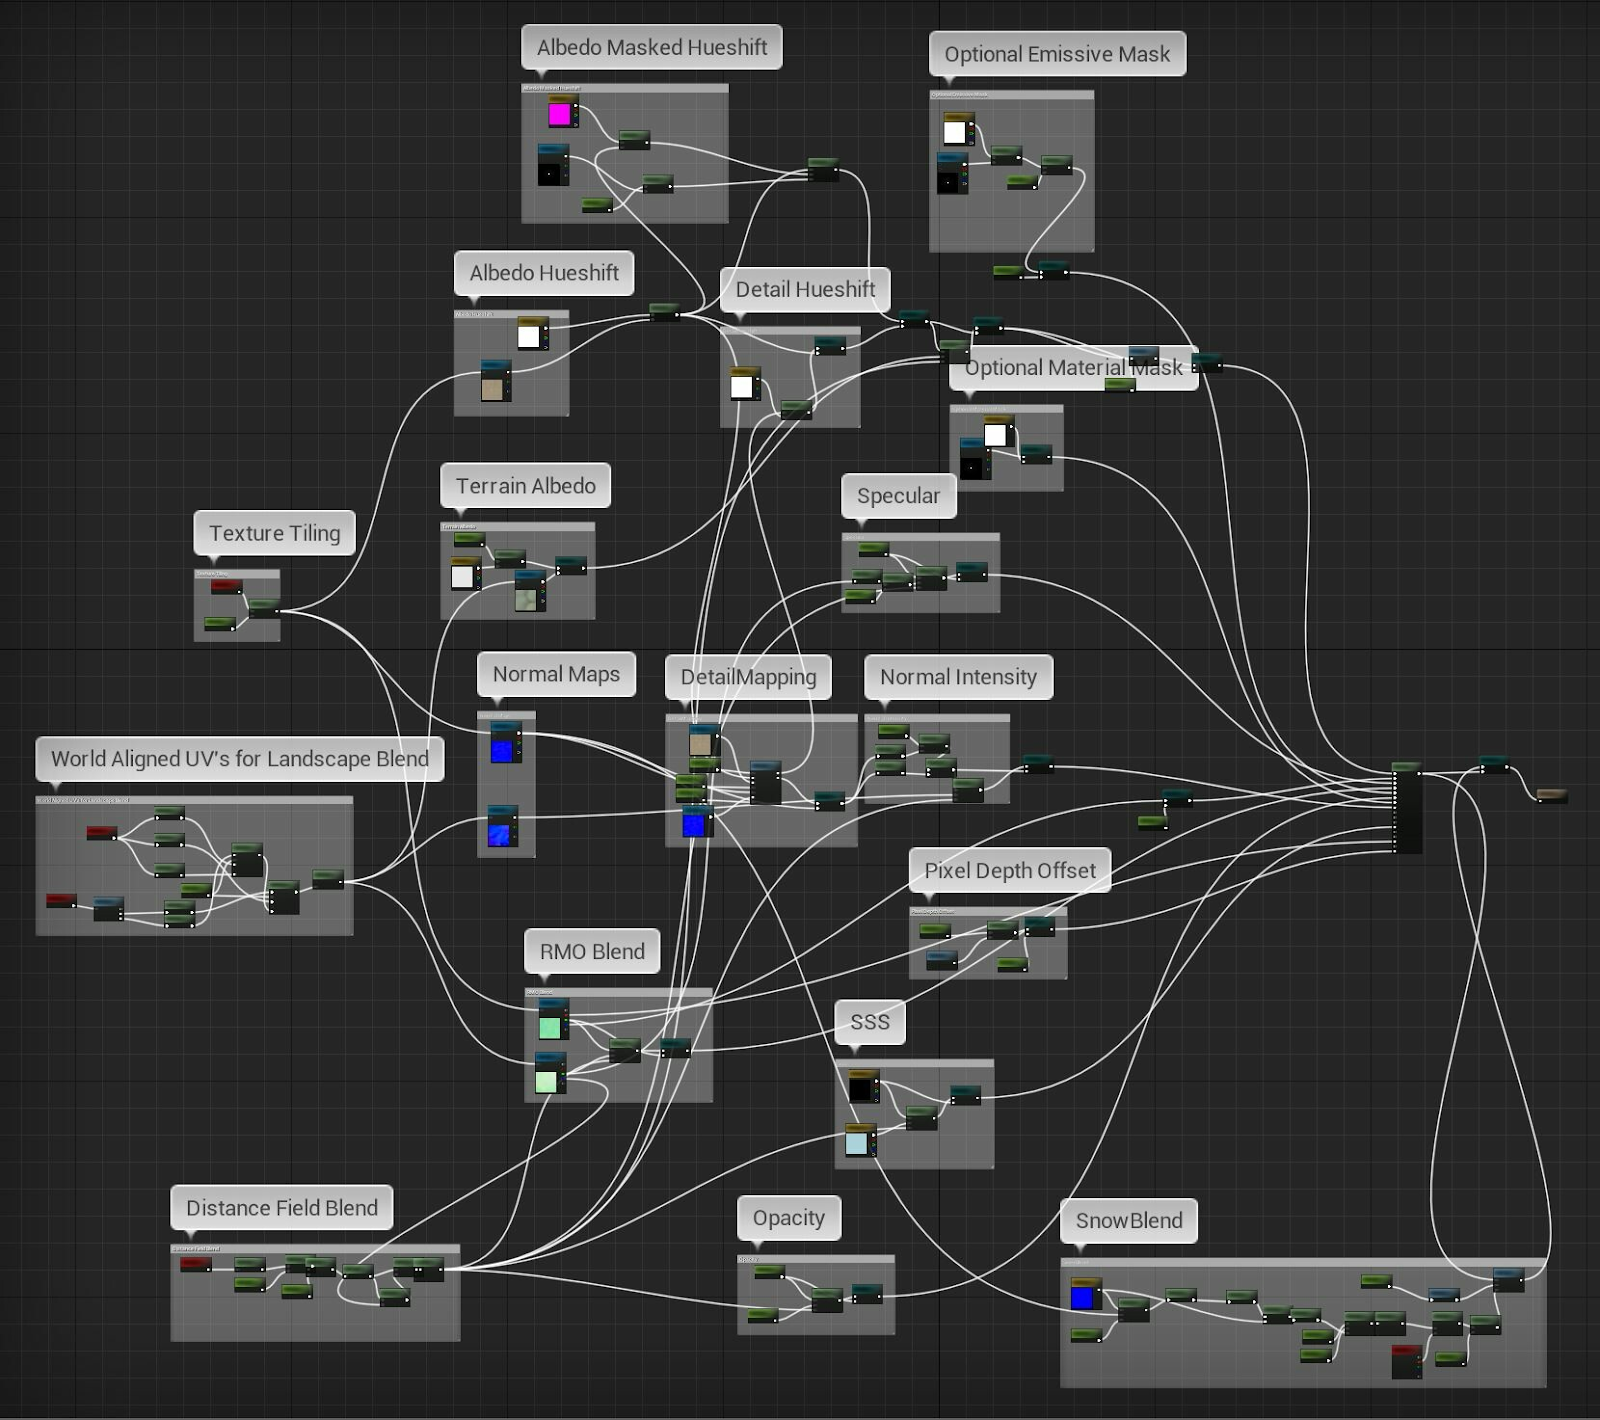
Light the Path: Master Material
Although the graph might look a little large, once you get the hang of using static switches and lerps, it becomes super easy to set this stuff up. The amount of time this saved me was invaluable so I plan to use master materials in all my future scenes.
Creating a cinematic mood
To properly portray the mood of my story, I needed to create something that felt was bleak, cold, and desolate. I saw an opportunity to bring some life back into the scene through the environment. I started by contrasting the cold snow with some warm torches. Not only would this draw the eye and help support the composition, but would imply that someone had moved through recently. By creating a corpse for this scene, I ironically made the scene feel more alive. Being able to see characters helped with the scale and storytelling massively.

Light the Path: Characters
By creating a cinematic, I had the opportunity to add another layer of mood to scene. I’m no cinematographer, so I decided upon a couple of stills and cinematic shots, but these are of no use if the whole scene is static. To breathe some life into the scene, I implemented just a couple of dynamic assets. Wind on the tree’s were achieved through Speedtree (just on button click!), I picked up some snow particles from the Infinity Blade Pack, and some fog sheets from the UE4 Marketplace. These simple effects layered together with some basic audio editing in Vegas was really worth doing to sell the mood.

Light the Path
A high colour temperature on the directional light brought in a lot of blue colours which mixed with the subsurface scattering on the snow, making it look quite cold. The use of some bright fire that would contrast with the snow and make both temperatures feel more extreme. The torch light really helped me control the composition of the shot and draw a path for the viewer's eye to follow.
Good principles to keep in mind when creating environments
Low effort, high impact.
Whilst studying Game Development at University, one of the principles covered was determining the effort over the impact. If part of your project is going to take a long time and requires a lot of effort but has an overall low impact on the overall piece, cut it. Too many tasks like this and you’ll become quickly overwhelmed with long tasks that detract from the project. Environment art has an incredibly broad range of workflows, pipelines, and technicalities. Focus on the ones that have the biggest impact.
For example, one of the most substantial low effort, high impact parts of my project were the torches. These only took roughly two hours to put together, but immediately gave me more control over composition, adding visual interest, and had a big impact on storytelling.
If you’re working on a project that can’t be solved through a low effort task, such as populating a scene with a ridiculous number of props, then buy an asset pack. If the scene looks great and you give credit where due, no one will care. You’ll have more time to focus on learning the high impact parts of environment production that will be much more important to your career.

Light the Path
Start projects with clear learning goals
Before starting you next project, initiate it with learning opportunities in mind and goals to achieve. This can be as broad as wanting to learn more about PBR and roughness or as focused as trying to create a good water shader. Ideally, you’ll pick something based off your interests in the field which will help keep you motivated about the project.
These goals can also be useful pillars to fall back on if you’ve lost focus or disassociated with the project. They also come in useful when you have difficult decisions to make that have significant weight on your project. Asking “will this help achieve my goal of learning more about PBR?” (or whatever your goal is) will help you decide whether you should spend two weeks in Zbrush sketching or not.
Pick a couple of interesting topics or goals and come out of the project with a clearer understanding of them. This should help prevent burnout, boredom, and hopefully push your knowledge further, making you a more well-rounded environment artist.
Ending advice
During this project I dealt with many issues surrounding scope and poor time management. Having a project of this scale caused option paralysis and burnout which made this project so difficult to go back to.

The siege camp I ended up cutting
When realising that a project has become too challenging or complicated, focus on the best part of it, and take that to completion. Go back to your original intentions and prioritise learning something new over repetitive tasks. It’s much better to have a smaller scene of higher quality that you can be proud of, rather than a big mediocre mess. This could involve cutting half of your scene or using asset packs to focus on what’s important: getting better as an artist.
That’s it. I hope you’ve gained something from my mistakes and advice. If you’re interested in seeing any of my other works or getting in touch, just follow or message me on ArtStation