
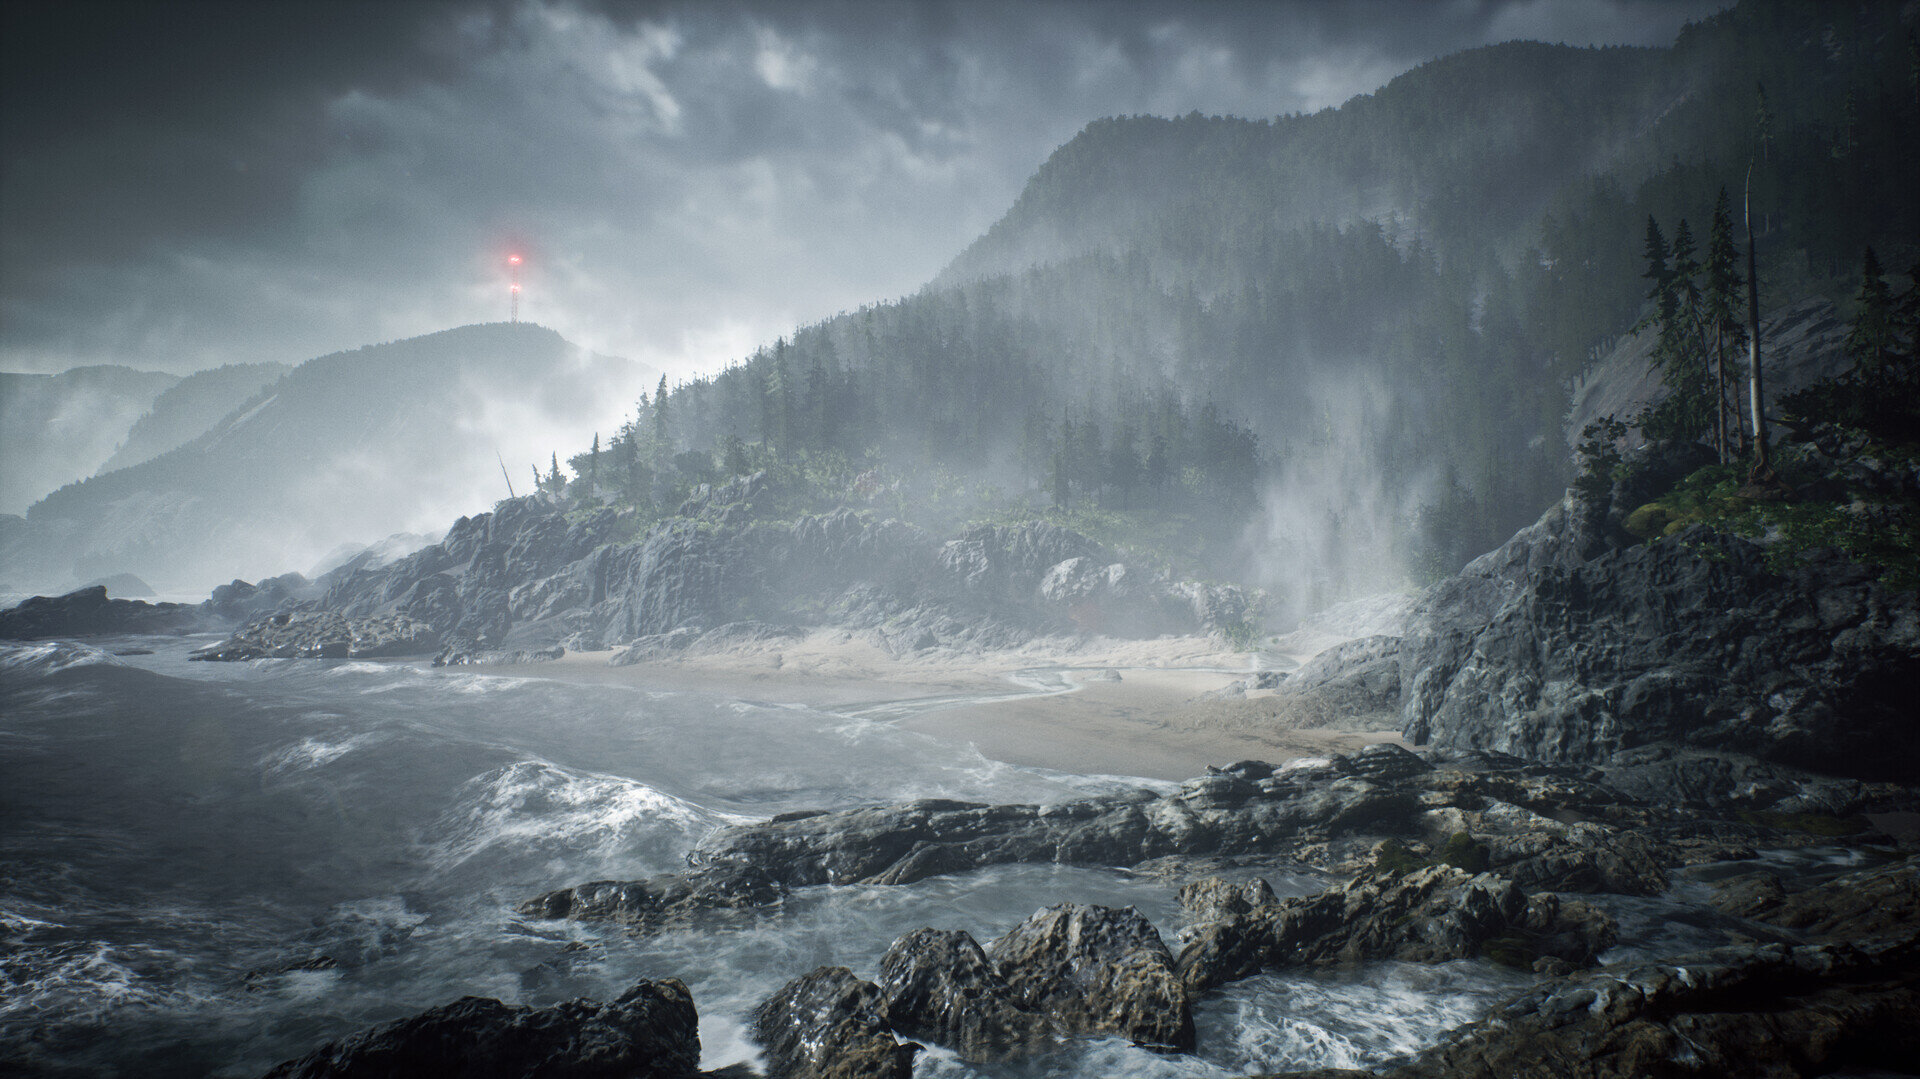
Atmospheric coastal scene in ue4
Lighting Artist Adam Alexander breaks down The Middle Coast. In this article you’ll find out how Adam combines VFX, Megascans, terrain, lighting and more to create his dramatic coastal environment in UE4. He also shares his tips, tricks and inspiration for aspiring Lighting Artists.
Introduction
My name is Adam Alexander, and I'm a lighting artist at Hardsuit Labs in Seattle, Washington, working on Bloodlines 2. I came to lighting from an environment art background. I've loved creating fictional worlds for as long as I can remember, and can trace my earliest game world-building projects back to playing in the game editors for Morrowind and Neverwinter Nights. For my most recent study “The Middle Coast,” I wanted to try to capture my memories of exploring the Oregon coast during my time living in Eugene.

Composition
When I started on this piece, I had several areas of focus I wanted to concentrate on. I was interested in doing a study of an overcast scene, and relying on fog, depth, silhouettes, and a muted palette to create a compelling composition. I collected lots of reference images of the Oregon coast in different weather conditions, focusing on shots that illustrated how the coastal shoreline and mountains would recede into the distance and fog. I knew I would want a variety of shots (moving and still) from different locations, and I began blocking out sections of my environment thinking about interesting shapes and silhouettes that would read well for the foreground, middle ground, and background for each location.


Reference Board
Colour and Light
Since I was trying to evoke a mostly-overcast sky, I created a weak light, and relied on fog, shape, and ambient occlusion to push my forms. This involved a lot of tweaking these different settings to get a composition that had enough value contrast to establish depth, but not too much that it broke the sense of overcast, even lighting. As I was detailing out some of the establishing shots of the coast, I decided to add a radio tower in the distance to add a little hue variety and to have a stronger focal point for the flatter, distant section of the shot. Keeping most of the elements of the scene desaturated made the smaller, colourful details pop, such as the radio tower or the sea stars in the tide pools.


Post Process Volume Settings

Story
When I began this piece, I knew I wanted to try to render a scene that evoked my memories of travelling along the central Oregon coast during the winter months. I lived in Eugene for almost 8 years, and we would frequently take day trips to drive west towards Florence, and up the coast towards Cape Perpetua. Popular summer locations on the coast would be mostly abandoned in the winter, and often you could have the beaches all to yourself. Watching those winter storms and choppy waves crash over the volcanic, rocky shore, surrounded in low-lying clouds, is one of my fondest memories.
Foliage
The foliage in this scene is a mix of assets that I have collected from Epic, Megascans, and Unity's “Book of the Dead” demo. I've tweaked a few to more closely resemble the coastal pines, cedar, and fir trees that grow along the Oregon coast. For the distant trees, I used a simpler, cheaper mesh. For the foreground foliage, I created a simple material that allowed for some subsurface scattering and wind vertex animation.

Foliage Material
Water
Getting the ocean material right was one of the biggest challenges of this piece. The coastal waters around Oregon are often choppy and rough, and a complex mix of greys, greens, and blues. I began by looking at two different examples from asset packs free from the Epic Store: the “Modular Seaside Town” pack and the “Water Materials” pack. I ended up re-using certain parts of both materials to get some colour and shapes I wanted, and then added some features to it such as a distance field driven foam mask system to get foam build up around my rocks, as well as a layered Gerstner wave function to drive the wave shapes. I ended up using vertex colours to control the amplitude of the waves in different distances from the shore. This material became fairly complex towards the end!

Water Material

Water in UE4
VFX
I tried to keep the particles in this scene straight forward. I developed a water spray VFX that I manually placed around the rocks along the shore. I then added them all to a Sequence to fire them off in order, and then used that Sequence as a re-usable shot in my master cinematic to time the wave crashes to my cameras. In the future, I would be interested in developing a way to tie their activation to the material animation of the waves directly.


Water Splash VFX Placement and Sequencer
Terrain
I started this project by iterating on the coastal terrain a lot! I knew it would be the backbone of most of the scene. I used the website terrain.party to capture height textures from the Oregon Coast around Yachats, and then took those textures into World Machine for clean up and editing (I experimented with getting even more detailed information from Lidar data, but it proved to be too detailed and unweildly – I was getting individual trees in my heightmap! Cool, but less useful). World Machine produced some erosion data and maps that I used as splatmaps for the terrain in Unreal.

Height Texture from terrain.party

Height Map from terrain.party Imported into World Machine

Final Heightmap in World Machine
Cinematics
I started planning out my camera shots pretty early in the project. I knew I wanted a variety of long establishing shots and more detailed, up-close shots. These changed a bit organically as I began detailing out the scene. For example, I began to have a lot of fun building up the tide pool areas in my scene, so I added an up close shot for it and detailed out the props and materials a little more for that spot.

Camera Path in UE4
Fog VFX
I knew my winter Oregon coast scene would rely on fog quite a bit, so I spent a lot of time trying to dial it in. I began by stitching together an HDR skybox texture that had an interesting breakup of stormy, overcast clouds, and then added a height fog actor. Unreal recently introduced the ability to have dual fog controls, which meant I could get a dense low-lying fog near the shore and still have a lighter gradient rolling up the hills behind it. I manually placed some fog cards along the hills and layered into the trees in the distance to both add some shape breakup to the fog and to pick out specific shapes I wanted to silhouette. For the foreground fog, I created a volumetric fog particle inspired by Ryan Brucks. I used this to get dense volumetric fog rolling through the trees and catching light near the camera. This particle used a world-aligned z-mask to break up the fog shapes, as well as some subtle, fake self-shadowing driven by my light's rotation vector.


Fog Breakdown
Megascans and Substance Designer
Megascans opening up their library to Unreal users was great for this project! I grabbed a variety of terrain textures, rock and log assets, and even some barnacle textures. This really let me compose the scene quickly. I did a lot of material work on these assets after bringing them in to get them to be more cohesive. I added several macro controls to these materials to ensure they could all have shared elements such as a world-driven “wetness height” tied to the water plane. This let me quickly add and move rock formations without having to worry about updating vertex painting or some other manual approach to wetness. In addition to the water height controls, I had shared material controls for a world-aligned albedo macro texture, vertex painting for barnacles, pixel depth blending, and a distance field-driven system for adding albedo value variations for exposed areas of rock.


A lot of my detail on the beaches came from decals generated from photos run through Substance Designer; it was an easy way to generate roughness, AO, and opacity maps and colour correct albedo values.

Without Decals

With Decals
Sky Textures
I created the skydome texture from HDR images taken from hdri-skies.com and stitched together in Photoshop. I used several different source photos to get a good mix of overcast sky and rolling storm clouds. Working with 32-bit photos in Photoshop is a bit tricky; since creating this image, I've actually found doing this compositing work is easier in Substance Designer. They have specific nodes to move back and forth from linear colour and sRGB colour for previewing your work, and have a very useful Panorama Shape node for generating masks. The actual material for the sky was very simple, with just an emissive intensity parameter.

Sky Material
Inspiration and Feedback
For this scene in particular, my main inspiration came from my memories of the Oregon coast. I was also particularly inspired by Patrick Joust's photo series “North,” and the way he captured the moody, overcast rural coast. When working out my colours and grading, I looked at the works of Andrew Wyeth for using a controlled, muted palette. For feedback on my work, I'd occasionally either ask other artists at work or online artist groups. I'd rely a lot on my wife's feedback as well, since she saw the project at all its different stages!
Tips For Lighting Artists
I think the single thing that has helped me the most in improving my lighting has been to study art outside of games; whether it be critically watching movies with good cinematography, seeking out new photographers, or even looking at theatre and installation art! Its easy to get in a cycle of only looking at the art of other artists in your field, and there is such a broad world of other work outside of it. Additionally, I think finding subjects that you personally feel passionate about or have a connection to can make all the difference in your personal work.
Future Work
I plan to keep working on personal scenes to try to improve my skill set in other areas; in particular, I've been wanting to collaborate with other artists to try to do something even more ambitious. I'm also working hard on Vampire: the Masquerade – Bloodlines 2 at Hardsuit Labs, and am excited to finally be able to share it with everyone soon! You can check out more of my artwork over on Artstation.
