
Rugged Mountain Path In Ue5
In this article Keltic shares with us his journey creating The Path, an atmospheric, serene walkway in the mountains. Learn how Keltic utilized Megascans and UE5 to craft his scene, how he setup his cameras, lighting and post processing, creating video clips as well as his tips for anyone looking to break into the industry.
Intro
Hey everyone! My name is Keltic Vermeersch and I’m currently an employee at Massive Entertainment a Ubisoft studio in Malmo Sweden. At the time of writing this article I am working on the new Avatar: Frontiers of Pandora game as an environment artist. I’m originally from Belgium and I’m 23 years old. Before joining massive I had worked at Guerrilla Games and Electric Square. I started getting into the world of 3D from a very young age actually (if you count Legos) and also wanted to make more and more. After a couple of years playing the very popular block game Minecraft I started to realise there was a way of earning money with the art I created in that game. That eventually lead to me deciding to go study 3D graphics in high school. I like it so much that I decided to go the collage university of Digital arts and entertainment to continue my studies, where I than graduated as a Game graphics production student.
Composition
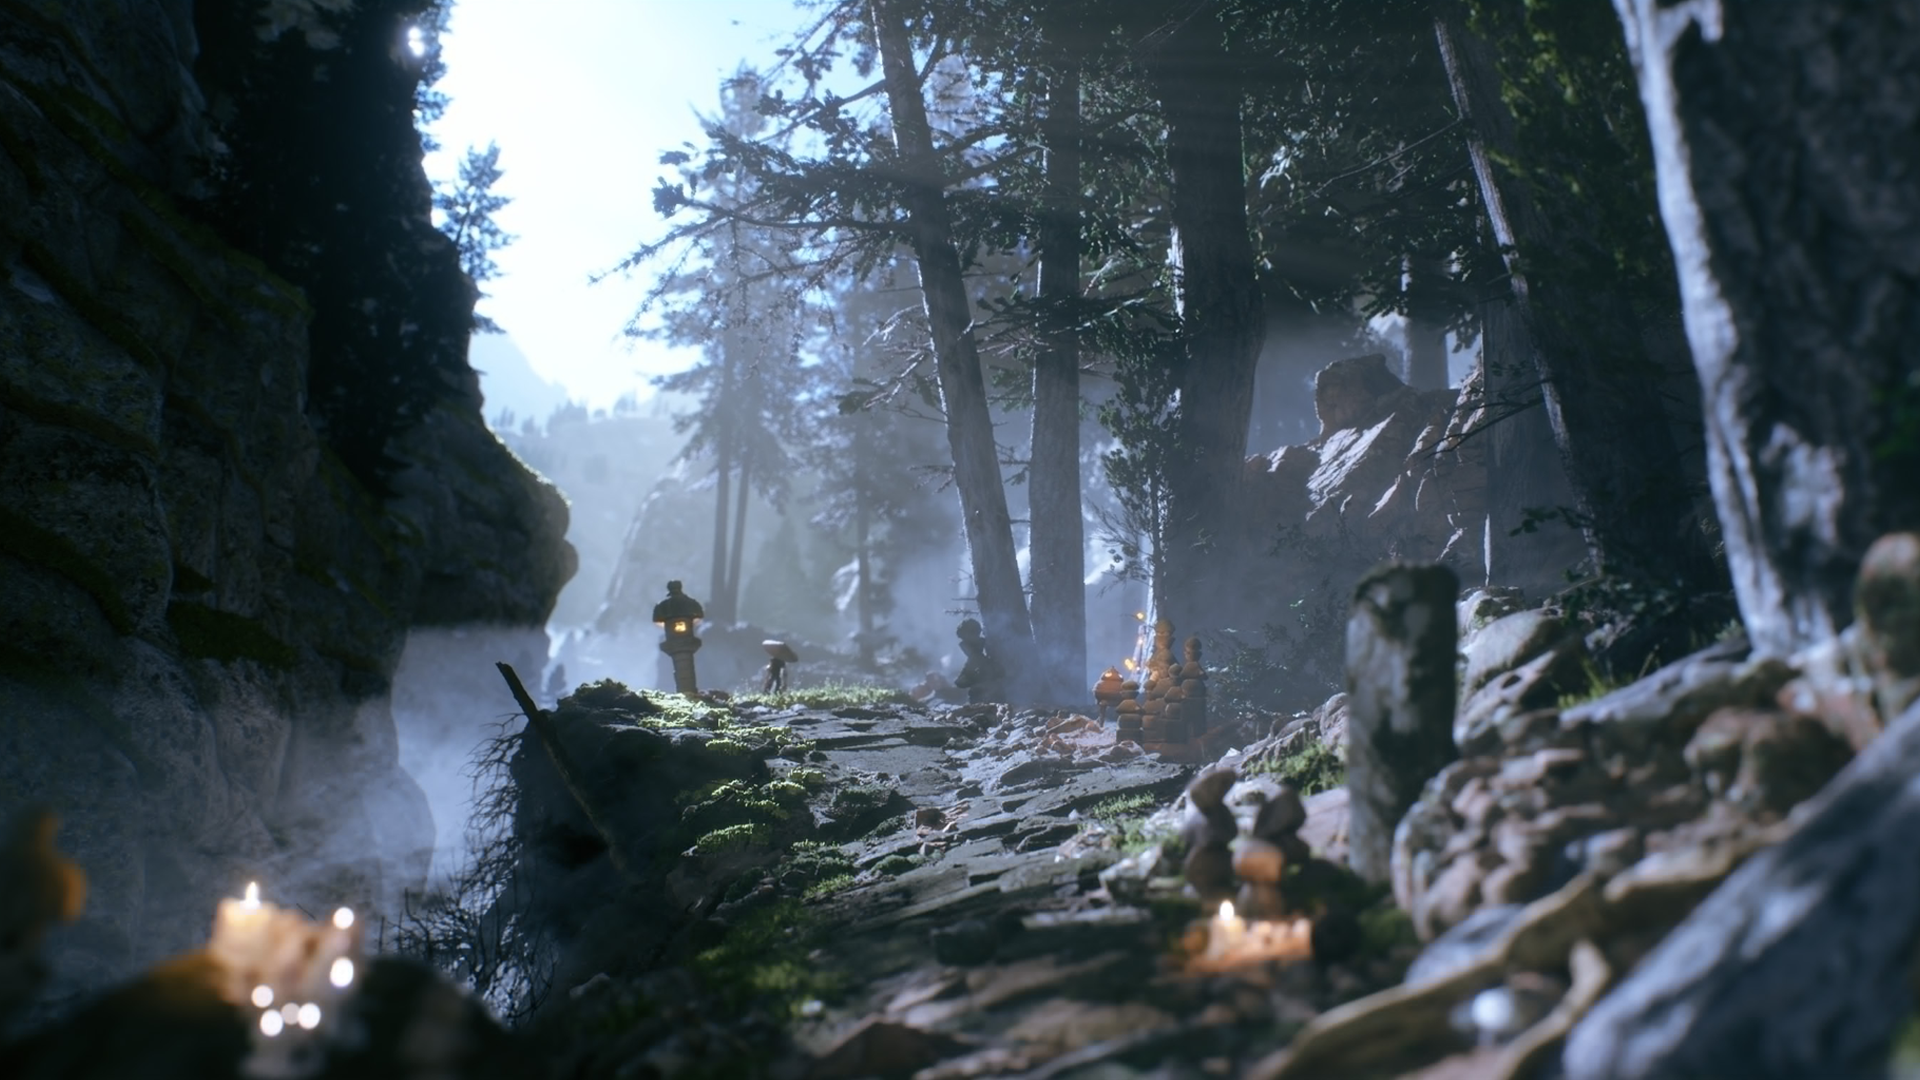
The composition of this is scene is in general very simple. Everything in the scene is trying to lead your eyes to one focal point. The trail itself, the mountains that roll down, the fog, and even the camera angle is slightly rotate to help bring this all together. Next to that the rule of thirds is also applied in this piece, making sure to give your eyes rest on the left and on the top, compared to the busier scenery towards the bottom and right, which compliments the focal point again.
Megascans
This scene was almost entirely build up from Megascans except for a few of the far away background pieces. I always look at my assets in terms of use, will I use them up-close, or will they just need to convey a certain shape in the distance to hint towards what it could be.
After I am happy with my general shapes and feeling of the piece, I go in start to layout the fundamental parts of my scenes. I do this very loosely though. I tend to go back and forth of what I am actually trying to achieve, and I make very drastic changes in the middle of these build ups. The great thing about Megascans is that you can much quicker see and feel where your piece is going. But not everything is sunshine and roses. The hard part of Megascans is making sure everything works together and feels as a whole. I tried to achieve this in a couple of ways here. Starting off with vegetation. One of my main blending methods. Not only does this increase the detail in your scene it is one of the best blending methods there is. Very quickly you can cover up seems and ugly patches with a blob of moss or a patch of grass. Next to that I can also recommend a Dithering technique you can apply in your shaders to softly blend to meshes together. I didn’t use this method in this scene as I wanted to a lot of hard edges in the path ahead focusing on the broken and crumbled state of the road.
Tips For Using Megascans
The main thing when using Megascans, or any other asset pack that you personally didn’t make is to get everything blended together, you can do this in many various way, but one of my favourite is laying. Layering is a simple technique where you simply look at real life and try to copy the many layers are present there. Let’s take this into practice and take a rock as an example. The first step here would be to get the rock into your engine. Once you have that you can start looking at the different layers that are present around and, on this rock, start by adding moss, and rocks, smaller rocks that are scattered around it, little pebbles, some grass that is trying to grow from under the rock, apply all of these layers together in a scene and you’ll instantly notice that all of these sperate assets start to blend together way more.
VFX
The VFX present in this scene is also a kit bash of different FX from previous scenes and Megascans together, when creating a piece where your main focus is to practice, lighting, composition and to train yourself to work faster, it’s important to know to know when and where you are able to cut corners and recycle things in different ways. It’s very important to think outside the box sometimes. In this scene, I had old campfire and wildfire FX from a different project where the smoke was very useful to create more depth and give the illusion of fog. I personally am not a great VFX artist myself as my focus lays with level art. The best advise I can give here is to ask for help where you need it, or consult YouTube, where I’ve spend many of my hours looking at great tutorials which go really in depth in the creation of FX and more.
Fire VFX
That all being said, VFX is still in my opinion one of the more important things in a scene. VFX is the thing that can either make or break you piece, it brings life into something that would otherwise be very still and dead. It can give the illusion that what we are looking at is bigger than what it actually is. It is also important to realise when not to use VFX as to much can break the illusion of realism once again. Always try to look at real life. It’s mostly the small things that makes the biggest difference, like a little bit of floating dust.
Lighting With Lumen
As Lumen is still pretty new there is a lot of trail and error when looking for the exact feeling you want in a scene. The first thing you should check is your project settings, normally Lumen should be active by default, but in case you are upgrading a project from UE4 to UE5 its important that your Dynamic Global Illumination and Reflections Method are both set to Lumen, also make sure that your generate Mesh distance fields are on. One of the great things about Lumen is the GI that it offers you can play around with bright emissive materials which will all impact your scene. This doesn’t not mean that you should replace actual lights with emissive materials, this will cause for unwanted noise and will look inconsistent overall. It’s also a good practice to avoid base colors with a value of 1 (pure white) This is just something that will never happen in real life. The same exact thing goes for dark colors. When you’re working with Lumen it is also always a good idea to work with the Lumen scene visualization mode. This mode is a great way to debug things when they don’t look right.
Trees
The trees just like anything else in the this scene is a combination of Megascans and asset packs. When looking up close to the assets, the assets in the front of the scene are Megascans, as these most of the time, offer the most detail, which is a great way to convey the realism in your scene, but when we look further down in the scene the tree’s are actually way less detailed and simplified from from free tree packs on the unreal market place. These don’t have to be detailed as we knew from the start that they were going to be in the background and mostly just a silhouette. When we then looking even further, the trees on top of the mountains, far, far away in the distance are just imposters. Imposters are simple planes with a texture of a silhouette of a tree on top of it. Because they are so far away, and this is just a still shot, it doesn’t matter that these are just 2d planes.
Working With Concept Art
When I look for a concept art, there isn’t anything particular I look for to begin with. My initial thought when looking for a concept art is if I just like it or not. I think to myself, will I have fun making this piece? Or will I just regret it after a couple of hours of starting. Once you can recognize this, it becomes a lot easier picking a piece you like and are sure that you will be able to finish. I also try to pick concept pieces that I know lean towards the skills I have, but still have a few challenges so that I can improve on my less developed skills.
Another important part when looking for a concept art is to be able to already visualize how you will approach it. Will I make all the assets myself? Or will I use assets packs?
Getting The Megascans To Fit The Concept
As I come from a background of kit bashing I rarely see a problem to fit obscure assets into a scene. Its important to be able to make things with what you have. You’ll come across situations in any company, if it is AAA or Indie, where you’ll have to come up with creative solutions to a problem where, for example, the right asset doesn’t exist. Being able to solve this problem with different assets or tools is a great skill to have. I would encourage anyone to train this skill, as it will come in useful more than you think.
Small Videos
When I think about making these small videos, I want to first of all give some life in the final overall shot, just by adding this small camera movement a still image can come to life, next to that the other videos intent, were to convey the detail that is put in the scene, sometimes one shot can’t do justice on an entire piece. With these small videos I’m able to show a little bit more of the work that went into the overall end result.
Camera and Post Process Setup
For my camera setup I stay mostly pretty standard, I adjust my focal point and that is pretty much it. For me post processing is where the magic happens. The first thing I like to play with when I start my post processing is the colours. Asking myself what the overall feeling is I want for this scene. I always start with my white balance options, once I’m happy with those I go to the global colours and work my way down to the shadows and highlights, once I’m happy with these, its time to just play around with the other settings, I recommend just adjusting every slider in the post processing and see what it does. Sometimes you does nothing, sometimes its very extreme, try, and see what works for you!
Post Processing
Things Learnt During The Creation Process
If there is any take away point from how I approach the creation of scenes, its that sometimes you need to work with what you have. Try to make the best out of the resources available and don’t be afraid to fail. Set yourself deadlines and see how far you get. And in the end if you really like the project, you can always extend your deadline. I like to set myself deadlines of a weekend. If I’m not happy with where I’m at at the end of the weekend, then I know for myself that I probably won’t be happy with it in a week. Art isn’t just about working day and night. Take rest, take care of yourself. Don’t push yourself to hard and just have fun with it. It’s okay to take a week break, or sometimes even a month. Set yourself small do-able deadlines, that you know you can finish. Keep your expectations realistic.
Breaking Into The Industry
I would like to give a piece of advice for anyone who is trying to break into the industry and is struggling with it. The best chance you have, is to put yourself out there, don’t be afraid to reach out to people in the industry and ask for help. Everyone working in games or art is still human. Try to start a friendly dialogue, just remember to stay polite, and don’t always try to apply for a job in the easiest and conventual way, be unique, stand out. Start a conversation on Linkedin, ask for a feedback session, reach out. It is possible, I’ve landed my jobs by applying in unconventional ways and they work, don’t be scared to try it. Like my mom always told me, You got a no, but you can get a yes.
Scene Progression
Where are you still looking to grow as an artist?
Personally, I like to grow towards a creative role, be a visionary, I want to grow and learn more about the ideas behind games, the stories of them. How to convey emotion to players while they are playing. I’ve always been interested in the creation of stories and how people can be touched by those. I strive to become better in the art of writing and combine my skills together to create better art.
Inspiration
I find inspiration everywhere, when I’m on a run, or at the climbing centrum, there is always something interesting happening around you. It’s the stories that I make in my head from what happens around me that sparks these inspirations.
Feedback
As anyone other artist the first thing I do is ask the people in the industry itself. People that are familiar with the craft and have been practicing itself for several years. However, from experience, this isn’t always the best way to approach feedback. Sometimes it can be a great idea to ask somebody who knows nothing about, colour theory, or composition, just ask a friend, ask what they think or what could improve, its in the eye of the unknowing that the truth mostly lies.
Additional Advice
If you get stuck on a project, or an idea, or just find it hard to continue with your art, try some different mediums, try to sketch instead of model, try to sculpt with clay instead of ZBrush, apply what you’ve learned in different mediums and see what happens.
What can we be on the lookout for from you in the future?
I’m looking forward to be sharing my work of Horizon Forbidden West with everyone hopefully soon on Artstation, next to that I’m working very hard on a dark fantasy novel in my free time, so for all those dark fantasy lovers out there, I’m doing my best!
Outro
Thank you guys for reading this article and spending some of your precious time reading a little bit more about me and my work, I truly hope this was helpful and that I’ve inspired you to think a little outside the box! I wish you all the best!