
Guide to Game Art Applications - Kieran Goodson - ArtStation Learning
Following the release of his Artstation Learning course, Guide to Game Art Applications, Kieran Goodson joins us to delve further into his reasons for creating the course, how he planned and executed the series as well as the challenges and enjoyable moments along the way. This article and series are an essential resource for anyone looking to get their foot into the games industry.
Introduction
You’re a talented artist, but SUCK at writing cover letters. Or you’re a literary weapon with applications but face-to-face you’re as quiet as a Dormouse. Or maybe you’ve got a natural knack for chat, but you’re lost when you need to channel that energy towards art.
Sound familiar?
We’re all built differently. The application process is something that connects every artist in the games industry no matter your background, interests or years of experience. It’s an evergreen topic that never goes out of fashion because people are always applying for work. Not to mention the imposter syndrome of making art, the refreshing of email inboxes and those pre-interview nerves.
Getting warmer?
What’s more frustrating is going through all of this not knowing if you’re heading in the right direction. You don’t want to feel like you’re on your own and it’s no fun hunting across millions of sites to piece together useful resources. The truth is, no one has it all figured out and everyone has their strengths and weaknesses.
That’s why I wanted to create a comprehensive series that supports artists on their own journeys, no matter their discipline. A compendium of topics to fill in the gaps for people.
Today, I’m presenting to you my Guide to Game Art Applications.
My name is Kieran Goodson and I’m an Environment Artist at Rebellion currently working on the Sniper Elite series. I suppose I’ve been best known for my 'Those Who Mourn' project and the work that I’ve done as a blogger, podcast guest and mentor in the game art scene for the last 2 years.
What is the Guide To Game Art Applications?
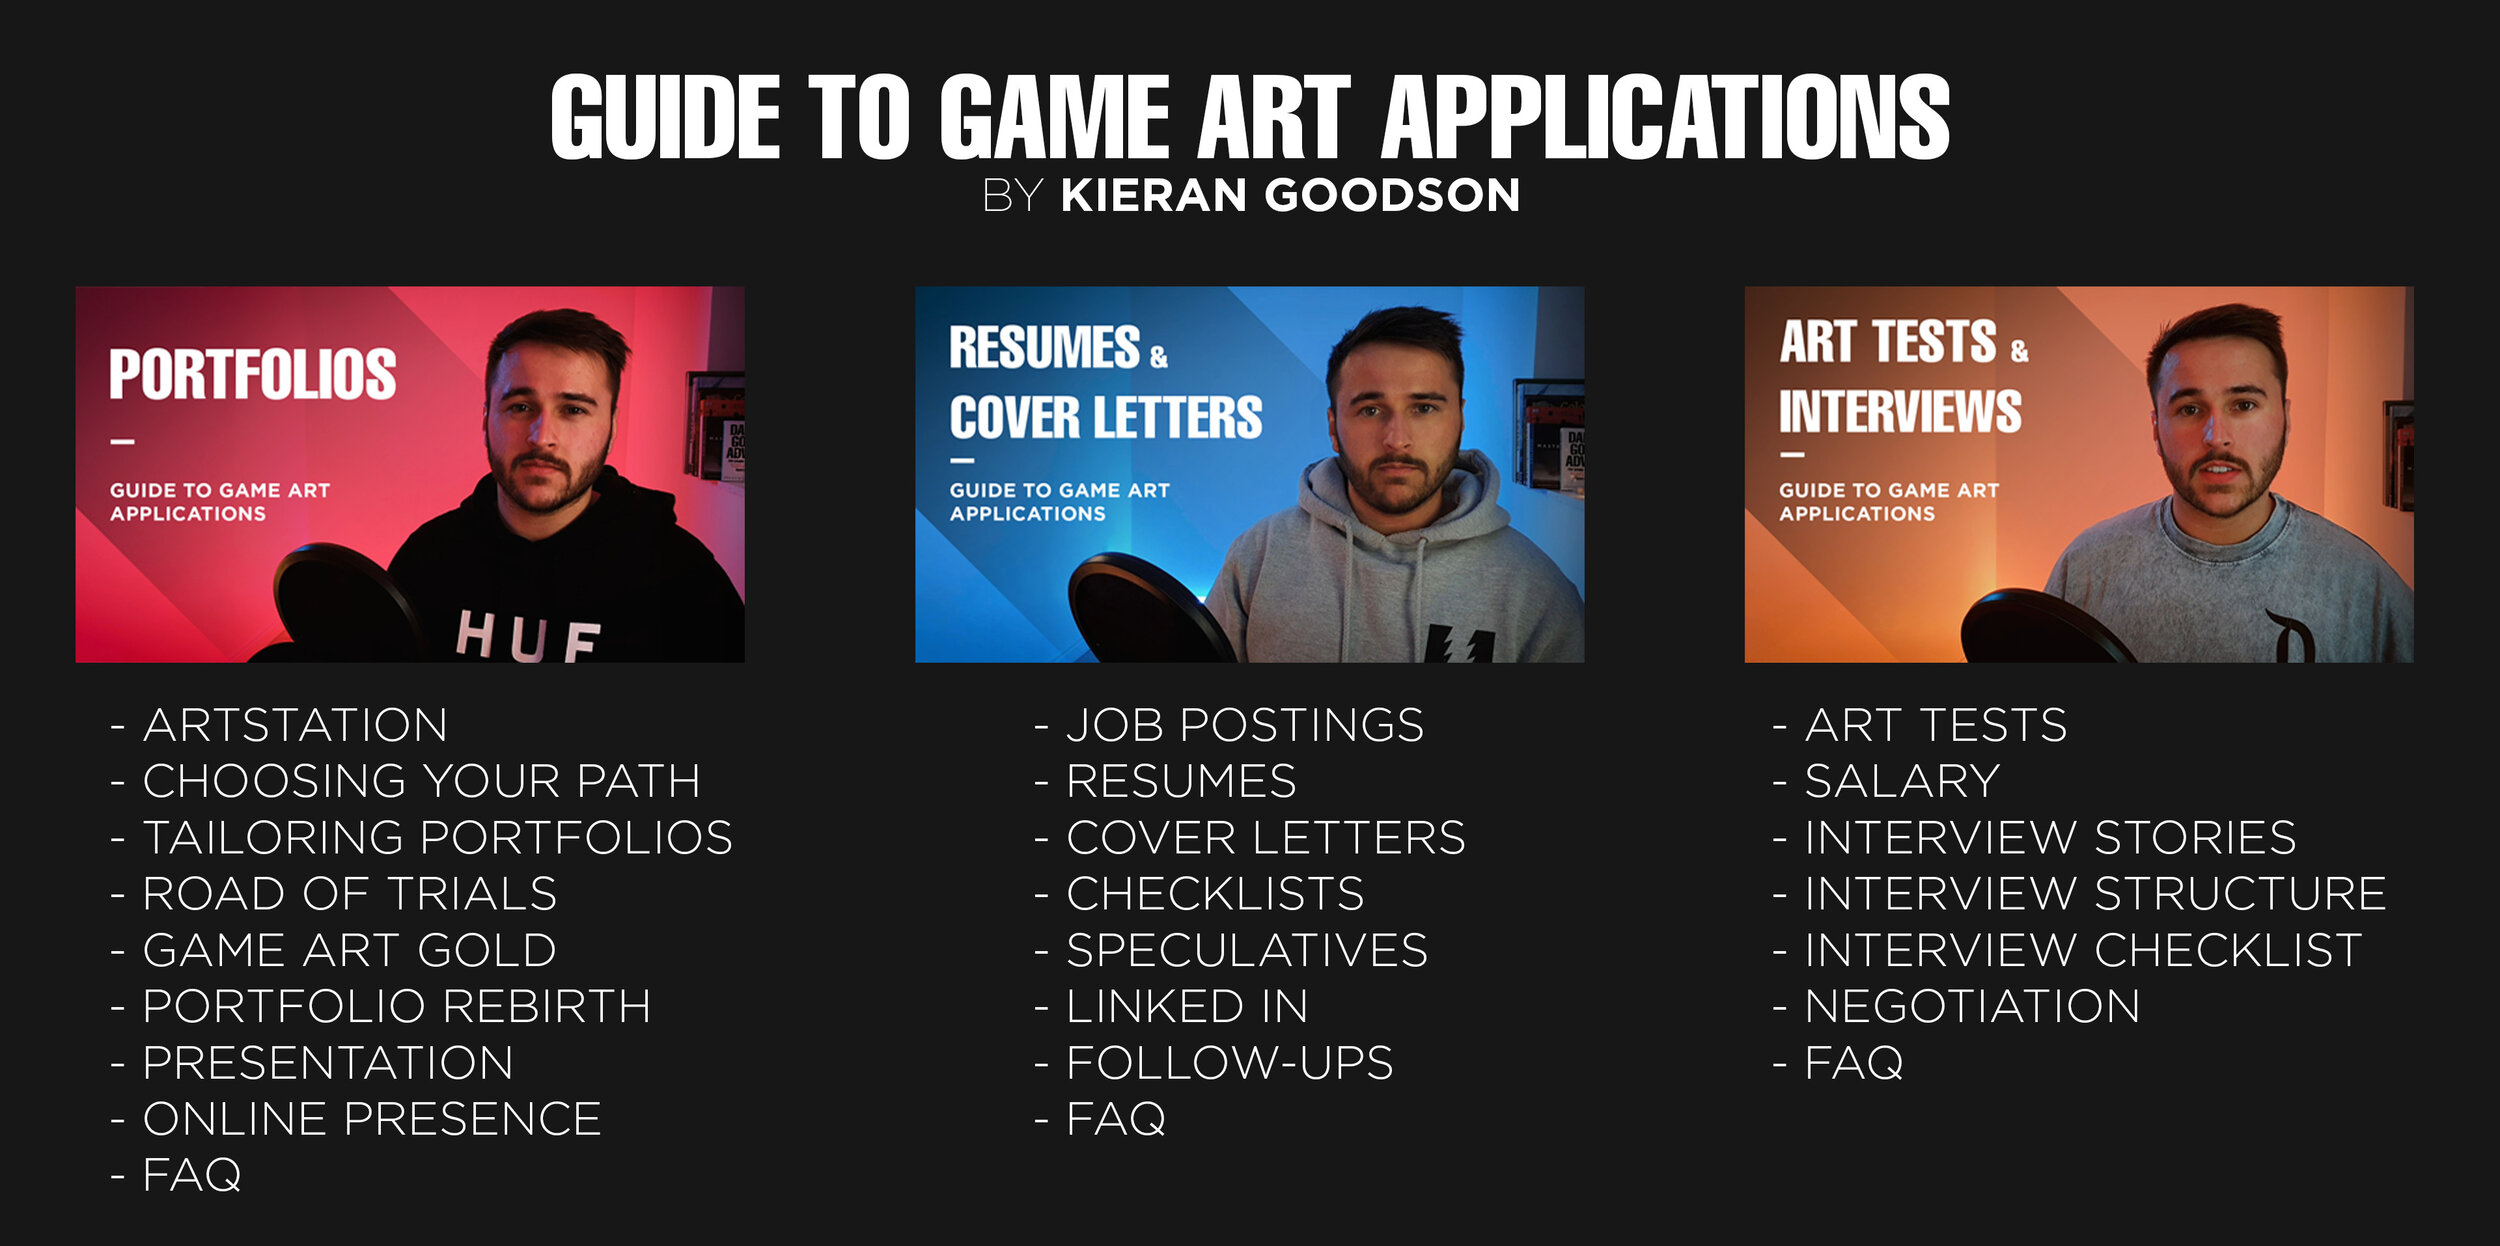
It’s a three-part video series on ArtStation Learning based on my experience breaking into the industry. It’s loosely based on content that I’ve written for my blog, for ArtStation, and for Experience Points in the past but this time, covering more topics and in further detail than ever before,
The guide exists as a handrail for the application process. It gives the journey a defined structure and offers advice on everything from art fundamentals, to persuasive writing, to soft skill interview preparation, and everything in between.
Why have I made the series?
The issue with game application advice is that it tends to get trapped in DM’s and discord discussions. I also found myself being asked the same questions time and time again in mentoring sessions. It was advice that was in high demand for a lot of students and young professionals so it made sense to start working on a resource that was open to the public.
The posts I did on my ArtStation blog of the same name were fine, and they were well received, but the character limit was very restrictive and I knew there was so much more to cover beyond a standard do’s and don’ts list. Along came the offer to produce an ArtStation Learning series and away I went. One of those preparation-meets-opportunity type situations.
There’s no two ways about it. Most career advice is dull. It’s often vague, it’s difficult to apply at the best of times and quite frankly, it doesn’t have the sex appeal compared to actually making artwork. But take that bedrock of career building away and the superstar artist that everyone strives to be has nowhere to work. Take that away, and the superstar artist lacks the bigger picture perspective, the healthy daily mindset and the crucial soft skills needed to interface with any team - making them not-so-super.
And let’s be real- no one wants to sit through 90 minutes of resumes and cover letters and you can’t blame them. Because of this, I wanted my series to be different in every way. I wanted the Guide to Game Art Applications to be an exciting, modern and refreshing journey through solid, structured content that everyone can benefit from. I hope that’s reflected in the light and bright production design too.
If you had to pick 5 chapters that everyone should watch, what would they be and why?
The ‘Road of Trials’ is in there because it’s a chapter that deals with issues that every artist faces throughout their careers. Imposter syndrome, perfectionism, motivation. What’s tough is that everyone will experience these things and deal with them in very different ways. I offer some techniques that have helped me in the past in the hope that it works for other people. I also recommend zooming out a little when you’re feeling low, get a little perspective. A lot of us are within the first 5-10 years of our careers and we’ve got 30+ years of work still left to do before we think about hanging up the Wacom. That’s plenty of time to make what we want to make and leave a mark. Take things day by day.
‘Game art GOLD’ is probably one of my favourite chapters. The tips and tricks in here are great, if I don't say so myself, and will help you break through that “Something-isn’t-right-but-I-don’t-know-what-it-is” wall. But this isn’t why it’s a favourite. It has taken me a couple of years to be able to formulate a theory I have about how to create artwork that looks good, feels ‘right’ and omits emotion harmoniously.
In this chapter, I present this framework in the form of a story table and demonstrate how it works with a live example. By working through the table, we can begin to explore and abstract out different story themes, plot details or compositional elements from our artwork by understanding the relationship between the three main pillars of meaning, function, and aesthetics. It’s something I’m pretty passionate about.
I do believe that if you are thinking like this as you go, you’ll be able to communicate across much more than just a composition of a place or prop or person.
To quote Marcos Mateu-Mestre (Framed Ink),
“If the drawing doesn’t serve a purpose within the bigger picture, it will just pull the audience out of the narration, making them conscious of the fact that they are simply setting their eyes on a paper with brushwork on it rather than living an experience, as following a story and its characters should be…
… Technique is one thing; feeling and mood - the expression of which is our goal - are another. The former will help us put the latter out there, but will never take its place”.

The Resume Checklist is to ensure that you’re laying out your history sensibly and not doing anything to harm the readability or professionalism of your application. Most people know what goes in, but it may not be obvious as to what to leave out. Keep it simple and you’ll be golden.
I’ve chosen Cover Letters Structure because persuasive writing is tricky. Artists struggle with writing enough as it is so I figured a structural chapter would be really beneficial. These letters are a bit of a dying breed in my estimation but they’re still something that studios ask for and it’s your chance to lay down your best “this is why you should hire me” pitch. In a sea of applications, I don’t think it’s an opportunity that should be wasted.
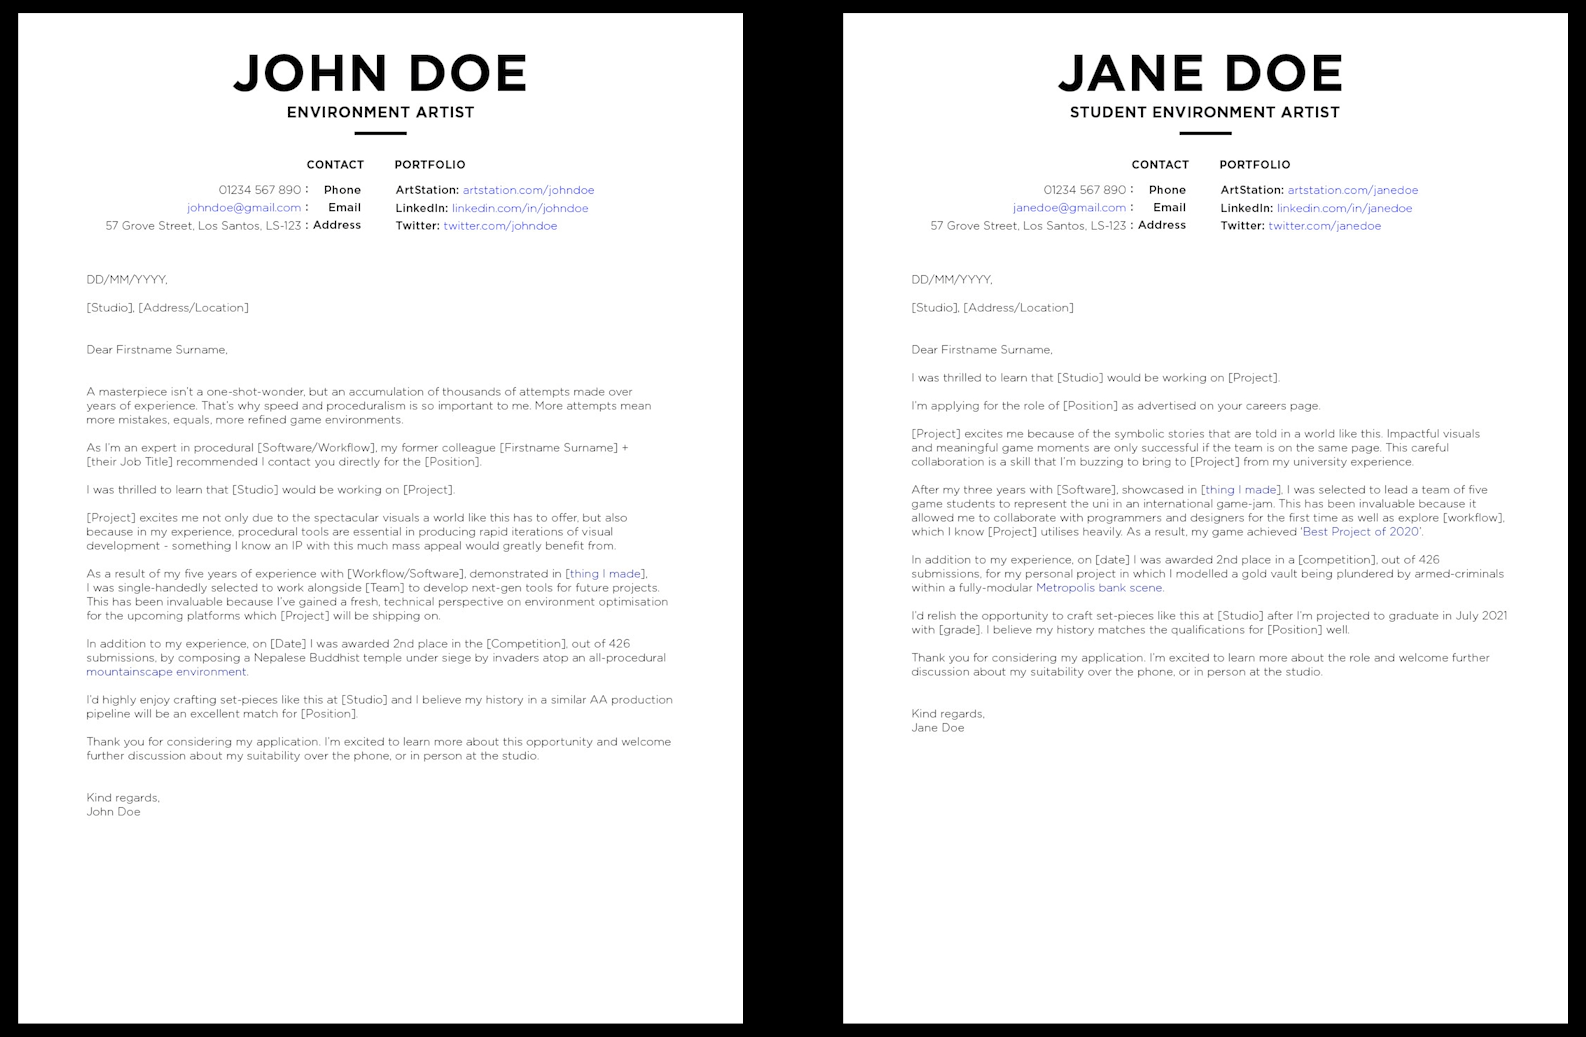
Resume Examples
In career conversations, soft skills are something that get mentioned but not necessarily demonstrated beyond the buzzwords of ‘communication’, ‘leadership’ or ‘teamwork’. In Interview Stories, I describe some key moments from my job interviewing experience to highlight the kind of interactions where soft skills will be vital in making a good impression. After all, your art will get you to the door of a studio, but your soft skills will get you through it, and to that final job offer.
So that’s 5 chapters but I couldn’t resist mentioning an extra. A terrifying part of any interview is negotiation. I wanted to tackle this as a topic because these are vital skills you’ll need to use in order to secure an attractive compensation package. Get to know the market. Describe how you’re an exceptional candidate and put the ball in their court - don’t play their guessing games. The chapter is also a gentle reminder that salary is just one component to this conversation and there are other parts of a job offer that will make you a happy, and productive bunny.
What was the most fun to make?
To watch the entire series start to finish you’ll need nearly 6 hours and I’m not assuming everyone has that kind of time. I made the trailers as a quick and easy in-and-out overview of each course and they were really fun to make. I hope that comes through in the final cut. Finding music that I could visualize the edit to in my mind was the hardest part but when it clicked, I was away. It was an interesting process trying to boil each course down into its core themes and quippy one-liner hooks.

The 3 Part Series
How did you maintain a consistent pacing through your series?
I took into consideration pacing at the macro view and the micro view.
At the macro level for each course, I tried to distribute the length of the chapters so that the heart of the course was in the middle and was the longest runtime. These tended to be the largest and most important chapters. I tried to keep the starting and ending chapters shorter so that the momentum of viewing slowly ramps up and back down again, like one big peak on a rollercoaster. Just like the “Yes ladder”, it’s easier to get into content when starting small and digestible.
At the micro level for each chapter, I would try to separate long parts of explanation or voice over with B-roll, subtitles cards, screen capture footage or other graphics to keep the viewer entertained and engaged. The human attention span is short as it is and the mental buy-in for examples and stories is low so it’s good to carry people through topics with those - plus they’re more memorable than being talked at with a raw information dump.
How long did it take you to produce the series?
Six months start to finish. My workflow looked like this:
⦁ Write a first draft of the script
⦁ Do a polish pass of the script
⦁ Record the footage
⦁ Then record the voice over stuff
⦁ Do noise reduction processing on all the raw audio
⦁ Produce the raw edit of the video, smashing together the video and audio and cutting it into something cohesive
⦁ Then come in with a graphics pass- title cards, summaries and lower thirds
⦁ Record any screen capture video and insert any stock imagery to help contextualize the narration
⦁ Do the music and sounds audio pass
⦁ Then finish up with the post-processing- the colour grade, video crop and audio presets before rendering
All that, 3 times over.
What was the hardest part about putting this all together?
Knowing that I’d written the script, recorded the video and done the raw edit only to realize that’s only half the job. For some chapters, the amount of graphics work that went into them took longer than all of the former list combined.

Video Editing
It took a substantial amount of time refining the lighting setup, as well as setting up the audio, video and lower third presets in the first place. Essentially the underwater iceberg of background preparation that no one sees in the final cut of it all.
What was interesting is that the first course took the longest, the next course took half the time of the first and the final course took half the time of that course. By the end a lot of the editing became muscle memory and there weren’t any question marks over how to approach certain things.
Speaking of which, how did you achieve the lighting for the series?
There’s nothing high spec or crazy about this setup. I adapted the classic three-point lighting setup to the restrictions within the room. I had a standard key light and fill lights either side of me. Then I used a kicker light to lift my profile away from the background a bit as well as a colour accent. The LEDs behind me gave the video the coloured background and the practical fairy lights are in there just for some added ambience. I cover lighting in further detail in the Presentation chapter of the Portfolios course.

Lighting Setup
What you don’t see is how unglamorous the setup was behind the scenes. Lots of rubber bands, tape, boxes, mirrors and t-shirts slung over lamps to get the lighting looking right. Not a clamp or c-stand in sight. Just pure and unadulterated improvise-with-what-I-have-until-it-works.
As for the rest of the tech, the audio was recorded in Audacity, captured on a Yeti Blue desktop microphone. The video was just recorded on my phone - Samsung S10+. Editing completed in Adobe Premiere Pro.
What have you learned from being an ArtStation Learning instructor?
I’ve gained a new perspective from all of this. Every time I see a new article or resource pack or tutorial out there, I remember that the author behind it has sacrificed personal growth with their own artwork for others to improve in theirs.
I also learned a difference or two between mediums. What might sound good on the page, might not translate across well on camera and vice versa. A huge benefit of video is that you can control the pacing fairly easily in the edit. Of course you can do this with an article, but it’s a smidge more subliminal in writing.
Have you got any advice for people wanting to produce high quality video content?
Nothing revolutionary! It was my first time producing anything like this so it was a challenge in many ways.
In terms of producing video content, I’d suggest keeping it simple, being yourself and always back up your work. Fortunately I was backing up my projects every single evening which paid off in the end as I had a couple files corrupt along the way. You don’t want to learn that lesson the hard way.
I think the lighting improved over the course of the series and I would highly recommend getting the best shot possible in-camera before cranking stuff in post-production with colour correction and grades. Use your histograms, avoid tangents and play around with different backgrounds.
Overall I’m fairly happy with the quality but I know where I can improve for next time. It’s all just a learning process though. I think what helped push me through many tedious nights was that I enjoyed the writing parts, I’m passionate about what I’m teaching and I love editing. I hope that shows because I truly believe people can tell when your heart isn’t in something. As mentioned before, it took 6 months of evenings, weekends and holidays to produce this alongside permanent full time work. Some days were less than productive where I was just shattered from work-work and couldn’t face recording or editing. To tackle this I really did use the ‘yes ladder’ method I described in the course. On those nights, I took the path of least resistance and still did something, no matter the size of the task. Starting with small stepping stone tasks and gradually increasing the workload helps build momentum and before I knew it, what might have been considered a dud evening turned out to be solid steps in the right direction. So I guess I would advise rolling with the punches and negotiating with yourself about what you can achieve every day. A marathon is just a series of thousands of small steps.
What can we expect in the future from you?

I did enjoy making this kind of content. It was challenging and refreshing and I’d be open to doing it again. The only caveat would be the subject would have to be something I’m mega passionate about.
In terms of personal work, I’ve got a couple of things in the pipeline and I’ll be excited to bring those out into the wild when they’re ready. I’m looking to learn much more about storytelling and cinematics for my future work.
If you had to give people one final round of application advice, what would it be?
Be decisive in what you do for a living, research what that means and go to town building a portfolio for that job. Remember, you aren’t alone in your struggles of learning. Make things that you’re interested in and never ignore your fundamentals. Weave story into the heart of your plots and compositional choices. Present your work and yourself in the best possible light - literally!
Study postings carefully. Keep your resumes and cover letters short and simple- don’t let your fanciness get in the way here. Back up your persuasive points with evidence and stay professional throughout. Personalize your LinkedIn to get the most out of the platform and your ‘network’.
If you’ve made it as far as an art test, you’re heading in the right direction. Bear in mind the scope, time and quality dimensions of the test and work accordingly. Be informed when setting your salary range. If you’ve made it to an interview, you’re doing even better. Soft skills are vital here so be confident in yourself. And don’t forget to negotiate with care! Best of luck.
You can view the series here
You can pick up the free resource pack for the course here

And you can follow me on all the socials here:
As always, thank you for reading, and thank you to Kem, Jacob, Luan and the rest of the Experience Points gang for the feature!