
recreating The Witcher 3 in ue4
Join us in the article where Roman breaks down the creation of his diploma project, a tribute to The Witcher 3. Roman covers topics such as modelling in Maya, texturing with Substance Designer and Painter, terrain creation with World Machine and lighting, post processing and material creation in UE4.
Intro
Hello! My name is Roman Voronin, I’m 24 years old and I am working as Junior Lighting Artist at Sperasoft, A Keywords Studio.
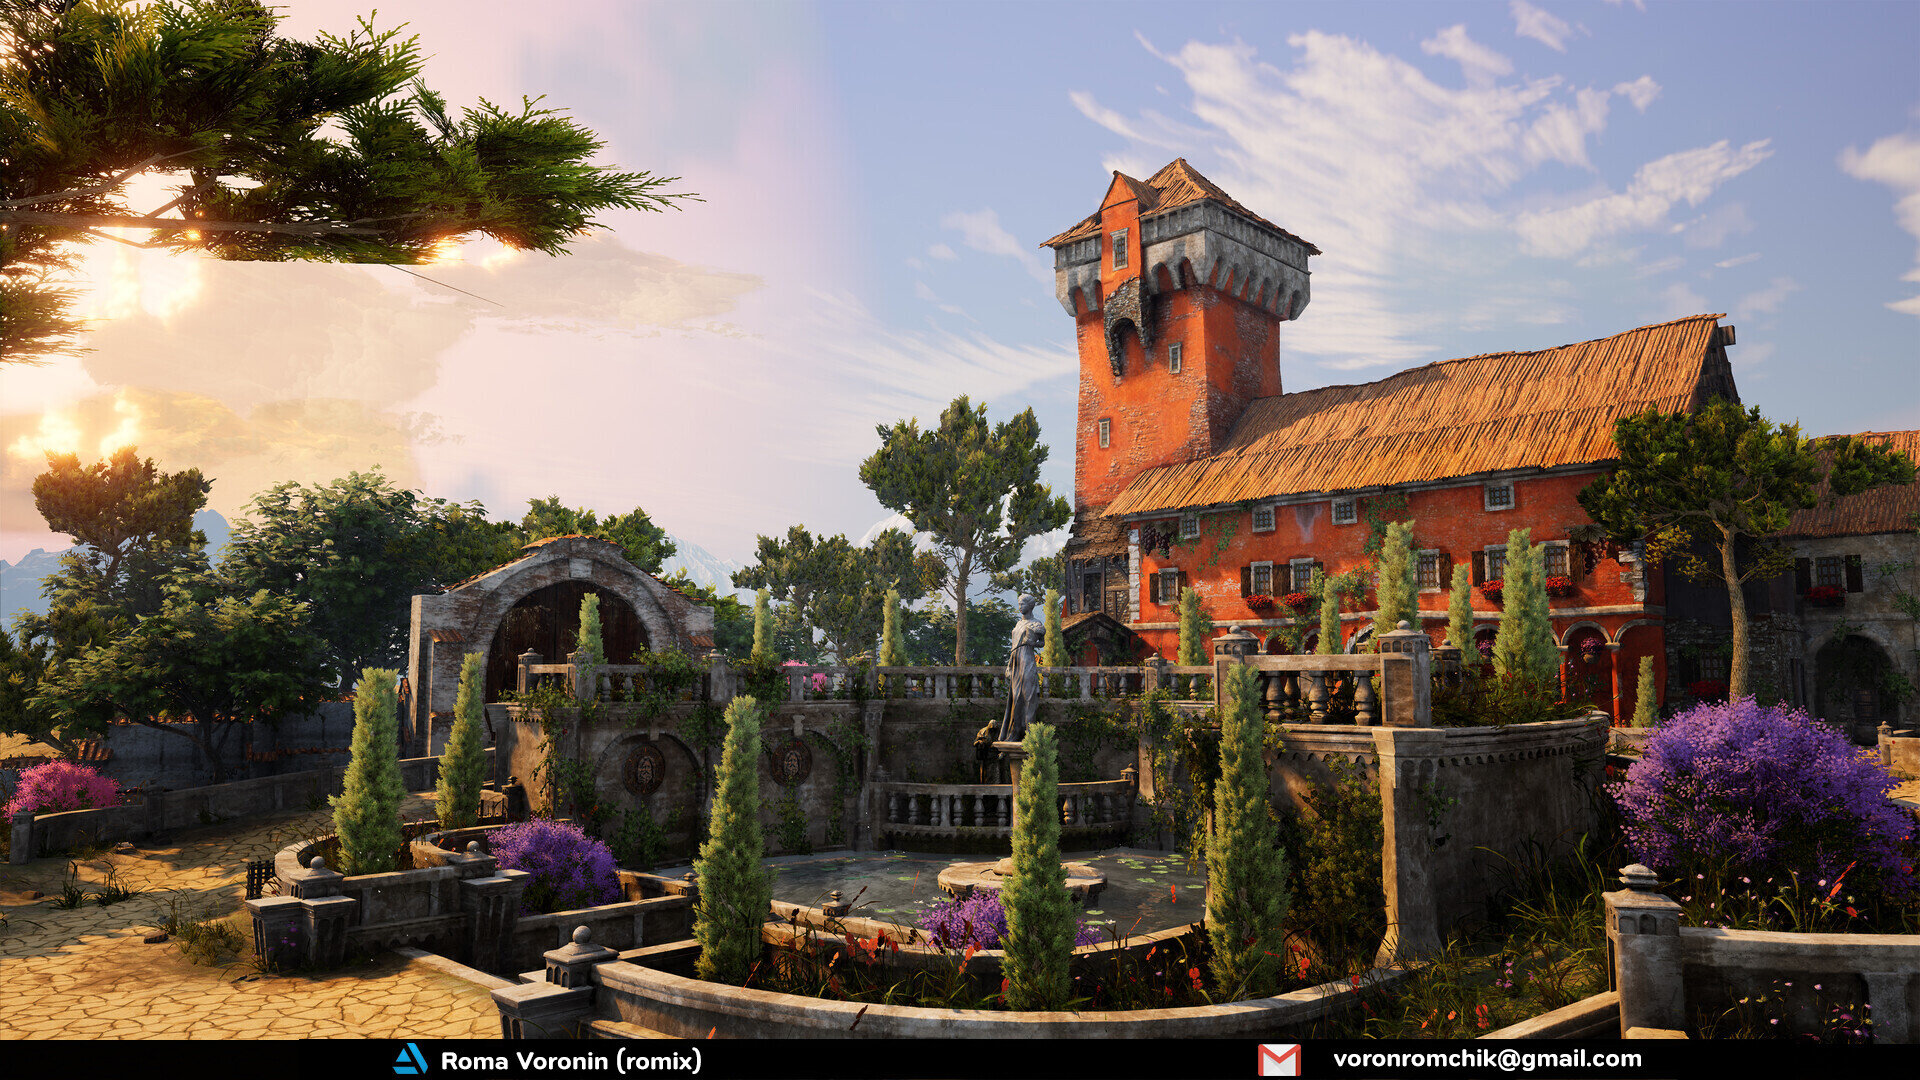
In Moscow, there is a good school with an interesting name “Scream School” with many courses including “Game Graphics”. During the course, I found it interesting to model an environment and adjust the lighting of the scene and for a long time I messed around with post effects and colour correction until I stuck with it. In the last year of my studies, I had a big task to make three scenes in different styles. Something stylized, sci-fi using the midpoly technique and the third is “any to your taste”. By that time, I was just completing The Witcher 3 and was still shocked by the beauty of that world and its complexity. So, I began to collect references from the game, fly on the map, compare the size of the environment with the character model, write out what remains to be done and make a list of tasks. And start modelling in Maya…

A first iteration of painting the houses in Substance Painter:


At the final stage there were 3-4 materials on each house. Still, it’s not an optimized way to paint such buildings but to meet the deadline it was the only way. I hope a “material layer system” in UE4 will save a huge amount of time for me in the future.
Not being a Character Artist, I had to scan or sculpt the sculptures by myself. Scanning did not work, as it meant I’d have to find the exact statues I was looking for to scan. Sculpting would take a lot of time and I would not be satisfied with the final result. So in the end I decided to take the model from the game and “upgrade it”.

Also in the process of creating the scene, I wanted to try not to produce a lot of materials, but to have literally 3-5 materials for the whole scene. What actually happened was there was a master material for objects, decals, organics, sky, landscape and water.

This saved a lot of time and shader compilation. The material has Tesselation, Parallax, Vertex Colour options and more. I believe that the material editor in Unreal Engine 4 is very strong and allows you to create amazing things, like simulating the ocean.


To create the backdrop mountains, I first used World Creator, but the node system in World Machine turned out to be extremely convenient, even though the program does take a long time to render a final texture.

I made the organics in SpeedTree with no edits in Max or Maya. Until that moment, I did not have much work experience and unfortunately, there are no organic lessons at Scream School. But I'm happy with my results and thanks to Jobye Karmaker and his “Approaching Modular Vegetation in Games” lecture on YouTube.

The materials for objects and landscapes I did in my favourite program - Substance Designer. Its speed and flexibility allowed me to create many variations of wood, concrete etc. without much time wasting.


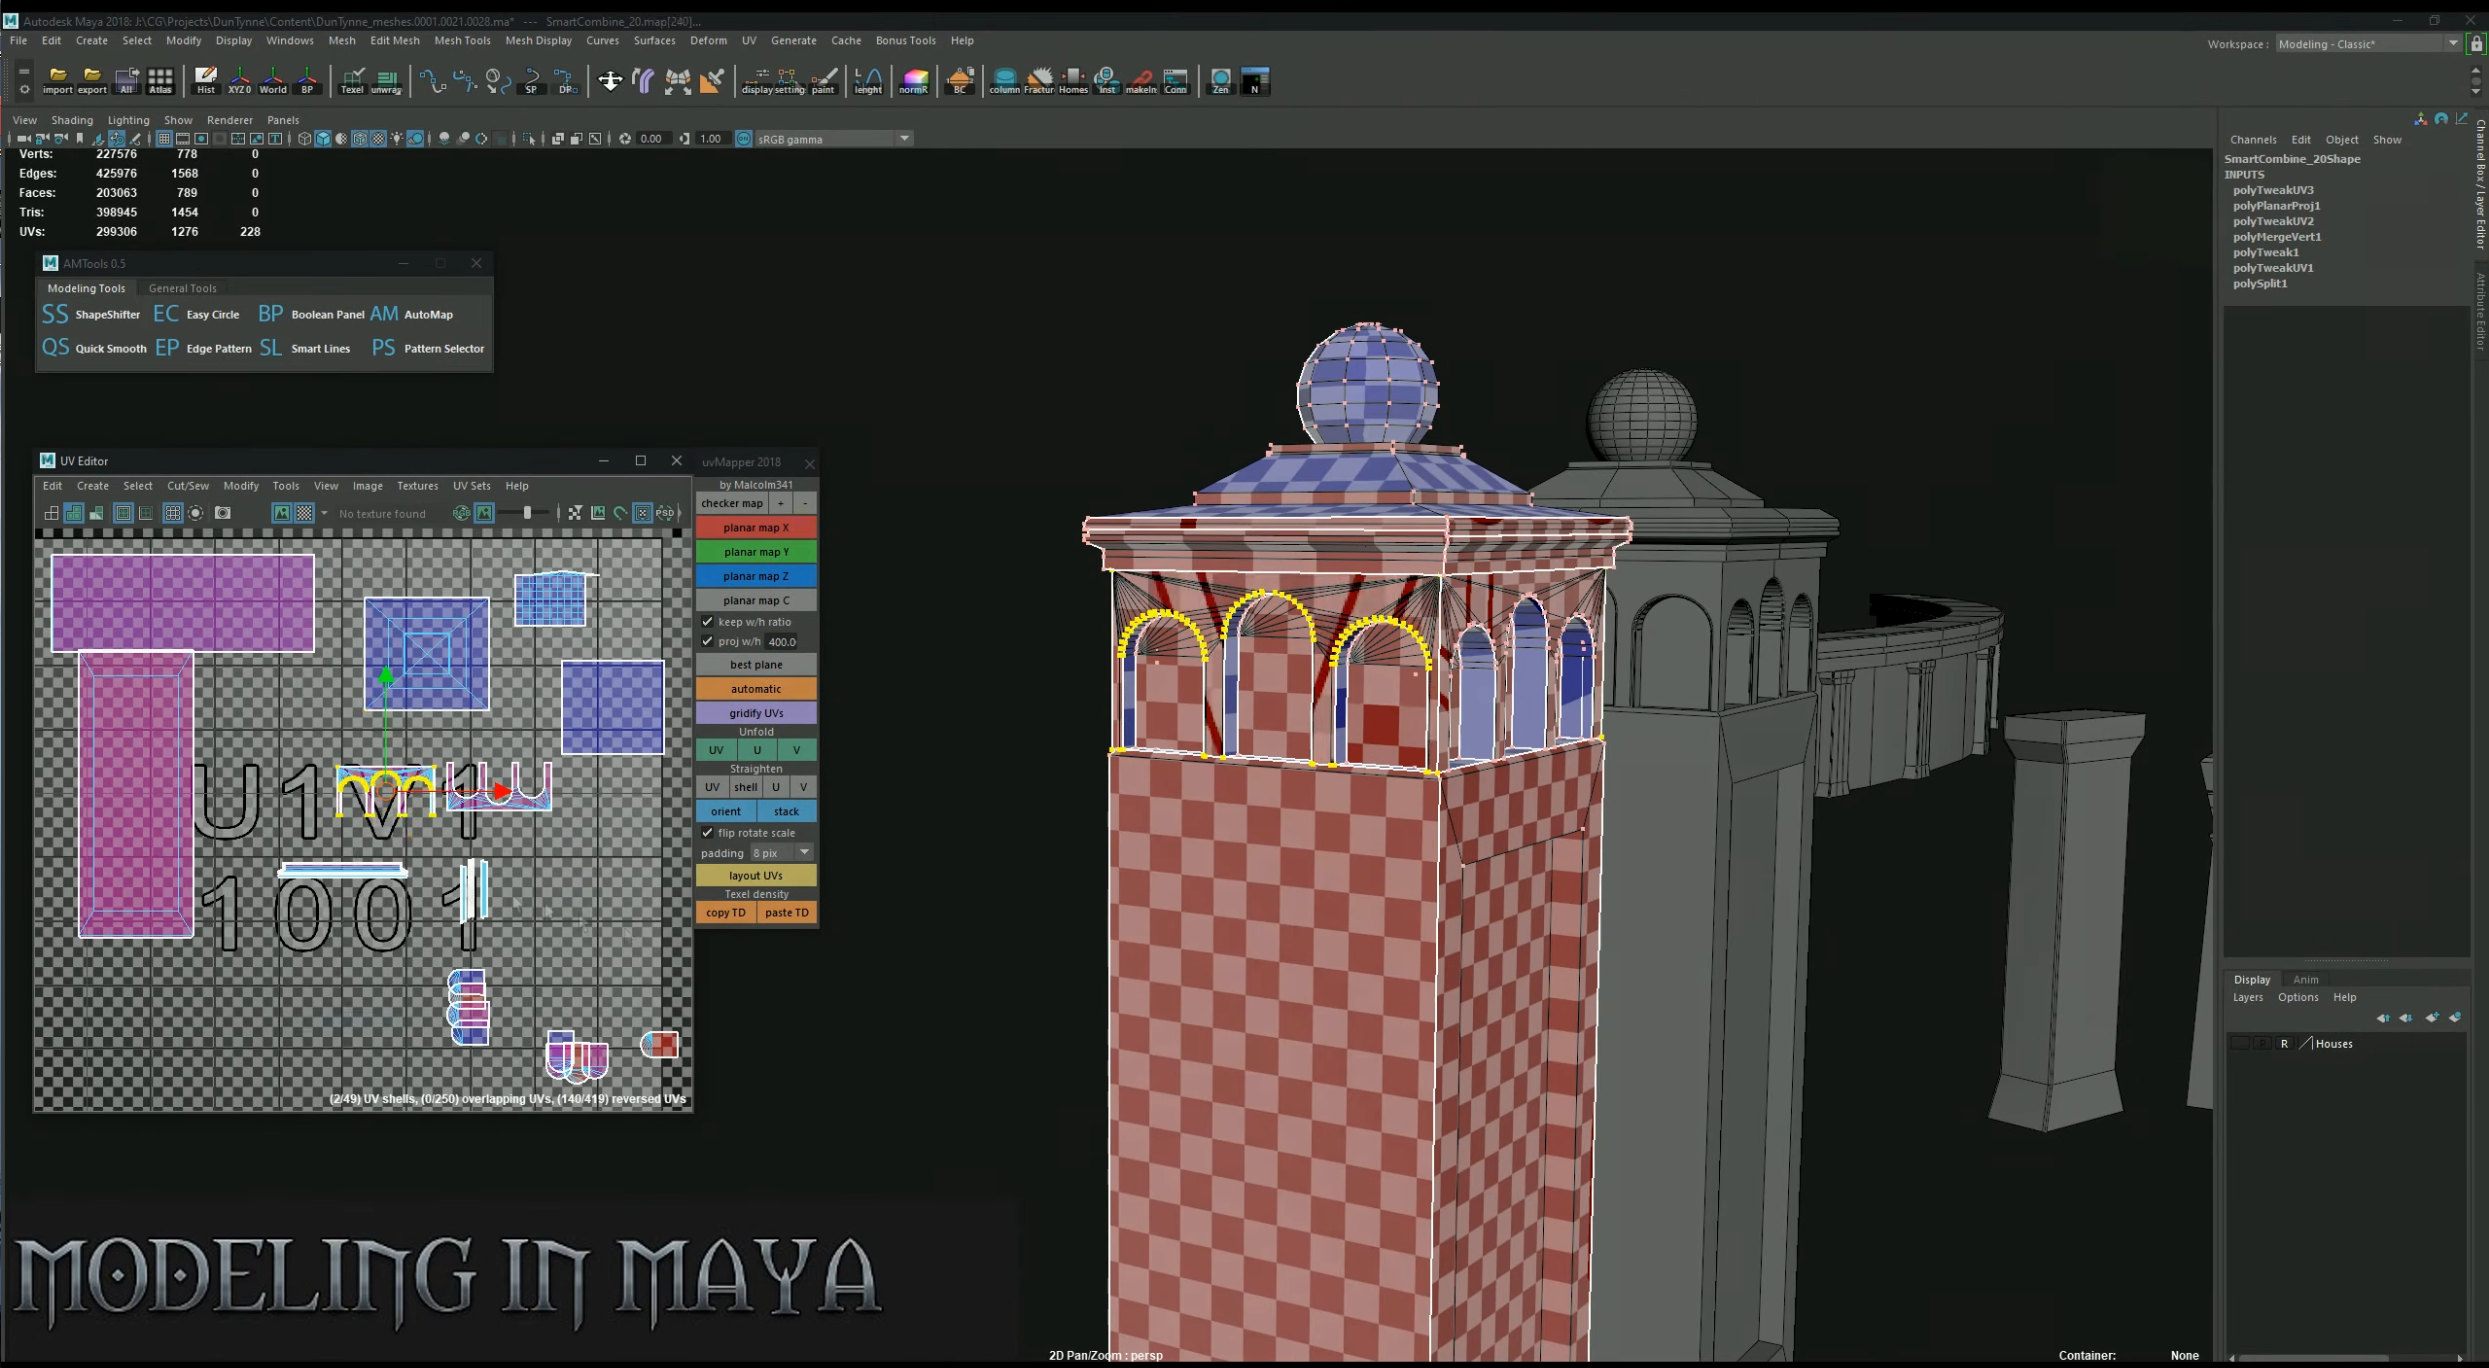
Well, now for the assembly. I advise everyone to start your project with the creation of folders (meshes, materials, blueprints, etc.) and give them different colours. I started everything as usual with gray boxes and gradually adjusted the scene to the camera frames. After assembling the level from the ready-made assets, I sketched a loach. The “SmartSpline UE4” gen system helped me so much.

Usually, I start to work with one directional light to understand how the shadows and the illumination itself should look. Then I work with the fog and Skylight. Once contrasts and atmosphere have been created, I begin to add additional light sources. And at the very end - Post Process.

As for the settings, I try to do everything very subtley. No strong lens flare effects and things like that, as they come as a nice addition to your current picture. And there is no “blood from the eyes”.

Post Process Settings
Material For Lighting Study
I suggest you watch the “Lighting Academy” videos on YouTube for more understanding on lighting in UE4.
Try to imitate film lighting for lighting practice like Mike Marra.
If you find yourself struggling with making a decision like “what colour should I use with my main colour?” I advise you to use the Adobe Color Wheel
And something for reading - “The Secret Lives of Colour” by Kassia St Clair
And also……

Outro
Don’t forget about lighting when you think the scene is done. Because lighting can help to represent your materials and silhouette or the shapes of 3d objects in a better way. Once you find yourself satisfied with the result, just leave your workspace, rest and come back. You will notice that something can be fixed/made better. Lighting can be very dependant on your self-feeling right now. And day by day the results will be different and by each iteration, it will become better and better. Feel free to reach out to me on Artstation and my Discord username is: romix#1572