
towers of doom - influenced by heroes of the storm
Sherif Dawoud stepped out of his comfort zone and created this beautiful fan art of Towers of Doom. Explore this beastly breakdown where Sherif details every step of development. Learn how he captured the art style of Heroes of the Storm, set up his master materials for the ground and props, lighting the scene, sculpting all of the assets,the tools he uses as well as a ton of resources that he gathered along the way.
Introduction
Hi there, My name is Sherif Dawoud and I'm a 20 year old environment artist and I’ve wanted to work in game development ever since I was a kid. One of the first 3D games I played was Prince of Persia: The Sands of Time and it really sparked my interest in game development, I’m trying to learn as much as I can about game development but game art is the aspect that interests me the most. Alongside game art I'm also pursuing a degree in mathematics and computer science.
Scene Planning
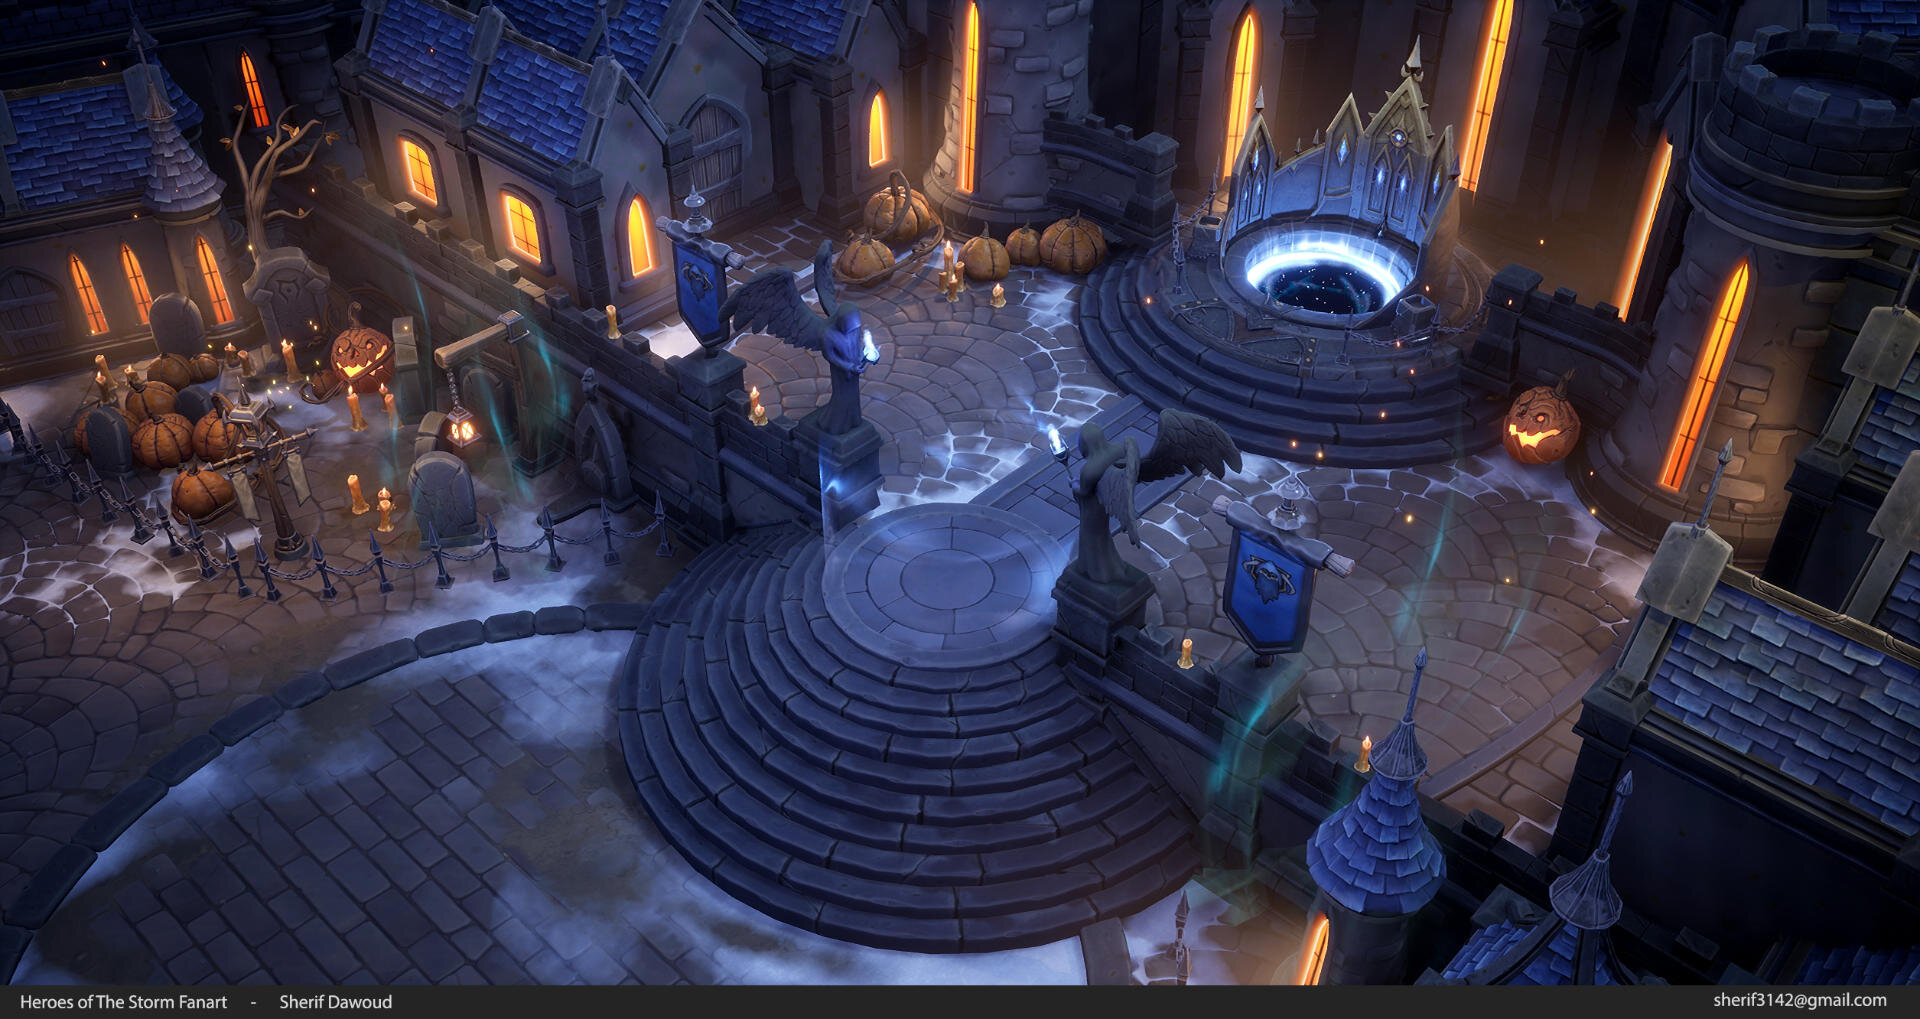
The last personal project I worked on was a fan art of the Towers of Doom map from Heroes of the Storm, I wanted to do something that’s a bit outside my comfort zone and this scene seemed like a suitable choice. I really like the art-style of this game and thought it’d be a good exercise to try making something similar.
Before blocking out the scene I made sure to collect and study as many reference images from the game as I could to aid me later with the scene composition. After I had collected the reference images I started to break them down to determine the overall scene layout, what assets needed to be made, mood and lighting of the scene and the main points of interest that I want to present.

Composition and Lighting
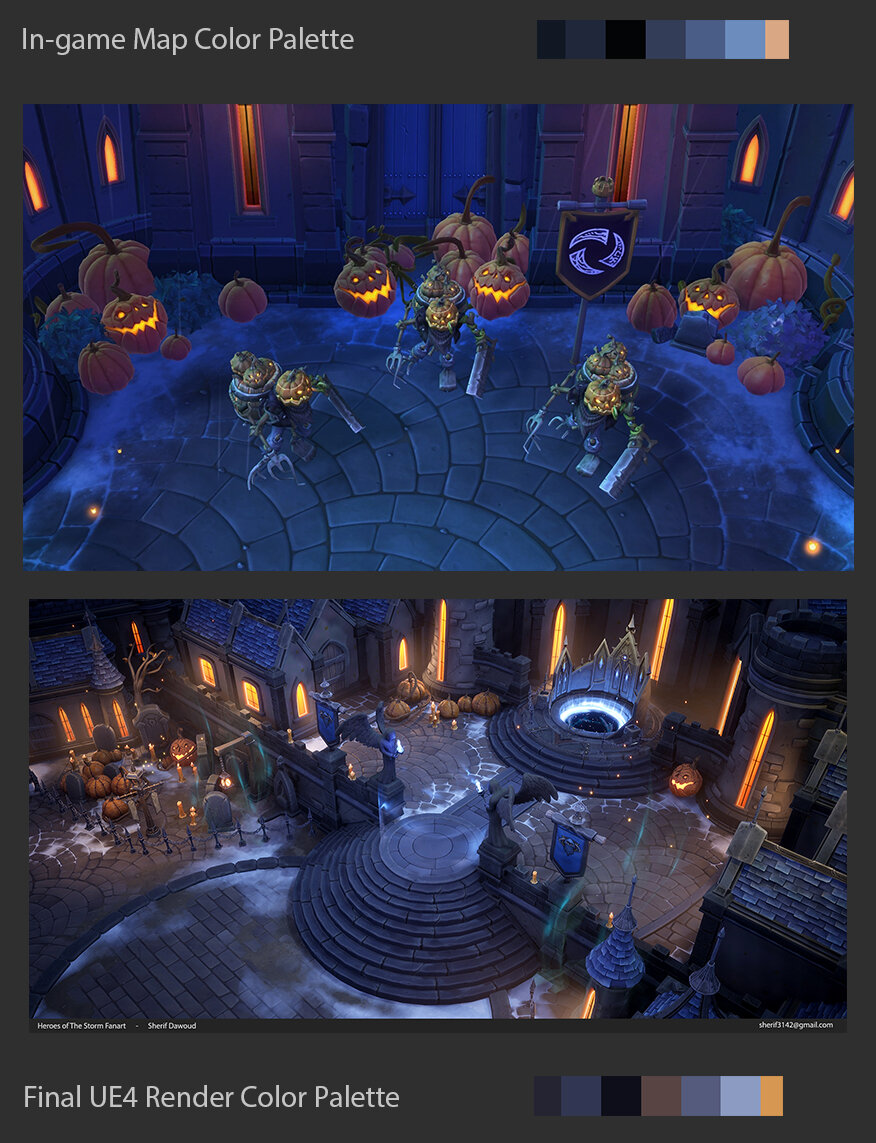
The first thing that stands out in the reference is the saturated blue tint on everything. This is balanced by the warm reddish lighting, I used a bluish skylight as the main light source and used warmer colours as secondary lights to balance the main colours in the scene, this balance was intentionally broken in some areas to make them stand out more and draw attention towards them.

Laying out the scene in UE4 was fairly straightforward I just followed the reference as much as I could to establish the basic composition of the scene, I didn’t worry too much about lighting at first since most of the lights in the scene were point/spot lights used to highlight certain areas. Initially, I placed a skylight with a bluish tint to it to establish that bluish ambient light present in the reference. When placing the cameras in UE4 I used the composition grid overlay, that helped me find the camera’s locations and FOV that would complement the layout of the scene.

For the lighting I’ve used a skylight from the captured scene without a HDR map. Then a directional light source was added to create directional shadows just like the reference. The directional light had a neutral temperature and most of the colours in the scene were driven by the skylight and the spot lights scattered throughout the map. Spot lights were used to paint colour values into the scene and add shadows/highlights where needed. All lights in this scene were set to dynamic so the performance wasn’t great but for a portfolio scene that wasn’t much of a problem.
Materials

Ground Materials
After setting up the camera angle and position and establishing the mood with lighting I started working on the floor materials as they occupied the most screen space. The ground consists of five different materials
Two variants of floor tiles – Snow – Dirt – Grass
I made all of these in Substance Designer but I decided against using the grass material in the end. The floor bricks were generated in Substance using a hand-drawn mask as input, a single graph was used for all the brick-like surfaces I needed to make and I just changed the input mask and some of the parameters to get a slightly different look.
Textures in Heroes of the Storm have very little surface detail. They mainly consist of chunky primary forms with soft bevelled edges to maintain readability from a long distance. Hand-sculpted cracks and negative shapes help give the textures a more interesting look without adding much noise and detail to the surfaces. Replicating this look using Substance alone was quite challenging, using the Slope Blur node to push the pixels outwards ”towards darker pixels” helped me get bevelled and smooth edged.

The colour maps were very simple to make. The Flood Fill node was used to create subtle colour variation between bricks and the Curvature node was used to add highlights to the edges with soft falloff. The AO node was used to darken the crevices, combining the normal map with the Colour to Mask allowed me to select certain areas from the texture from the direction they’re facing and use that mask to add subtle variations in hue and value, procedural noises with a very low range were also used for subtle surface detailing.
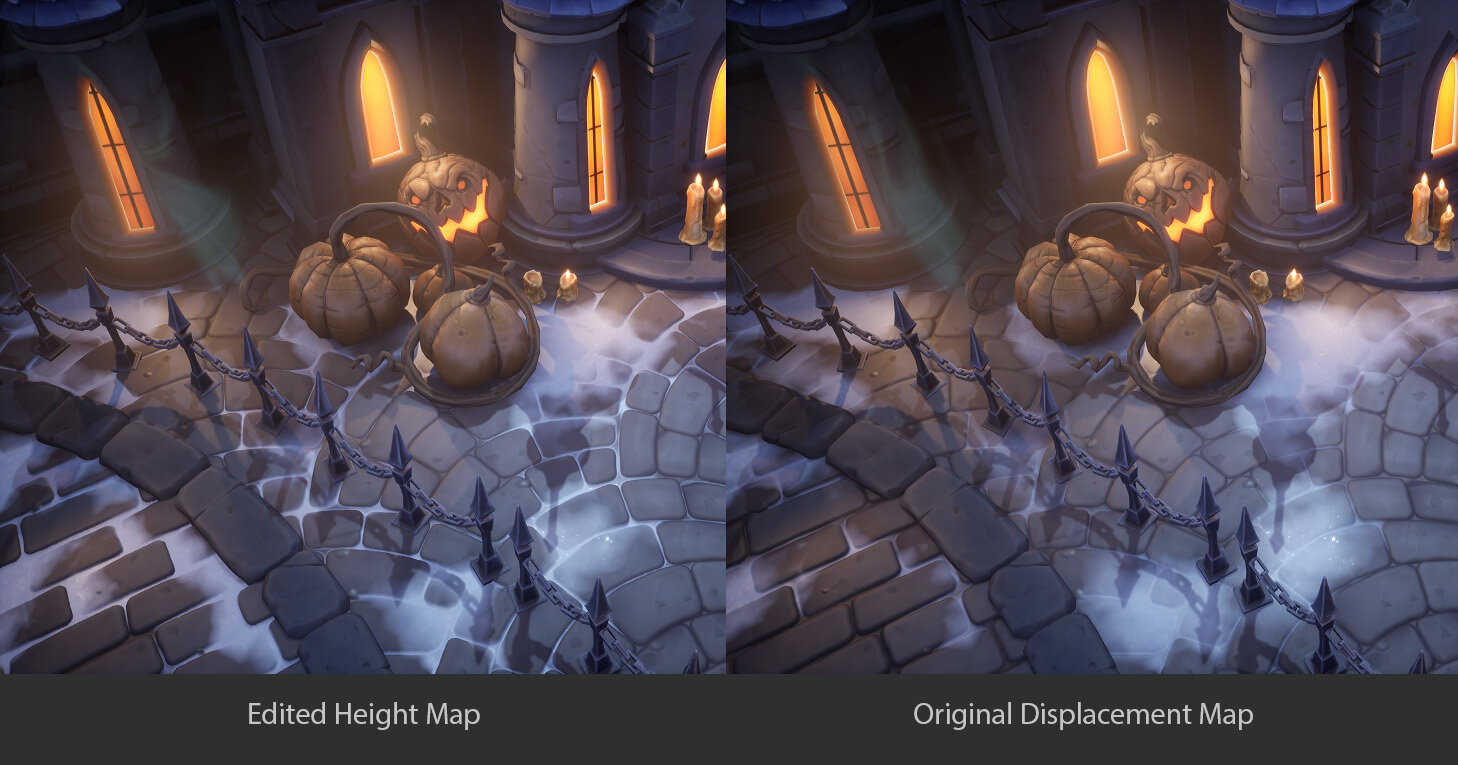
The ground material in UE4 consists of four materials fed to a few Make Material Attributes nodes and vertex colours were used to blend between them. To have the snow cover the crevices around the tiles before the more elevated spots, a Height Lerp node was used to blend based on an input height map, this effect was not needed for the grass and the dirt materials as it would produce issues if the snow was painted over any other material than the tiles since it’s using the tiles height map as a transition mask. To fix this an If node was used to check whether the material below the snow is the floor tiles or not.

The tiles height map used for the blending was different from the one used for displacement. The original height map had a low range that made it difficult to get a defined transition to the snow. Here’s a comparison below between the two.
Modular Kit
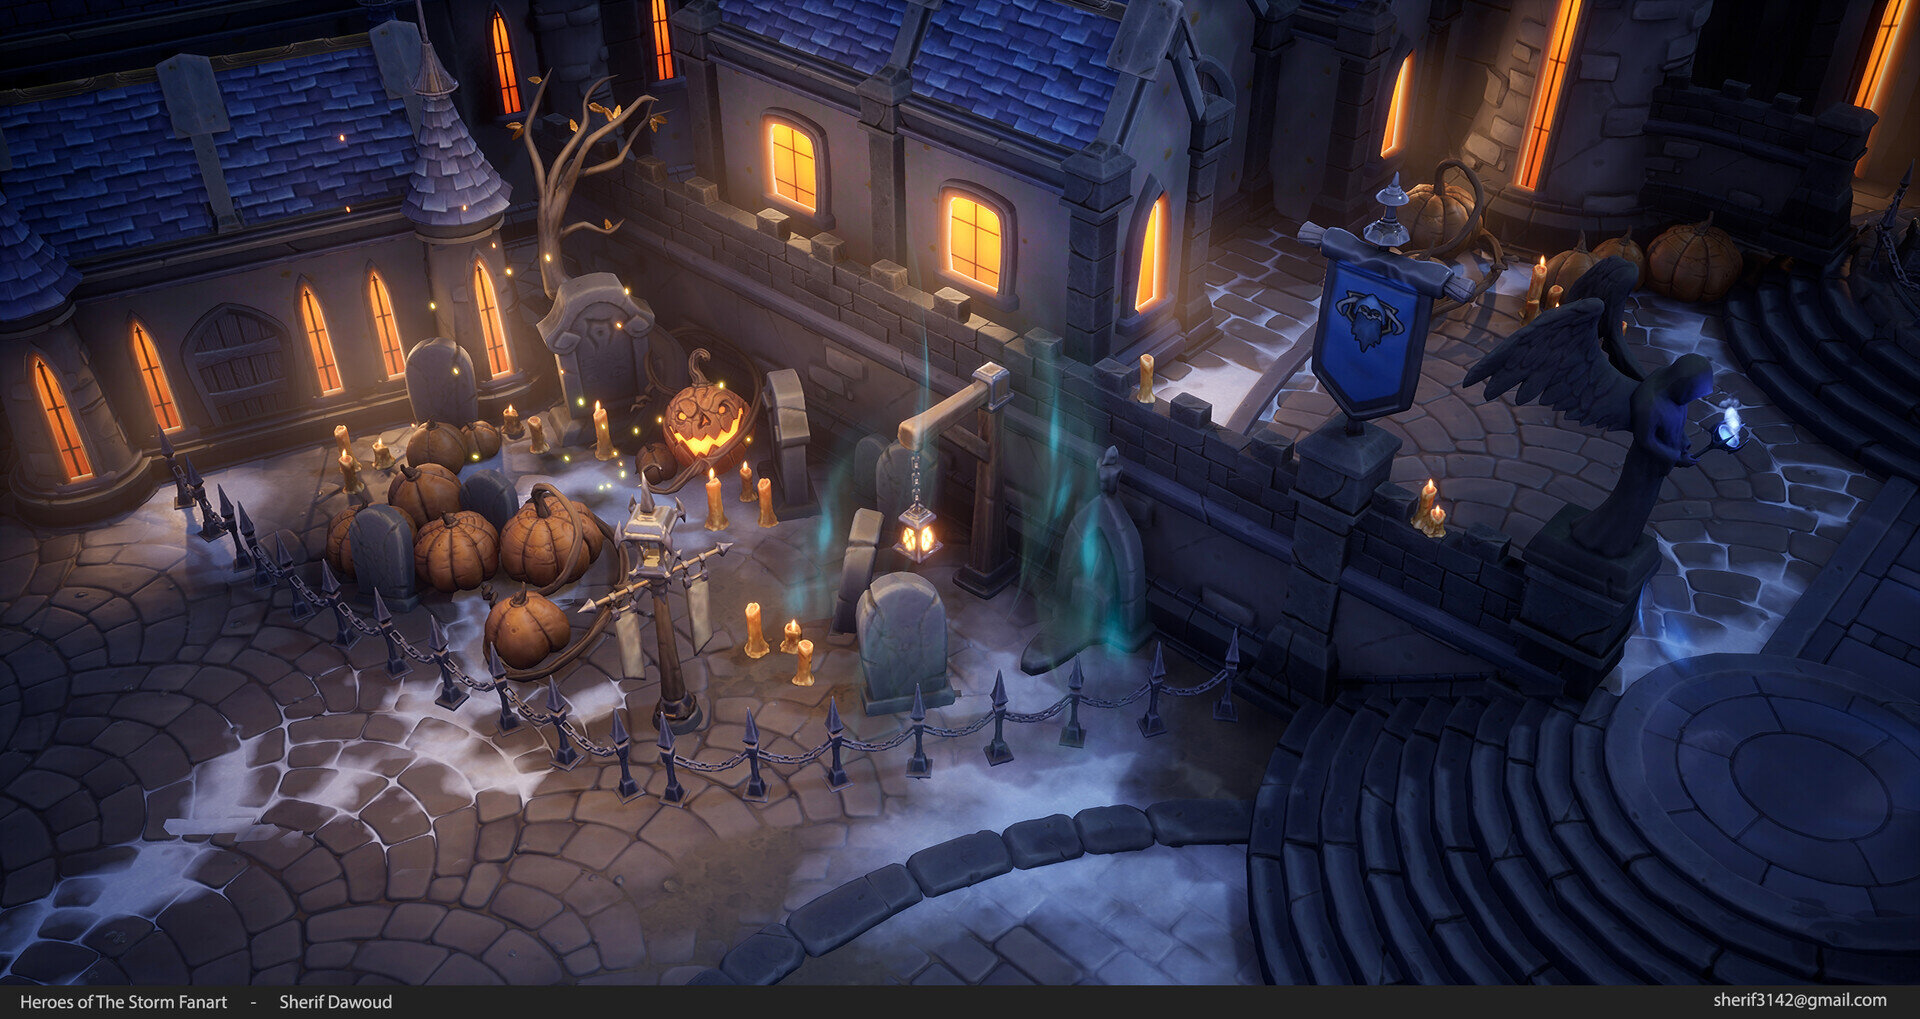
The architecture in the scene covers the most screen space after the ground so I proceeded to work on that next. It was quite clear from the reference that a modular kit was used to create the houses and determining how the kit should be used and what assets were needed before modelling them saves a lot of effort and time down the line, so I started by looking at the in-game level to identify what the modular kit used consisted of.

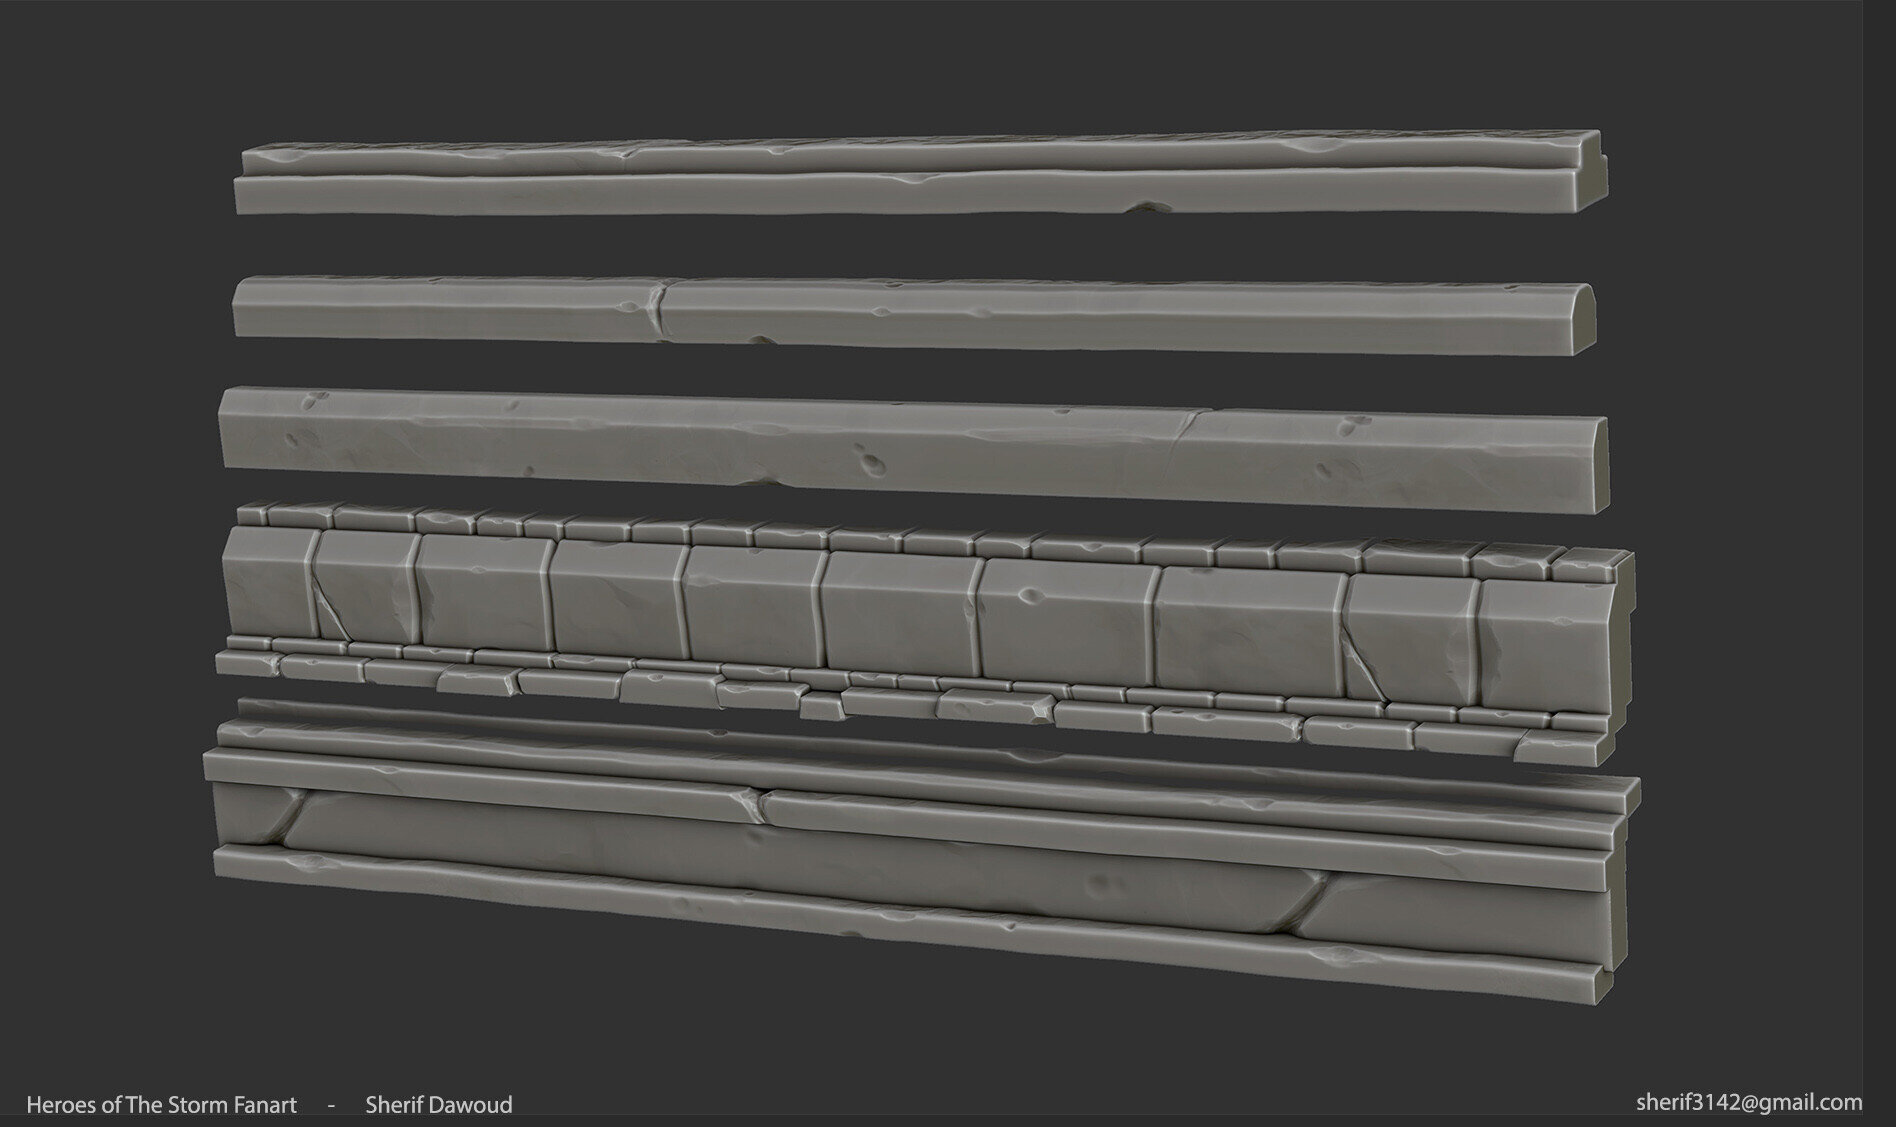
There are about 4-5 different trims used in the reference. A quick block-out of them was made in Maya and exported to ZBrush for sculpting. In ZBrush, wrap mode with a value of 1 was used to maintain tiling of the trims while sculpting. The low-poly model was made in Maya with tileability in mind. I made sure the edges snapped together with no seams when placed next to each other and that the vertices on the UV’s were snapped to the same vertical position to avoid adding seams to the textures. These trims where textured procedurally in Substance Painter, I avoided using triplanar mapping for the masks to maintain tileability.

All the houses\buildings in the scene were made from this modular kit.
The final kit consisted of the tiling assets and the few unique pieces shown in the image above. The roof and walls are geometry modelled over a texture authored in Substance Designer to give it some depth without the use of tessellation. The rest of the assets were blocked out in Maya, sculpted in ZBrush and textured in Substance Painter, I’ve made sure to have many vertical edge loops in the trims that needed to be curved to be able to bend them with little stretching.


The houses were assembled from the kit in Maya and exported to UE4. The modular approach allowed me to quickly create multiple structures that could be combined to make all of the architecture for the scene.

Unique Assets And Props

At the block-out stage my main objective was to ensure that the proportions and scale were consistent with the art-style I was aiming for. As with most stylized games, the proportions here were made with exaggerated features and more attention given to larger shapes with minimum surface detail, emphasising readability from a longer distance.
There are multiple sculpts done for this game on Artstation so I referred to them when making all of the assets for this project. While blocking-out the props I’d constantly compare the assets I made with actual assets form the game to make sure I wasn’t drifting too far away from my reference. Here are some of the references I’ve used for the props. The following reference images are from artists Michael vicente – Orb, Ranko Prozo and Nicholas Reid.
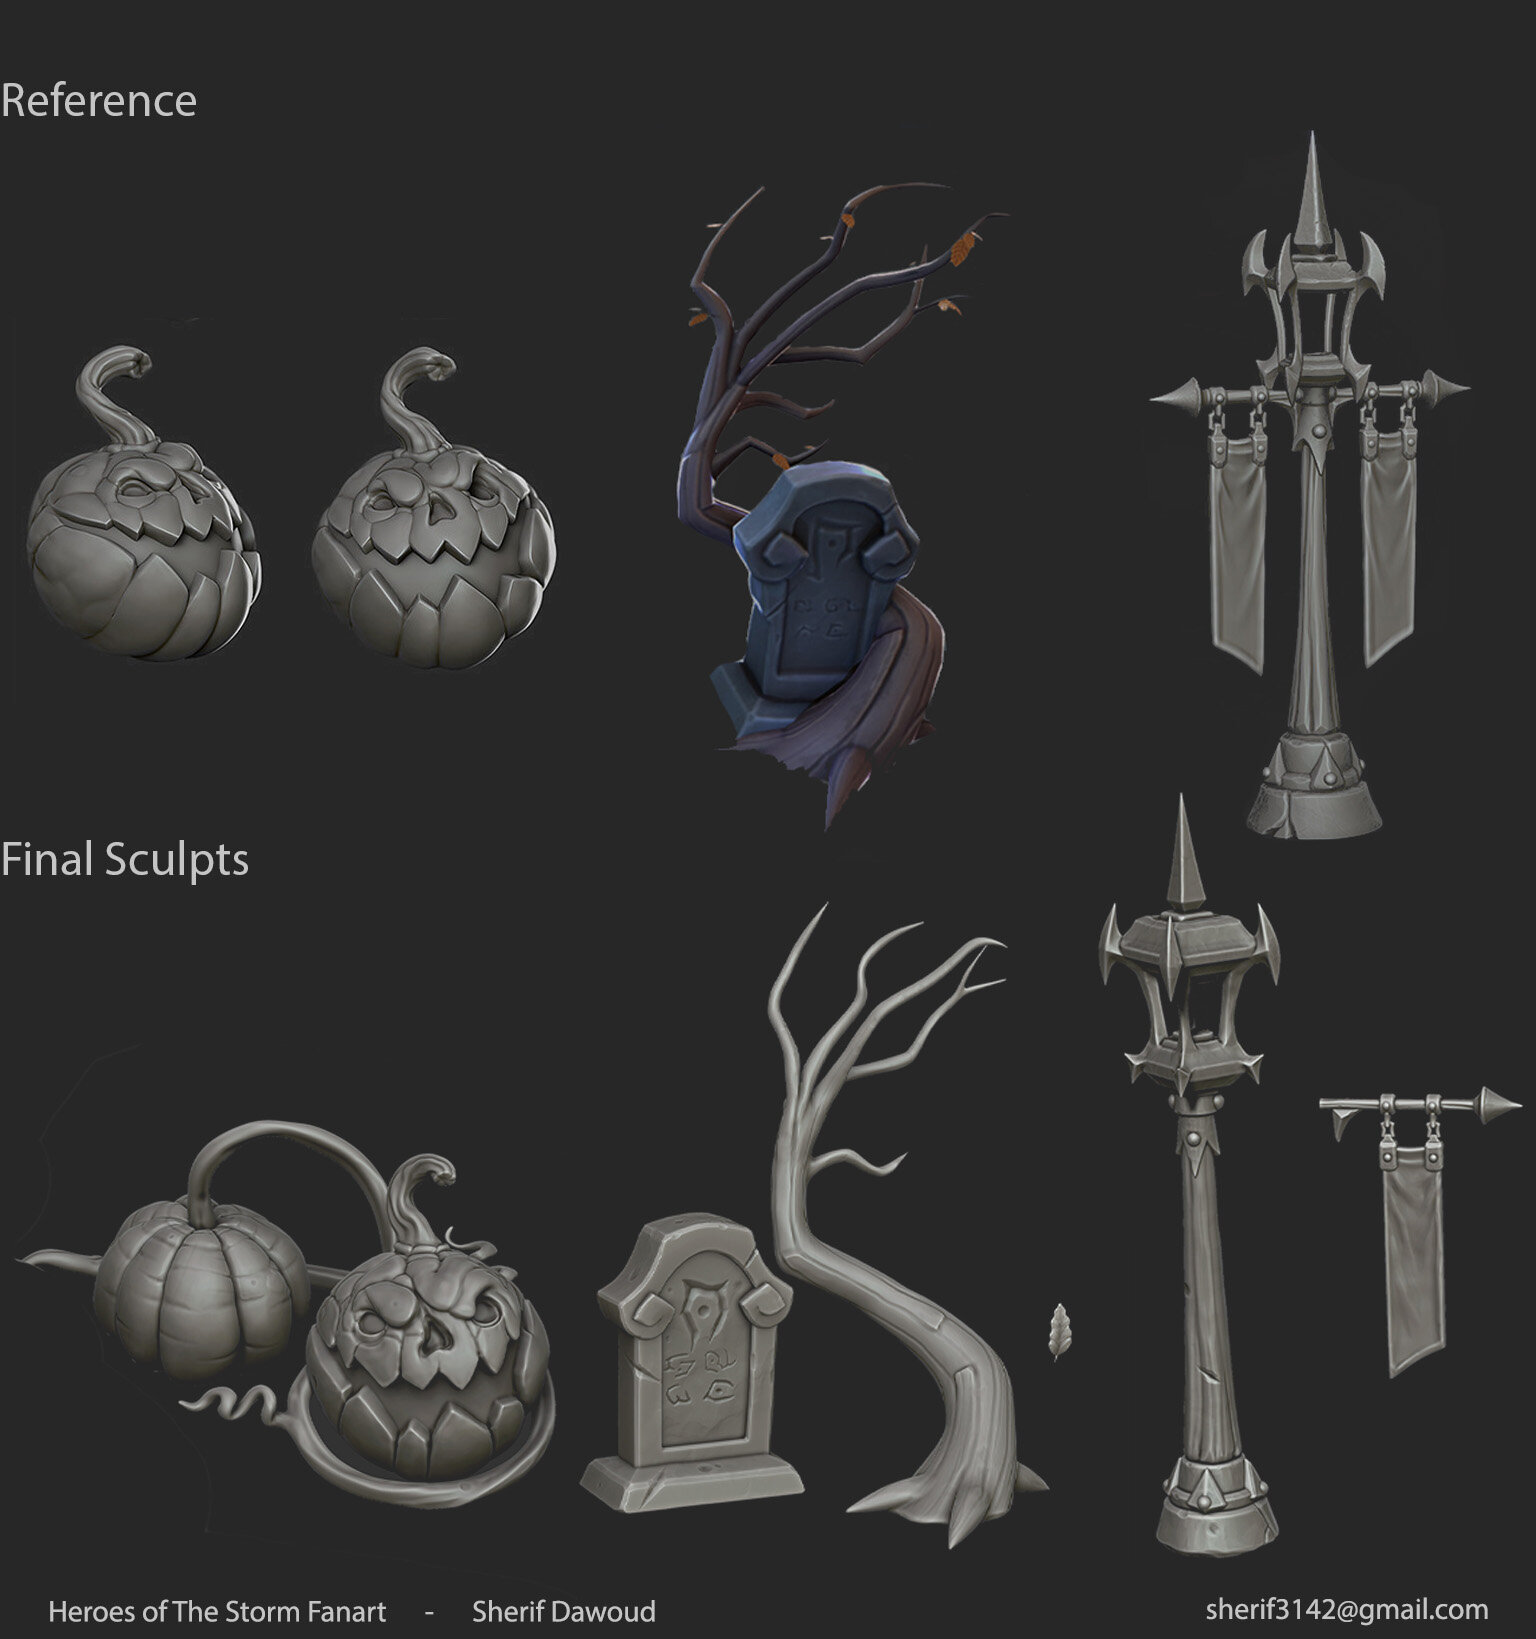
To maintain artistic style and consistency I tried to use the same techniques and processes for all the assets, I’ve also used just a few brushes in ZBrush for all of my sculpting. I’ve used the Orb Brush Pack extensively for this project.
The sculpting process for this project starts with refining the block-out to to get it close to the reference in terms of proportion and scale mainly using the Move,Flatten and Clay Buildup brushes. As soon as I’m satisfied with the block-out I start defining the primary shapes. At this stage I only focus on the large scale shapes to further refine the asset, I also use clay polish to get more defined edges and remove some of the unnecessary detail.
Then I add secondary shapes like the cracks, edge bevels and subtle surface damage. A list of all the brushes used and a breakdown of how they were used is included below.

The final low-poly models were made in ZBrush and Maya and baked/textured in Substance Painter. I made a few custom smart materials for each surface type and used them as a base for my texturing throughout this project. After adding the base smart materials to each mesh I usually edit some of their parameters to adapt the material to their scale since the smart materials were driven mainly by the Curvature and AO Maps.
At this stage the textures were exported to UE4 to make sure they looked good in the lighting setup I was using. Hand-painted details were added later to highlight/darken certain areas for a more interesting look.
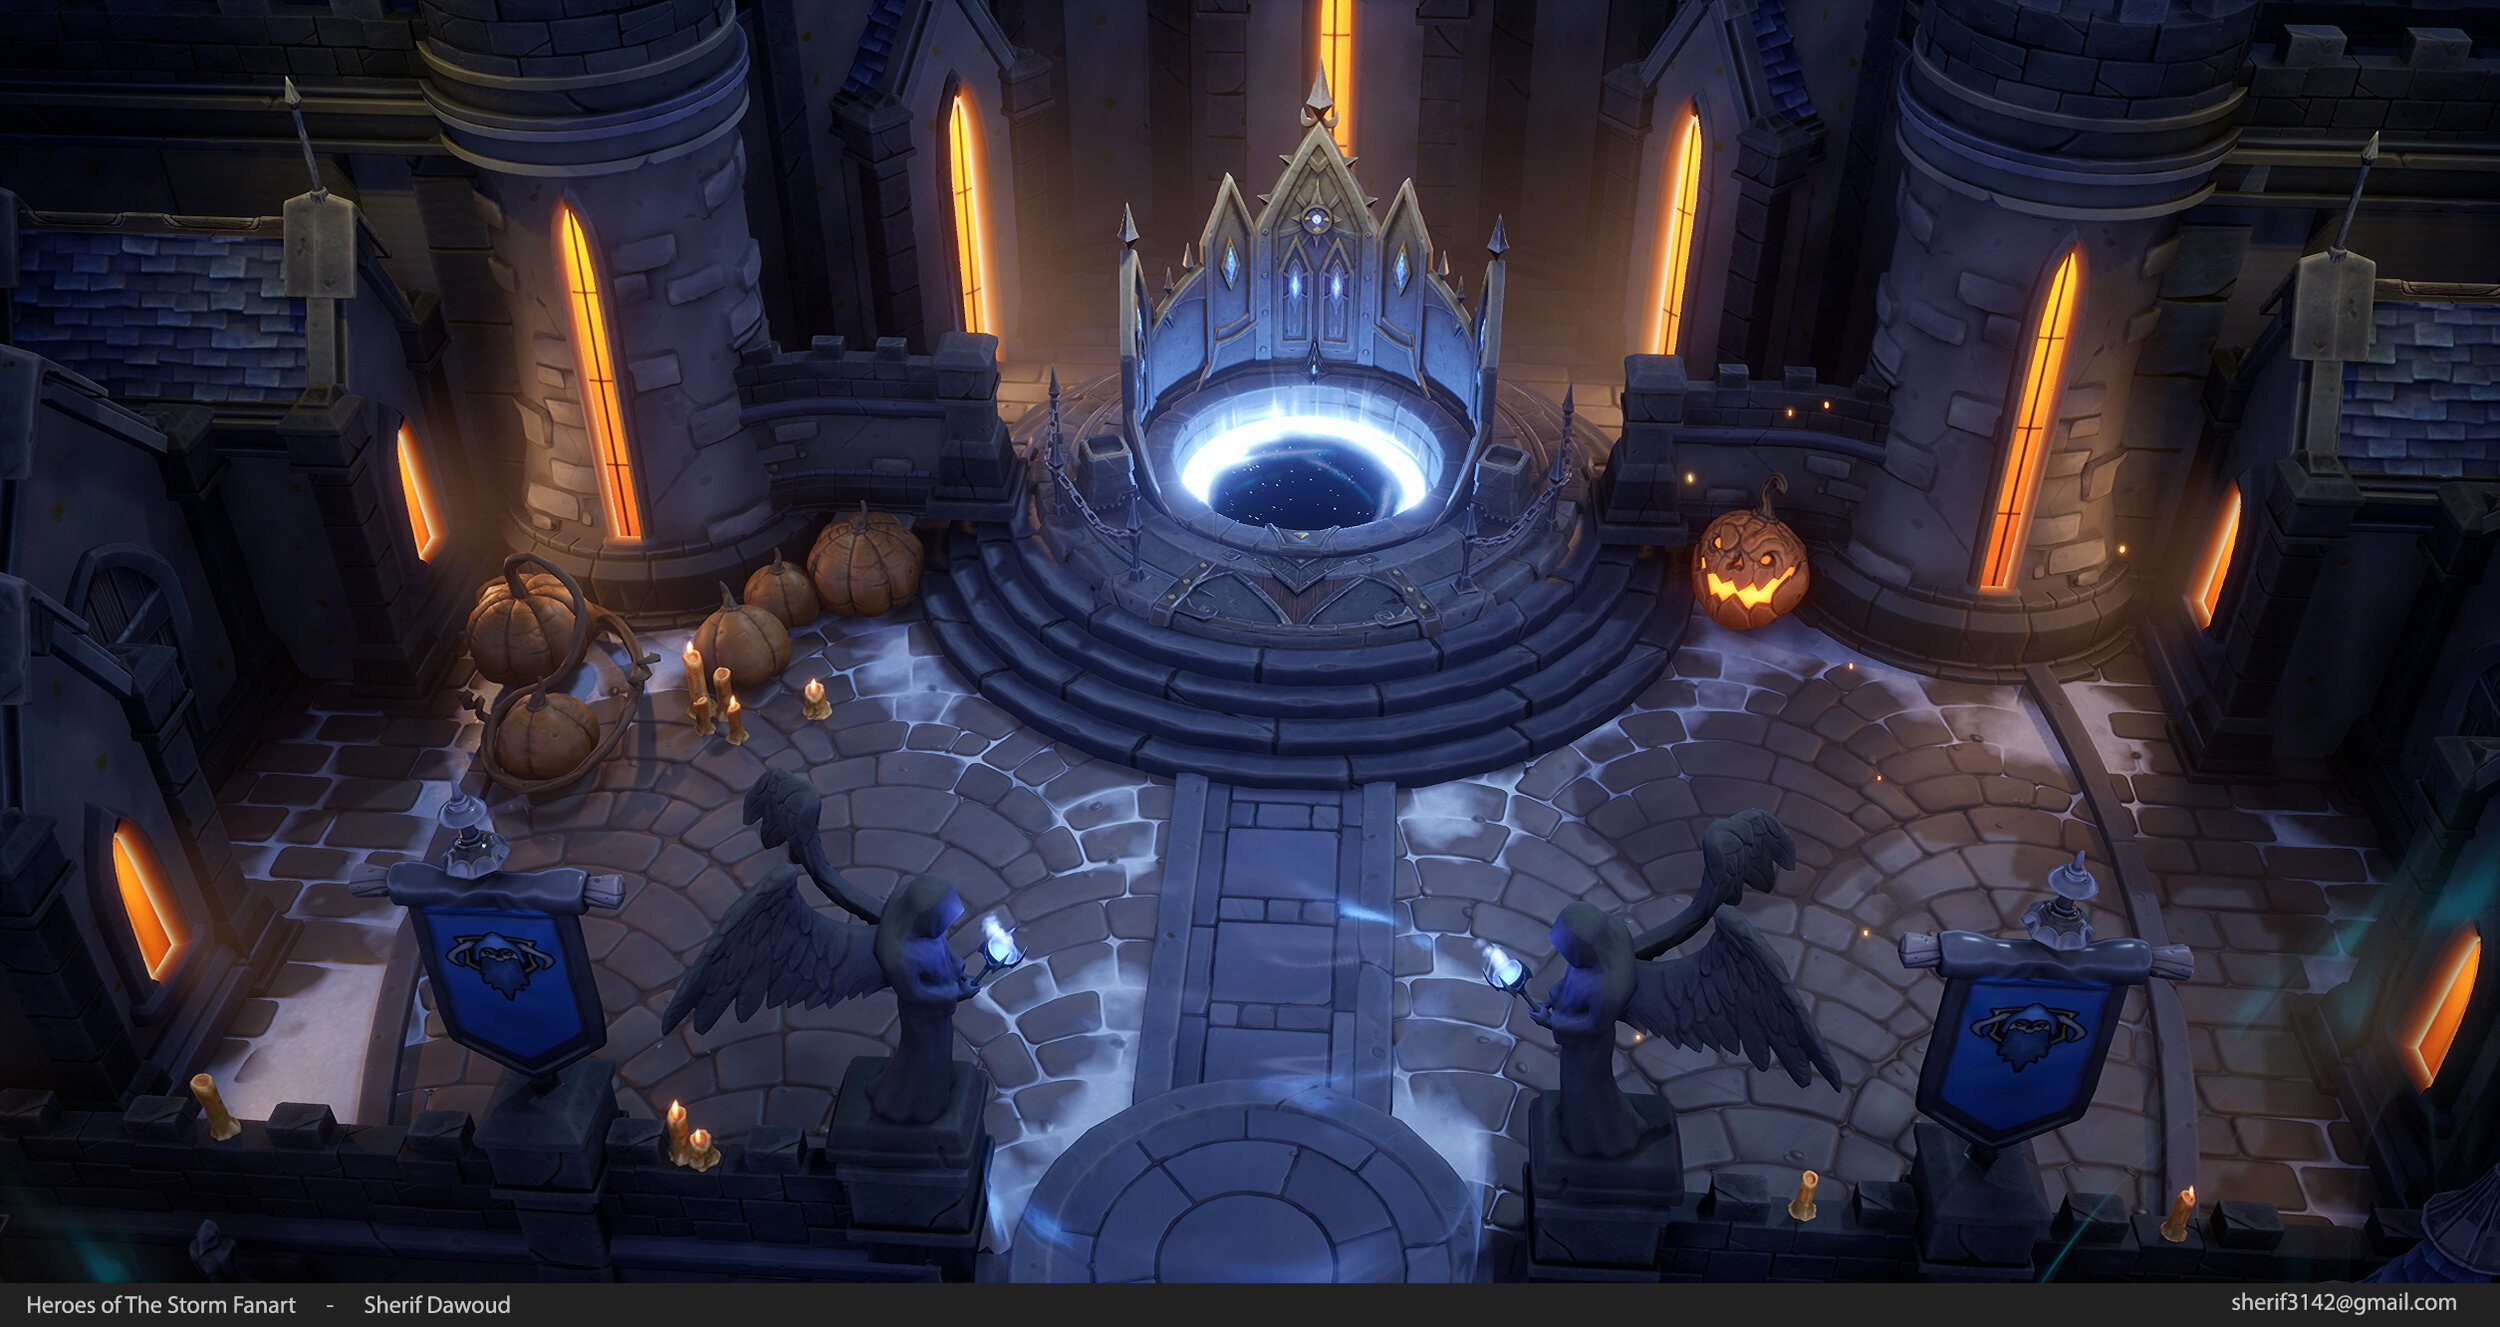
The plan was to make something very similar to the original layout of the level, but I decided to deviate from that a bit and model this Starting Platform by David Harrington instead of the one used in-game because I thought it complemented the rest of the architecture in the scene very well. I also changed the lighting slightly and tried to use colour contrast as well as positioning the camera to guide the viewers eye to the starting platform.
In UE4 I’m using a simple master material setup for the props that allows me to quickly edit things like the brightness, contrast, hue, saturation and roughness values. Using material instances allows me to view the changes made by tweaking these values in real-time. A few variations of this material were made for assets that required emissive maps, opacity maps or SSS.

VFX
Unlike other aspects of this project, VFX is something I don’t have much experience with. I haven’t made any real-time VFX before so I learned a lot about this topic while working on this scene. Some of the useful resources that I learned from that I recommend to people interested in real-time VFX are:
Stylized VFX in RiME: A presentation by 3D/VFX artist Simon Trümpler discusses a few very useful techniques to make stylized VFX that are also very easy to implement in UE4. Simon has a lot of great tutorials,breakdowns and learning resources for anyone interested in game art on his blog here.
Real-Time VFX Forum: This is a great community for anyone interested in VFX for real-time applications. I’ve learned a lot from reading this particular thread discussing the uses of Substance Designer in VFX.
VFX of Diablo: A great presentation by Senior Designer Julian Love from Blizzard, he discusses a few important principles for VFX design in games with a high-level overview of the in-engine implementation of the VFX in Diablo.
Imbuefx: This channel by Senior VFX Artist William Kladis is a really useful resource for learning VFX. He explains his VFX creation process in detail with multiple example using mostly UDK’s cascade, knowledge gained here can be easily implemented in UE4.
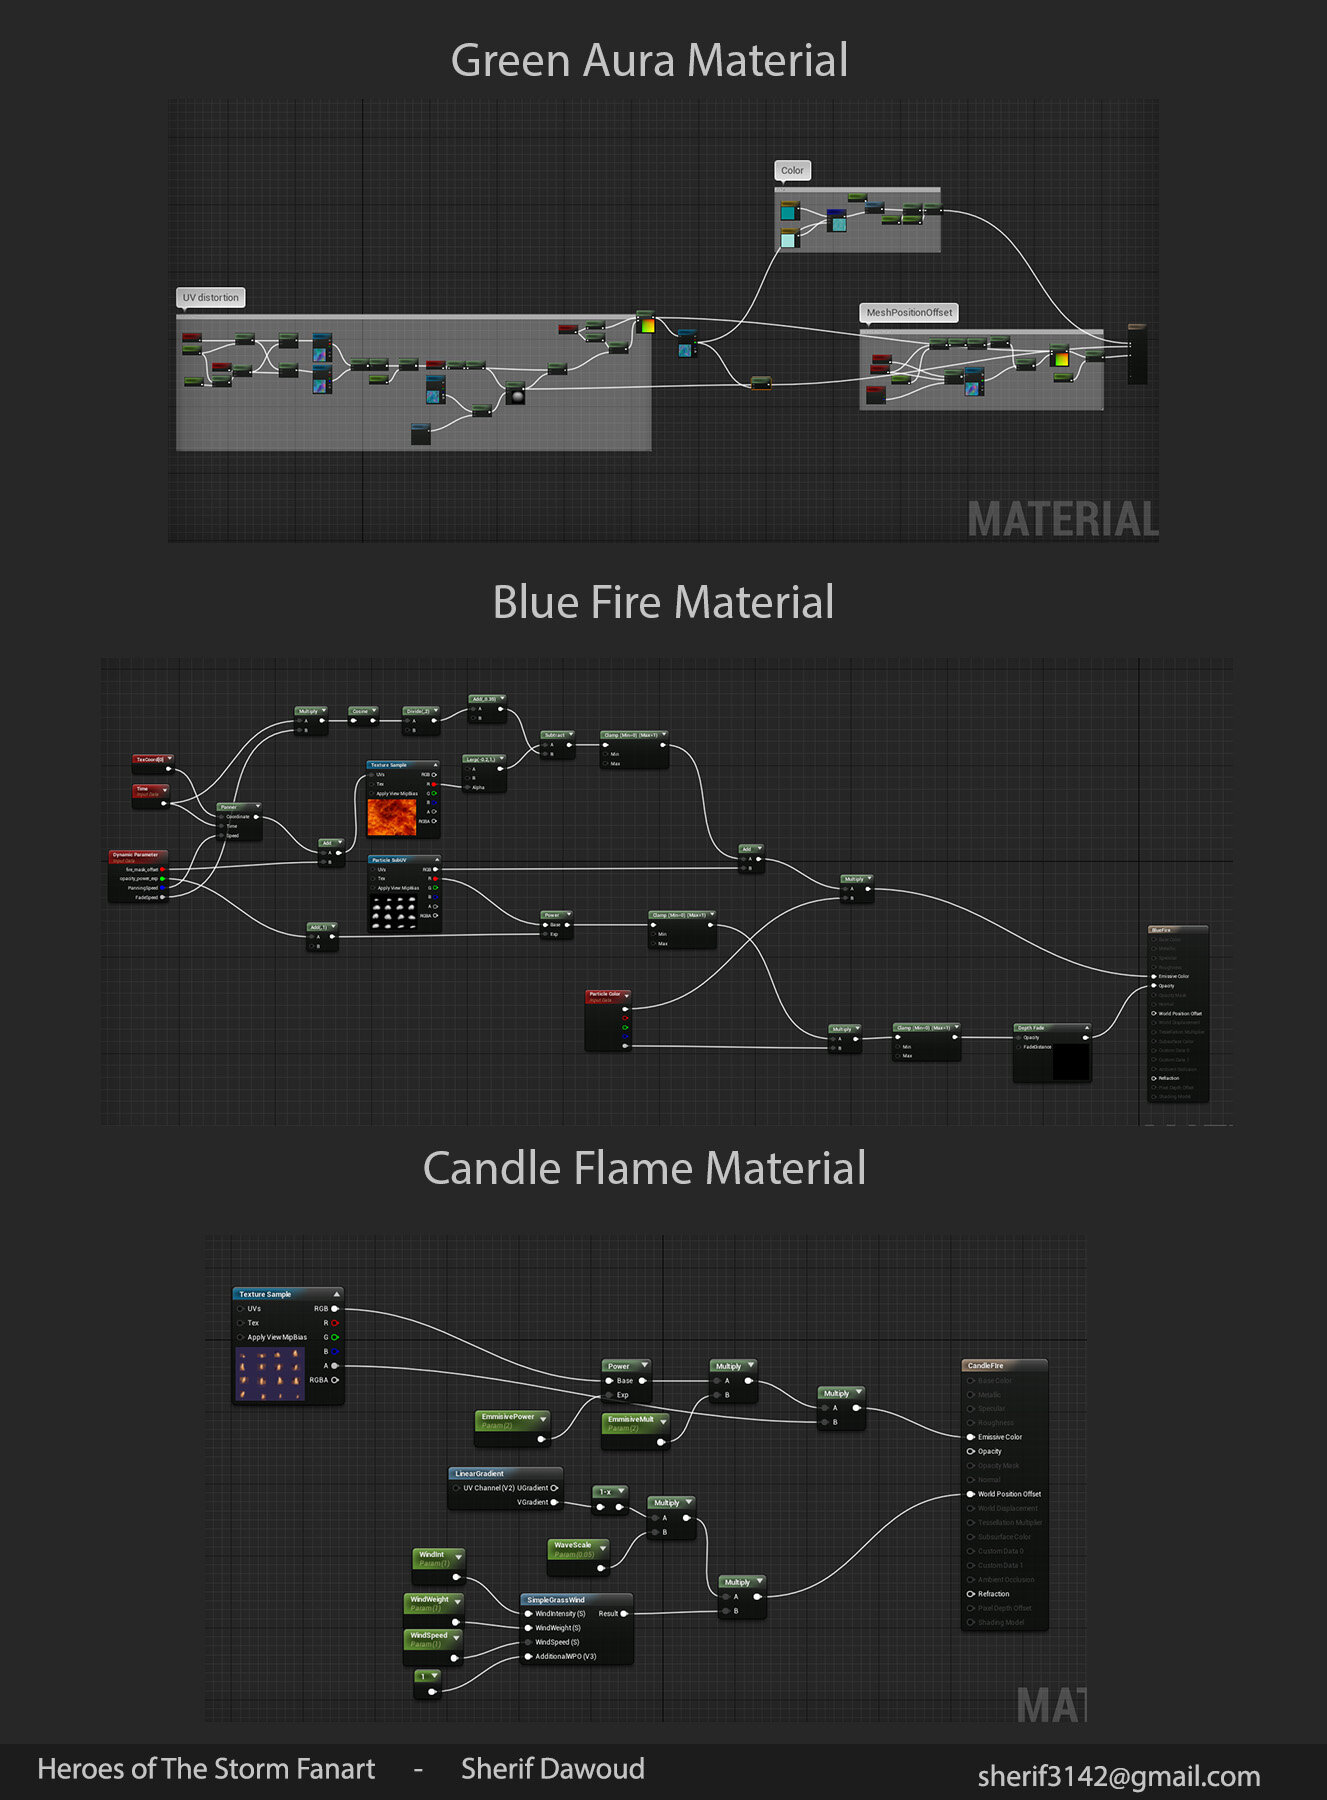
All of the textures used for VFX in this scene were made in Substance Designer. Some of the effects are driven by a flip-book texture that was also generated in Substance. I’ve exposed some parameters of the main graphs and fed multiple instances of them to a tile node to layout the flip-book, to make sure the flip-book loops perfectly without seams I’ve controlled the exported parameters using functions that swing back and forth within a given range of outputs.

The flip-books are used inside UE4’s materials that are used in the cascade editor. Inside cascade the sub UV settings were set to represent the number of horizontal and vertical sub-images. That tells the particle system the total number of images packed in the flip-book. You can use the sub-image index module to flip through them based on the relative time of the particle.
There are multiple ways other than flip-books to make animated effects.
Another approach I’ve used is make custom masks in Substance Designer and use them to drive UV distortion in the material editor. Using this method I made the green aura effect without any particle system. The vertex animation, opacity, colour variations and the aura’s movement were all driven by the masks and UV distortion, this approach was heavily inspired by the VFX of RiME presentation. They used a similar setup for the fire effects.


General Advice and Tips
Creating game environments can be a very long process and it’s easy to lose motivation and interest along the way. That’s why spending some time on planning ahead is crucial. Another way to stay motivated is to establishing multiple mini-goals for the project since it could take a few months to finish an environment and staring at an unfinished piece for that long could make one lose interest in the entire project.
One thing I try to do is to complete assets one by one instead of blocking out all the needed assets then having to sculpt 20 – 30 assets in a row. It’s less boring this way and I get a small boost in motivation when I actually finish something.
Determining what parts of the scene you need to allocate the most time to could save you a lot of time when working on large environments. Ideally you would spend some time establishing the scene’s composition and the camera position for the main shots before any modelling is done. This way you could decide what assets will occupy the most screen space, What are the main points of interest in the scene and what would function as supporting background assets, then prioritise the assets accordingly.
Another thing I can recommend is to consistently try to approach personal projects that are outside you comfort zone. Doesn’t have to be something entirely different from what you’re used to working with but it would be great if you could learn at least one new thing with each project. With this project I’ve learned a lot about real-time VFX and I’ll be using what I’ve learned so far for current and future projects.
Thanks for reading and I hope you found this useful :)