
creating environments - mentorship coalition
Markus explains his experience with The Mentorship Coalition and how his mentor helped him create this environment in only 5 weeks. Learn how he used only 2 trim sheets, vertex blending and decals to efficiently create everything.
Introduction
Hello, my name is Markus, I’m a 28 year old Environment Artist from Austria.
I got into video games through my parents. They owned a NES and the first game I ever played was Super Mario Bros. When I was about 6 years old I played Rayman for the first time and when Ocarina of Time was released in 1998 I had one of the greatest video game experiences ever. I've also always been interested in movies, storytelling and visual effects so movies like Star Wars and Lord of the Rings, as well as the games I mentioned had a huge impact on me.
When I was a teenager I started to learn some 3D. Since in Austria game development isn’t really a huge thing compared to other countries I thought I'd never be able to get into games and decided to choose a different direction. I did an apprenticeship to be an electrician where I worked for four years as a technical drawer for construction sites and after three study programs, I dropped out and got back into 3D and followed my passion.
I committed myself to a games career and after 2 years of self-teaching I finally got a job in a games studio.
Inspiration & Mentor
The scene was created within the Mentor Coalition Program. Before I started the one month mentorship I was asked by my mentor what kind of environment I would like to create. At the time I played Shadow of the Tomb Raider and was heavily inspired by the environments and mood in the game.
Furthermore, I really like the idea as a player to be able to explore ruins, temples and ancient places. So it's no coincidence that I like Zelda, Assassins Creed and Indiana Jones ;)
For reference, I played some levels and took screenshots of moods and level compositions that I wanted to achieve. My mentor Billy asked me to create a moodboard and a sketch/concept for the scene I wanted to create.
Concept created for this project

Moodboard, reference images
The concept that I created is not a beautiful concept art that you would show off but it brought us both on the same page and we knew how the environment had to look. He then told me that the environment was kind of a huge project for just 4 weeks but by planning it the right way it was possible to achieve a finished scene.
The Mentorship Coalition
Before I decided to do this mentorship, I was self-taught for about 1 year and just focused on props. As soon as I thought that the quality of my props were reasonable and I was comfortable with a workflow, I wanted to create an environment. But I didn't plan it right, the scene was too big and I created unique UV layouts and textures for every prop so the scene took way too long and I lost motivation. So I stopped doing that environment and fell back into my comfort zone of just doing props.
A few months later I wanted to get back into creating environments but I knew that I would need some help. I always got some support and critique from communities but to tackle a bigger project I needed something like a one-on-one training. That's why I decided to do this environment mentorship from The Mentor Coalition. Before the mentorship started, my mentor Billy Matjiunis contacted me. He sent me an email with questions such as:
Can you introduce yourself?
What are your expectations?
In which country/time zone do you live?
I was asked to fill out a time sheet and when I would like to do the weekly calls. When I had the first call, the mentorship officially started. In the first call we introduced ourselves and started with planning the scene. We went over the final concept and Billy gave me the first task to create a checklist and a blockout for the main pieces, bring them into the engine and create an initial greybox blockout.
In the next call he did some paintovers on my screenshots and I also sent him my Unreal project. We talked about what kind of steps to do next and how to tackle them. We also did some screen share in discord, that way I was able to follow his instructions better and he could guide me through steps.

Main Parts simple block out
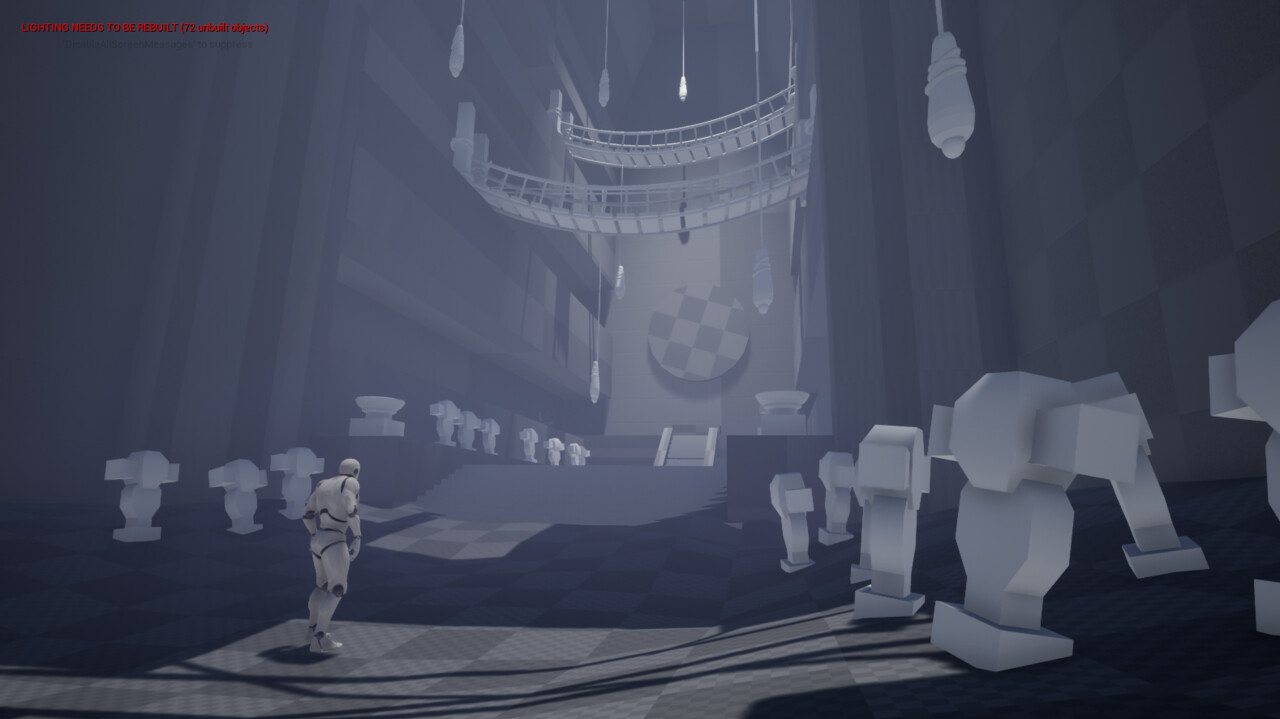
Main Parts in Unreal Engine
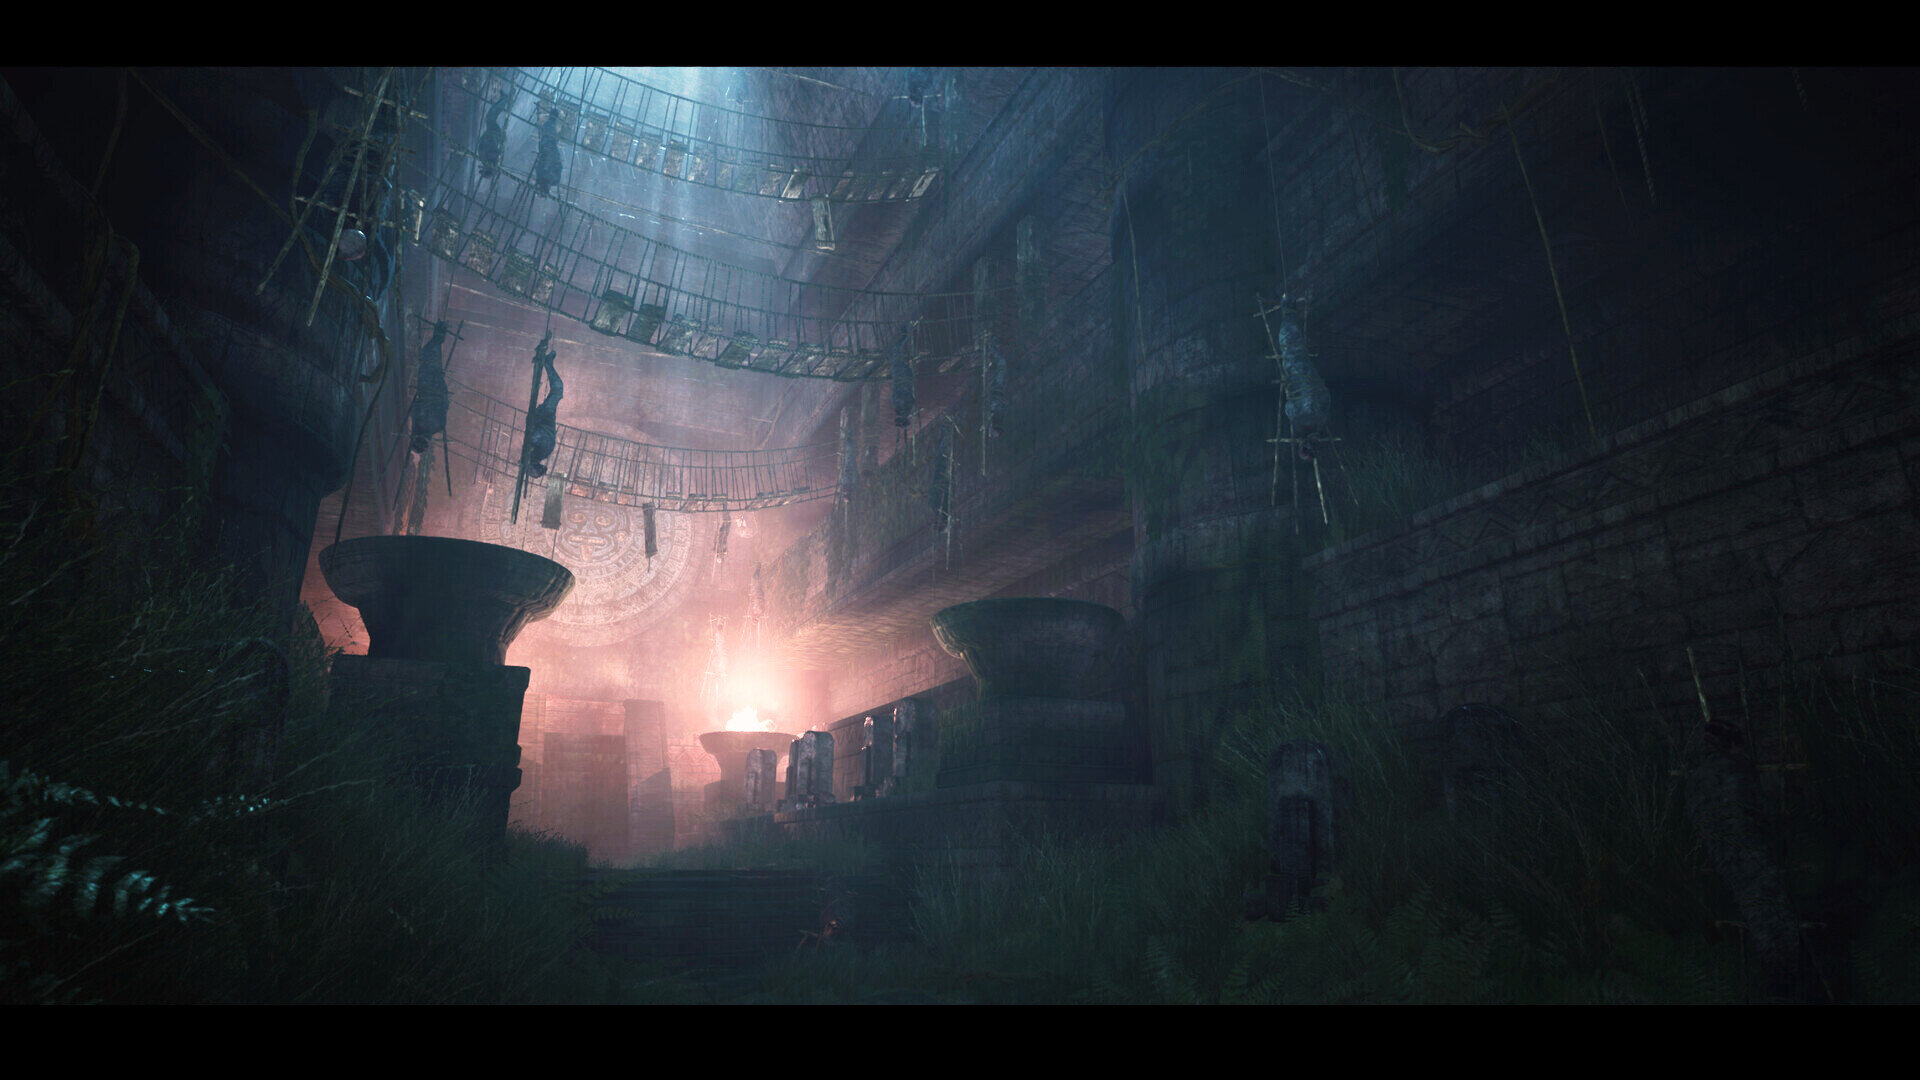
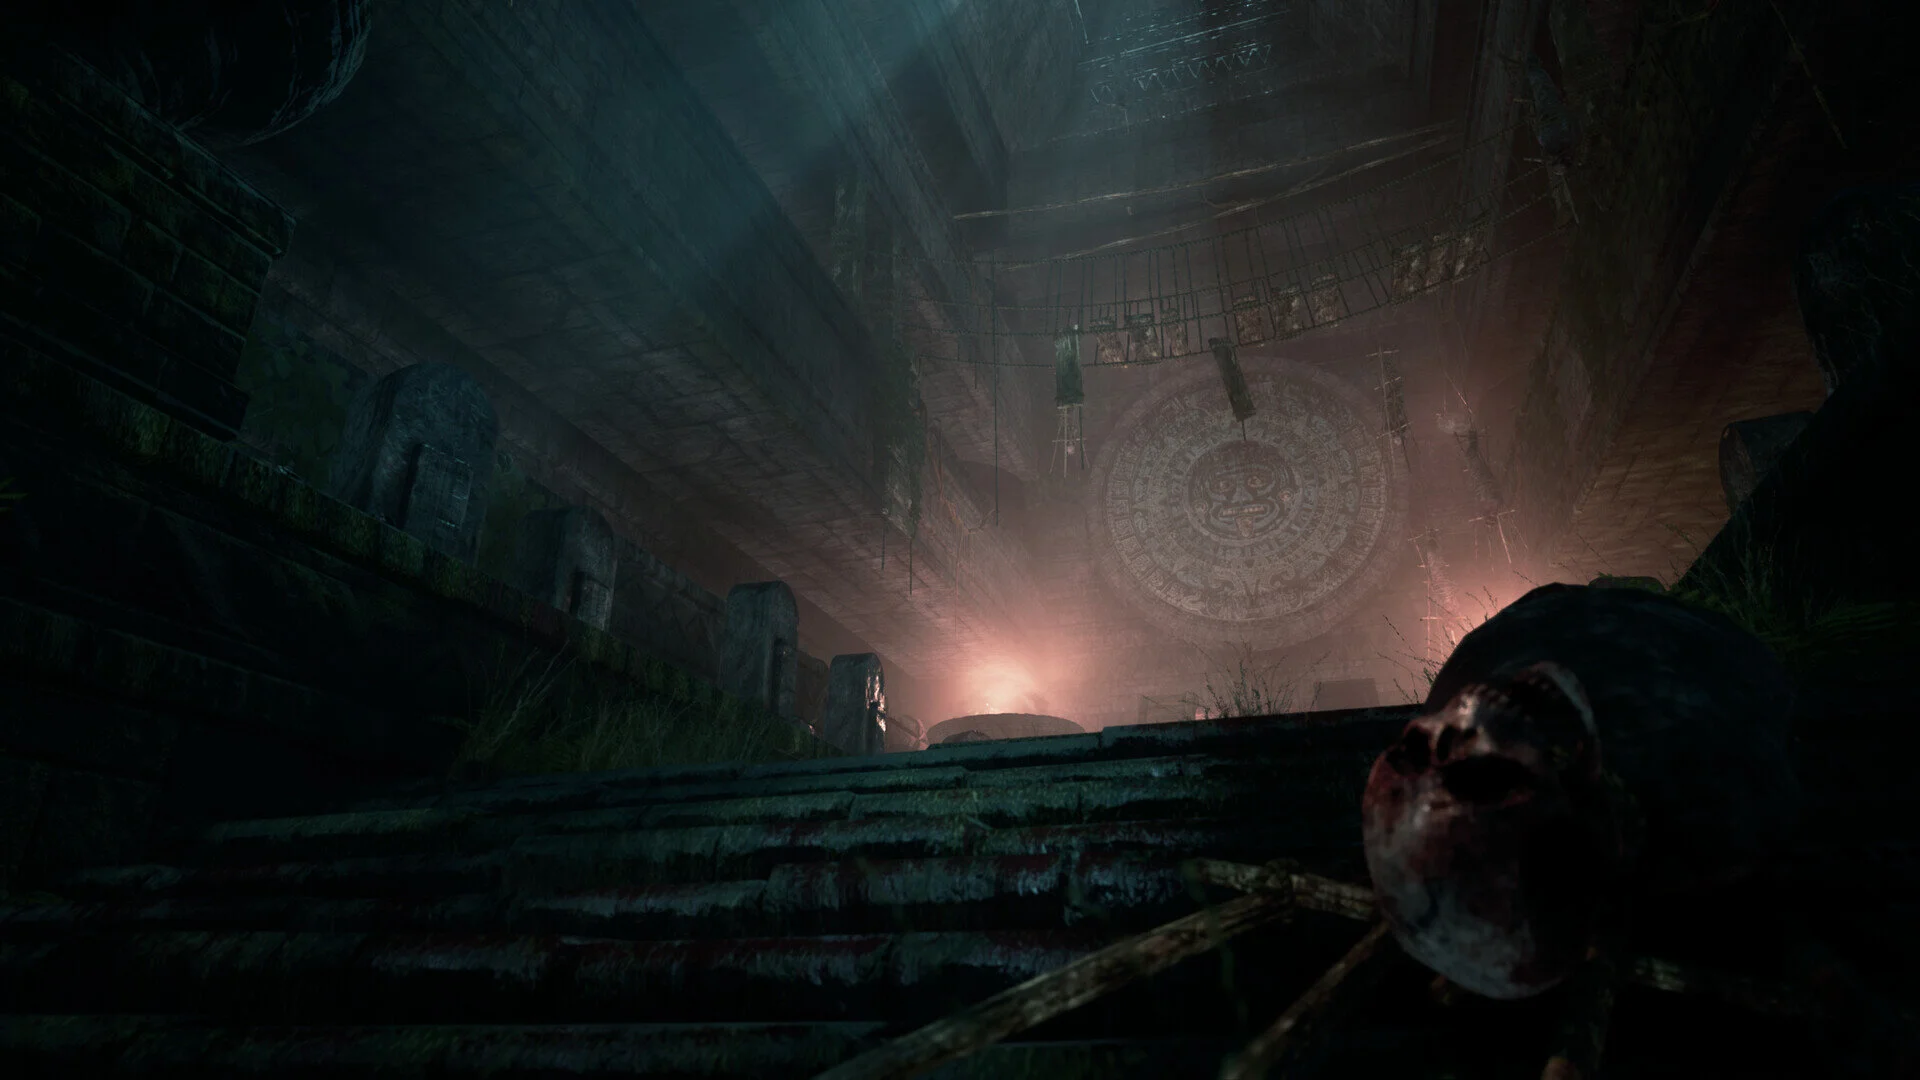
We constantly discussed how I would carry on or what I needed to change. Billy provided me with paintovers and immediate feedback. By planning to create as few textures and meshes as possible and re-using them over and over again I was able to save a ton of time. He showed me techniques on how I would get rid of the tiling on the textures, doing some vertex painting and using decals. Using only the two trims that I created, I was able to cover most of my props and also the huge walls and balconies.

Discussing via Discord Chat and Live Sessions

Covering most of the prop texture work by using just 2 Trim Textures

Trims also have the advantage that you can make changes on the fly by just moving the UV shells around, so I was able to make quick changes whenever needed. The whole scene creation was very iterative. When I had my mesh (with UV's) inside Unreal and added a material (Trim Sheet) to it, I got a feeling of how it looked when I started the level and walked around. If there was anything that I didn’t like the feel of, I just did a few tweaks on my UV Shells inside Maya, exported the mesh and imported it again in Unreal.
Baking Workflow in Zbrush
I had some issues with exporting the High Poly from ZBrush. Every time I wanted to export the mesh for baking ZBrush crashed, maybe the file or some subtools were damaged. But I found a workaround… I saw that you can add a Normal Map Material to your mesh and because this mesh was actually already more of a UV layout (already a texture) than a model I could skip the part of using a plane as my Low Poly Model.
I added a Normal Map Material to the Mesh and exported out a render from ZBrush (no shadows, orthogonal view). In Substance Painter I baked a Curvature, World Space Normals, Position and an AO map which I used for texturing with generators inside Painter based on the Normal Map from ZBrush. I used the sculpt from ZBrush just as a base. I also added a stone/rock material to it, painted a little moss inside the cracks and gave the bricks some subtle colour variation. After texturing I exported out my Albedo, Roughness, AO and Normal. That was Trim sheet No. 1, for the 2nd trim I used a different workflow.
I created the second trim sheet with a focus on the bridge asset I modelled so I put wood and ropes on that one. I wanted to use the latest Substance software release, Alchemist. First I created the albedo information inside Photoshop. I looked up photos on the internet and textures.com and found some rotten wood and bridge pictures that I used for this material. Inside Alchemist I played around with dirt generators and made the photo tileable. Alchemist gave me the Roughness, AO and Normal map to complete my texture set on the second trim sheet.
When I bake my maps I usually use Marmoset Toolbag, sometimes Substance Painter. But I wanted to try different things on this project and use different workflows that I normally don’t use. I created two trim sheets on this project and both had their own workflow.
For other things like the mummy heads or the tombstones I used a common high to low poly workflow with unique UV layout, textured in Substance Painter and then exported the mesh and textures into Unreal.

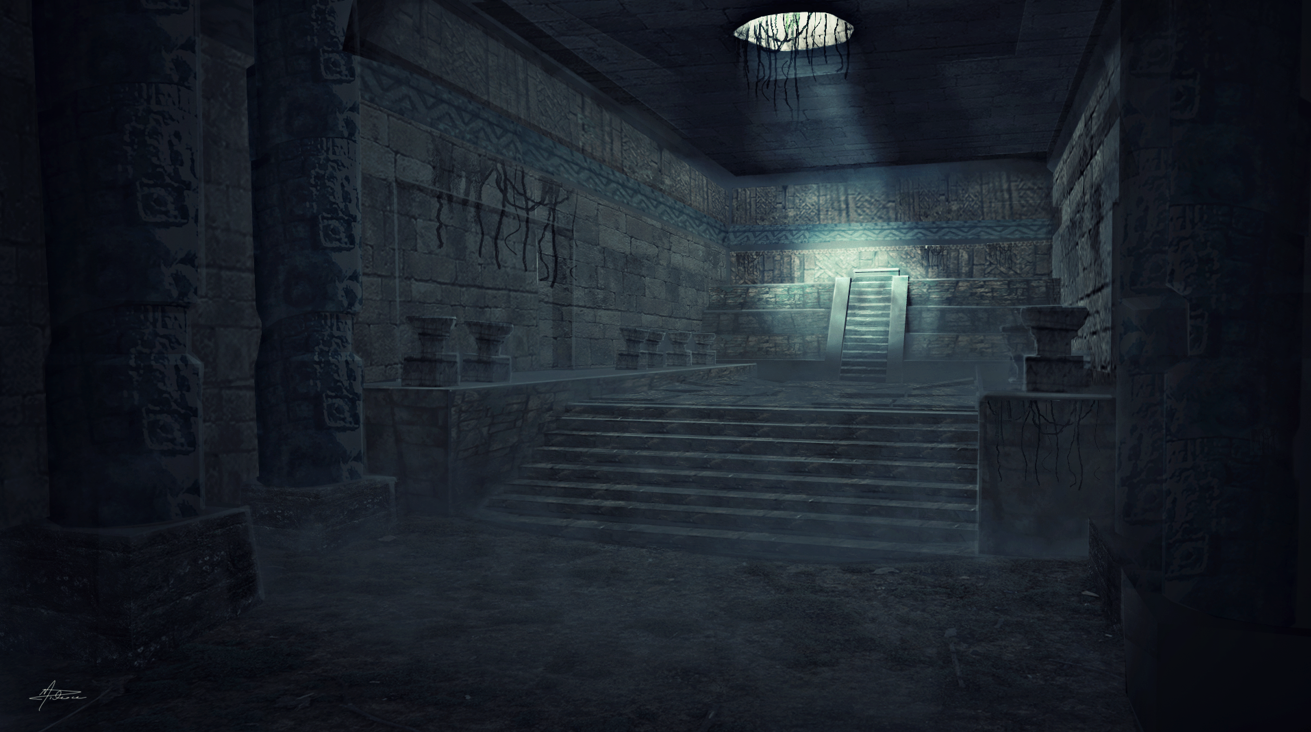
Lighting
Since it was my first environment and I have never done any lightmap baking before, we decided not to jump too deep into this and focus on creating props and the overall environment. So I did not use any static lighting on this scene. I set up the spotlight as my main lightsource (moonlight) and lit up the rest of the scene by using fog and fire (the fire was an Unreal Marketplace Asset).

Settings on Light and Fog

Lighting Breakdown
Challenges
The biggest challenge on the project was the project itself. I have never really done an environment in Unreal before, I didn’t know how to light such a huge scene and finish something in a short time with that size. I was able to overcome this problem with the help of Billy. As I said, he guided me through the process step by step, taught me to plan the scene right by using as few textures and meshes as possible (breaking down the scene into main meshes, trim textures, vertex painting, decals).
For creating the trim sheets I can highly recommend Tim Simpson’s (Polygon Academy) Tutorial on how to create Trim sheets, that really helped me a lot.
For creating the grass and the ivy I used textures from textures.com but for the fern I used my own textures. I hadn’t really done foliage before so I wanted to try that out. I can recommend Karen Stanley’s PDF tutorial from Gumroad where she goes step by step through her foliage creation process.

Creating the fern using Karen Stanley’s Tutorial
Reflecting Back
First thing I've learnt is to not be happy with your first version of your sketch/idea/blockout. When I showed Billy my first version of the concept, he told me to create a second version. If I had to do this project on my own, I would have used the first idea for my scene and it would have never looked as interesting as it does now. Of course you can always tweak things and push it even more further. But what I learned on the mentorship was to be more self-critical and start again if something looks off or boring. Also listening to critique of experienced people will help you a lot to improve your skills. Sometimes you are blinded by the work that you do and you need someone who tells you that you need to do better.
In this mentorship I was taught how to use trim sheets, tiling textures and break the repetition of them by using decals and vertex painting. I’d never used those techniques before since I'd just created props. I basically only did unique UV Layouts, baked the normals and created textures in Substance Painter.
What I've also learned was to create bigger projects with a lot of iterations. Defining small goals such as:
1. Sketch
2. Block out
3. First simple lighting pass and composition
4. Giving the meshes a uniform colour
5. Detailing the meshes
6. Unwrap them and first texture pass
7. Adding details, decals, vertex painting
8. Second texture pass
9. Second lighting pass and post processing
When I created my first environment that I'd messed up before I’d done this mentorship, my workflow was something like this:
1. Creating props (low poly/high poly, texturing)
2. Placing them into a new scene
3. Hopefully the scene looks good
I wasted too much time on creating props that I wasn't even able to see in the final picture because of my camera position. The composition and the lighting were bad, the scene looked boring because it was so big and I had too few props to make it look interesting and it lagged so bad because I threw a lot of 4k textures into the scene without needing them.
That being said, focusing on the next little milestone will keep you on track and you will have a lot more motivation to finalise that piece by seeing how the scene evolves step by step. The mentorship duration was 4 weeks, I finished the scene by myself in about 5 weeks. I created two trim sheets that helped me to cover about 75% of the scene.
Four months after my mentorship I was asked to do an Environment Art test for a company. I went through the same steps that I'd learned on this mentorship. But on that environment I had just two weeks to finalise it (actually it was smaller). After another interview where I explained my workflow and how I created some story elements, I got a job offer.
To sum it up, I've learned so much in this mentorship and I was able to use all this new knowledge on this art test scene.

Final Shot of the Environment Art Test
Feedback from Mentorship
As I said, Billy gave me milestones for every week. My goal was to upload WIP shots to Discord before we'd do the Discord Calls. He provided me with paint overs and examples of how to and how not to approach something. He also showed me his personal works and told me how he would do certain things if this was for a professional project.
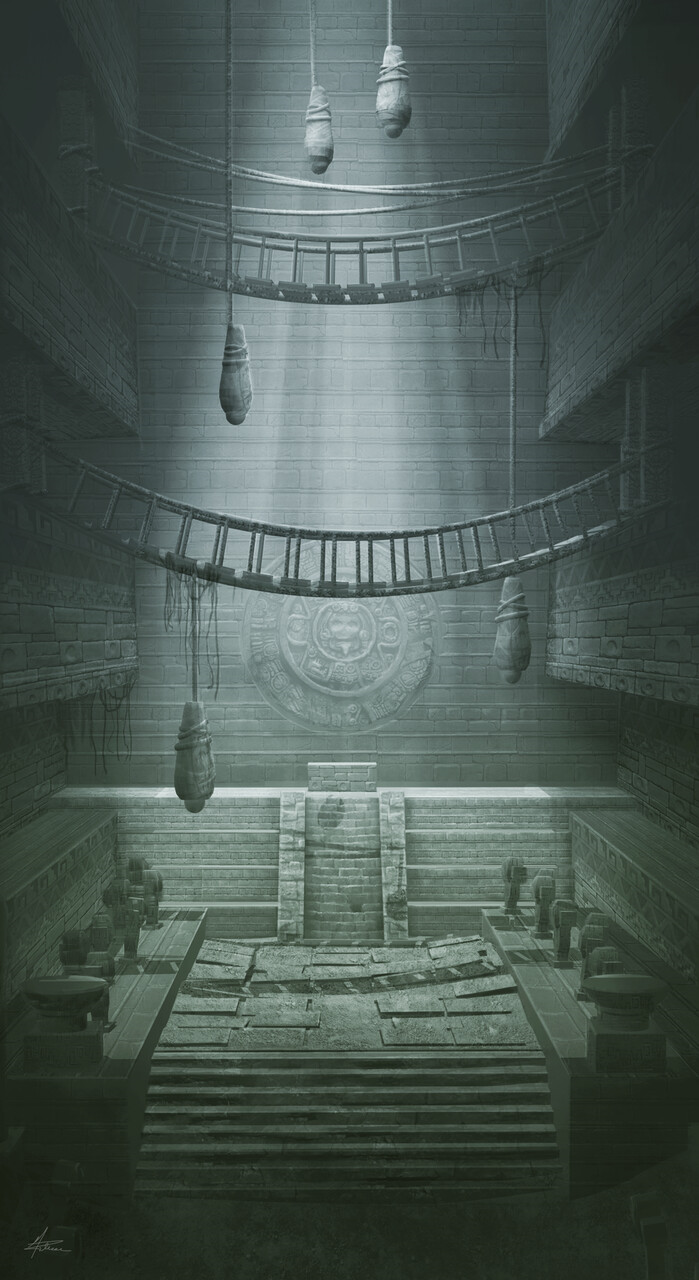
Before I started with the mentorship, Billy asked me what kind of environment I would like to do. As I said, I decided to do go for a kind of Tomb Raider scene. So I created a quick block out, rendered it in Marmoset Toolbag and painted over it in Photoshop. This is how the first iteration on this concept art looked.
First version of the concept art for this project
Then he told me that this was kind of boring and he’d seen a lot of this kind of stuff before. He told me to do a second iteration and add more details and more story to the scene to make it more unique. After some sketches, blockouts and another paintover I came up with my final concept art.
Just by adding a grave to the end of this flat room, I decided to add more height variation to the tomb. I added more story elements through the balconies where people were able stand and watch a sacrifice ceremony. The bridges allowed them to hang up the sacrificed bodies and worship them to their gods.
To sum it up, Billy told me as soon as there was something that didn't work. The critique was honest and helped me to push this project.

Advice & Tips
When you are self-taught and you walk this path into the games industry on your own, you should gather around other people. You need people that are more experienced to get feedback from. That’s why you should join communities. That has really helped me to gain experience very quickly.
I think you sometimes need to get out of your comfort zone to develop your skills and become a better artist. It was my first environment that I'd built and instead of going through my standard prop workflow again and again, I needed to learn Unreal, needed to do some research on lighting and post processing and learn how to set up a basic shader for vertex painting.
I sometimes failed on personal projects for my portfolio or never finished them because I had a lack of inspiration for them. Especially when you work full time and use your rare spare time to work on your stuff. You should not need to motivate yourself for your personal projects, instead your project should be exciting.
Outro
After finishing this scene in May I had some job interviews and those companies showed a lot of interest in this portfolio piece. That being said, The Mentor Coalition month definitely helped me a lot to increase my skills and finally get a job in the industry. I started my first game studio job at 2K Games as a Junior Environment Artist in November and I can’t be more happy about that :)
Thank you to Experience Points for this interview!