
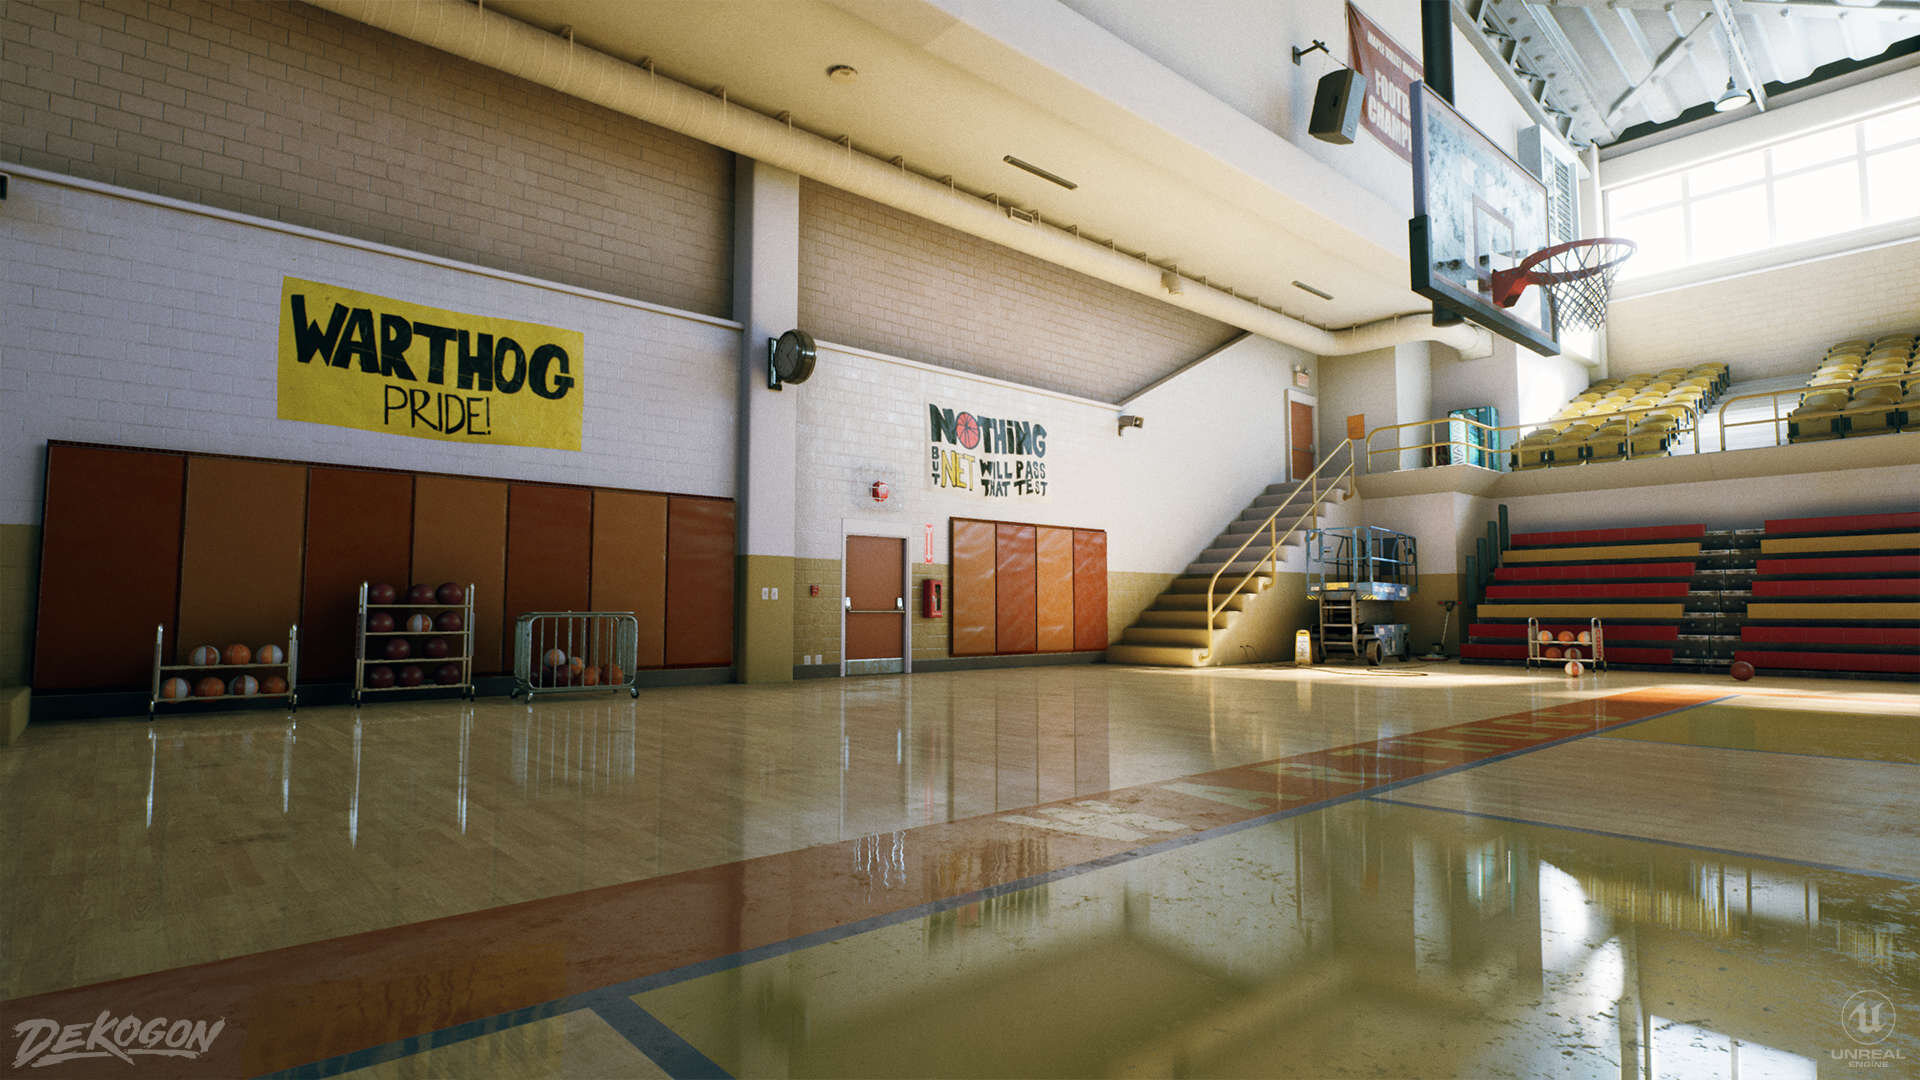
WARTHOGS GYM - REMOTE WORLDWIDE TEAM
Michael Kinsey was Lead Artist for this mind blowing project with Clinton Crumpler as the Art Director. In this high level analysis, Michael walks you through how he and the team he led crafted this scene, with a heavy emphasis on a modular approach from assets to materials. Dekogon always release high quality products, now you can learn how.
Introduction
Hey, my name is Michael Kinsey. I am originally from Zimbabwe and am based in the UK working as a freelance Environment Artist. This environment was made when I was a Lead Environment Artist at Dekogon Studios working with teams of artists from all around the world remotely to create environments and props that meet the needs of the various clients we work with.
This project was a small internal showcase environment created by myself and a team of talented artists from almost all continents on Earth. As well as some trainee artists as this was an internal project where we could give them the time and support needed to learn in a production setting.
Prop and material artists include: Alexander Sheynin, Arthur Guillot, Brian Leleux, Carl Shedd, Duard Mourstert, Felipe Abreu, Jason Guillion, Maxim Egorov, Taylor Brown, Zahin Abeeb, Chris Flynn, Mohaimn Draz, Romain Lemaire, Javier Benitez, Clinton Crumpler, Akshay Kumar and myself.
Clinton Crumpler acted as Art Director, and I handled level design and modelling, planning & managing what assets we needed, art direction, Unreal Engine setup and integration, shader scripting, giving artists feedback, package cleanup and prep, and then packaging the scene for Brian Leleux for lighting and then to Carl Shedd to take over for the final lighting pass making multiple lighting scenarios.
As for how I got into 3D: I personally got into games through my naive pursuit of wanting to create my own 3D animated productions. So in many instances I consider myself a failed animator, since I never made anything significant before curiosity drew down another rabbit hole. I started designing and modelling characters to animate, and learnt rigging to animate them. I then needed environments to animate them in; so I fell in love with environment design and modelling.
Then I needed to render my animations and environments. And at this time, software, hardware and budget limitations meant that each frame would take more than two days to render, so this pushed me down the rabbit hole of learning real time pipelines.
At this time PBR was about to become a standard and Quixel Suite had just come out showing that there are ways to automate specific areas of workflows starting my love for procedural workflows and automation. Then amazingly Unity 5 bought PBR rendering to the free version and UE4 became free which was my window into shader scripting for real time pipelines.
At this time I would have considered myself an okay generalist with no area of specialisation so after some reflection on my journey so far, I realised that environment design was my most enjoyable area of focus and the challenge of making things run in real time naturally took me down the road of learning to be an Environment Artist for games. I paid attention to what was industry standard and what exciting developments were just around the corner, eagerly learning as much as I could.


Dekogon Studios
Many people may know Dekogon for its Kollab asset packs sold on many 3D content stores online. This is an integral part of Dekogon, however for the last almost two years Deko has been ramping up its outsourcing team in the backend and it is now its largest focus at Dekogon. It was during the early stages of this that I got involved in working for Dekogon as a freelancer.
Dekogon still has the Kollab side of things, however outsourcing quickly grew to become the primary focus and things have been going very well. It has grown orders of magnitude since I started at Dekogon. And I have had the privilege to work on some very exciting projects that we can’t wait to show when we are able to.
Being a Lead at Dekogon I imagine is the same as being a lead anywhere, however as it stands everything is remote. I still had to manage the artists for my teams, attend meetings, plan sprints, maintain client relationships, and so on. The only huge difference is that we are all over the world and work remotely. This brings its own challenges; working from home is its own beast and time zones are always tricky to work around (especially with daylight savings).
However the company structure made scaling for projects very efficient. I worked with talented freelance artists all over the world from many backgrounds and could up and down scale how many people we needed for contracts very quickly and deliver fast turnarounds due to this.
This means that the types of projects we worked on varied greatly and we have worked in many areas of the industry, from using real time engines in TV production, to VR training, to stylized mobile, to AAA hyper realistic visuals. Coming from a more generalist background has helped me a lot in this area, as each new project came with new interesting workflows to follow or technical limitations to work around.
So having a background in shader scripting, a decent technical understanding of games pipelines, level design and exposure to many different workflows is a huge must if you wish to lead a project at a studio like Dekogon.
There was always something new to learn and an interesting new challenge around the corner. Having such a large pool of artists and specialisations helped immensely in this regard. And the talent I have had the privilege to work with at Dekogon is a huge honour. It allowed me to gain colleagues from many lifestyles and backgrounds who have become very good friends overtime.

Master Materials in UE4
So for the master materials I set up a few variations:
We wanted to make a diverse but simple shader that allows us to material using some features for the environment shader such as procedural dust and allowing color variation and simple roughness tweaking. I talk more about shader features in the upcoming section on master shaders. Here is a quick breakdown of the simple materials shader we have for environment and prop pieces:

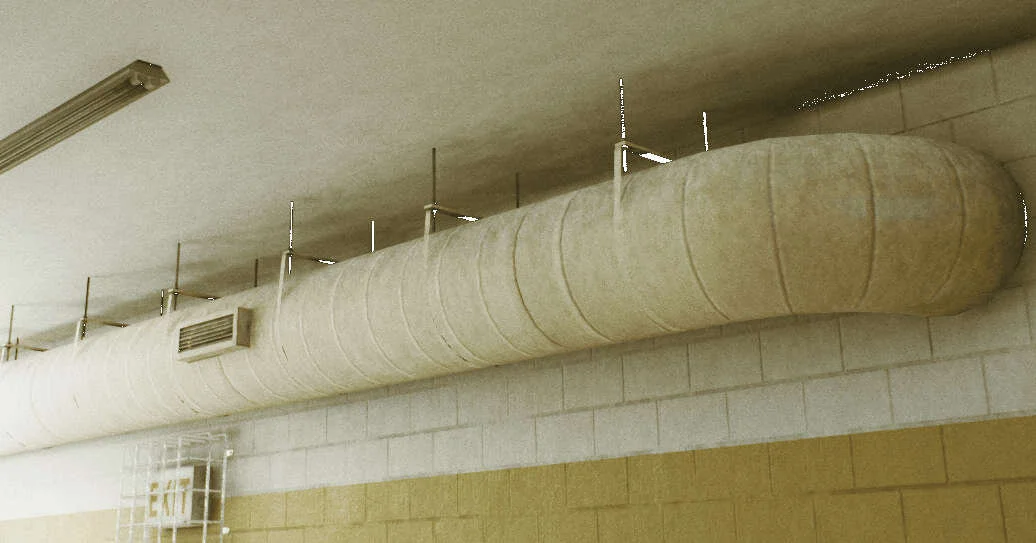
Additional features can be toggled off such as additional roughness and normal control, as well as the ability to have procedural gum appear on the material or not. Additionally I made a simple POM shader (Parallax Occlusion Mapping) for the roof to fake depth and give it some more detail.

Material Parameter Collections
Material Parameter Collections are Unreal’s way of localising shader functions to a single space outside of the shader instance that can then be used either by themselves, or edited through blueprint.
The idea being that if you have a blueprint and you want to access the dirt effects on all material instances in a level you can use a collection to control all of those parameters to affect the dirt levels across a whole level. This way if you have multiple master shaders with different base features but they all have a dirt feature you can have the parameters that control that feature localised to the collection making it easier to control in Blueprint or C++.
In our instance collection, we control the world aligned paint layer:
The procedural Dirt, which we decided to keep light for a realistic scene:
And lastly some colour controls that control specific assets in the level tying them to the colour blend settings for primary secondary, and tertiary colours. This allows for some fast colour variation and tweaking of the scene.


Optimization Techniques
Our master shaders are relatively simple and don’t use any expensive functions. The only expensive shader we have in our level is a simple POM shader to fake depth in the ceiling. This is expensive due to its for loop in the shader code that needs to be called multiple times to fake the depth effect with multiple samples.
Materials
The procedural AO is a simple UE4 feature where you use the Lightmap baked AO information modulated by a noise texture to control dirt buildup.
To use this in your own project, you enable the “Generate Ambient Occlusion Material Mask” feature in the world settings window under lightmap settings, and after you have baked your lightmaps, use the precomputed AO node in a material to use it as a mask in the shader. From this point you can use any type of blend or noise to modulate it, the falloff and create a dirt buildup effect.


We have standard shaders for most Dekogon UE4 projects, created by Clinton Crumpler. However I needed to tweak those and add features for this project.
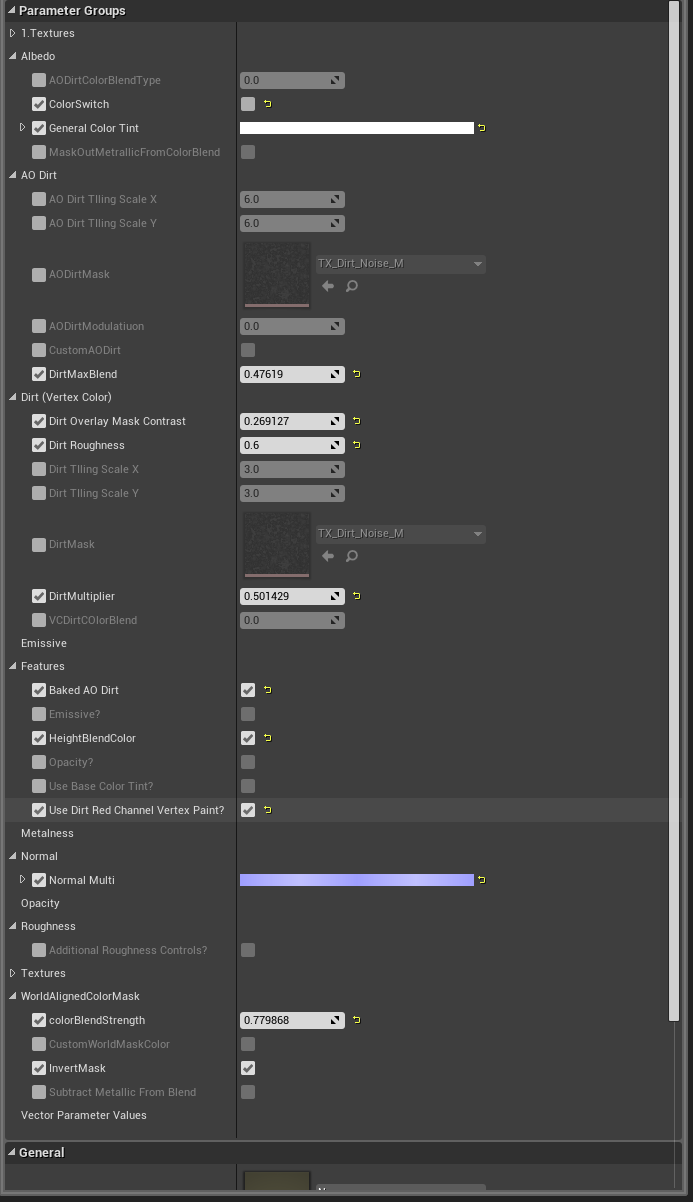
I wanted a simple shader that I could use as the master shader on all assets in this scene. That would be cheap and have the ability to turn features on and off per asset that used them on a per instance basis. For this I approached the material with a modular approach, breaking the features into sections that are stacked sequentially, with the feature that should be on top of all at the end and the base textures at the bottom/back of this stack.
We aren’t doing anything special with layered materials, it all just exists in the Master shader. I treat the shader linearly starting with the base and then allowing for albedo tweaking, then dirt on top. Just having the ability to paint Dirt in Vertex colours and using the masking method explained above you can get some pretty organic looking results.

When approaching any project it is important to know the limitations of the materials you want to use. If you have one master material that does everything you will end up wasting instructions somewhere down the line. For example you wont need SSS or Translucency on every asset, but it isn't something you can change with a variable in an instance of that master. Meaning you will either have to not have these features or always heave them on even if you aren’t using them which wastes resources.
So when starting out it is good to break down your scene by the assets that make it up and decide what features you need for them and break those up into multiple simpler master shaders. So having one instance with no SSS (Subsurface Scattering) and Translucency for simple props and another for curtains with those features as you need them.
I mask the R and G channels from the world space so it is just a gradient in the Z axis and control the height and contrast of that with simple parameters and have some simple height blending to modulate the blend slightly so that it isn't perfectly straight and looks painted.


When it comes to making instances of these master materials, limiting the amount of variables that artists can play with until they break materials is always important. And any variables that need to be in the thousands it makes more sense to divide them by 1000 to keep the values being edited within easy to calculate margins.
Tiling Grunge
The gum is a simple mask with a normal map placed about half way up the stack of the material so it is above the base material however below the dirt so it looks like dirt builds up on top of the gum over time. Then I use a simple slope mask to make sure it doesn't get masked to the walls as it is a procedural effect I wanted to be able to add to certain level pieces.

Material Functions
Material functions are powerful tools to encapsulate shader script into bitesize reusable chunks. However for the Gym we kept things very simple and didn't use any custom functions. The materials are simple blends all neatly organised for anyone to go through and follow it from base material through all the blends until final output. If this was a huge game project I was planning for I would take the time to break things down more for organisations sake but for this environment there are few master shaders and all customisation per asset is done in instances and the material parameter collection.
Staying Motivated
This is unfortunately something you can't control when working remotely, so you have to be patient and wait for the artist to respond when they can. To keep a uniform direction working remotely you have to outline as much as you need when doing planning and projections and communicate that precisely. For an environment like this it is much simpler then a whole large game.
I started with a greybox and built a blockout based on references until the scale and shapes felt right and then started making a list of what assets would be needed to fill the space. Once this is dialled in you can give these smaller tasks for assets to the team. Establishing material expectations early on will help keep all assets looking like they belong together and directing art to be more like that established style keeps things feeling consistent and will save a lot of headaches in the long run. Then once things are all approved and in the build it is all down to tweaking and polishing. Then things can be passed off to lighting to do their magic.

Challenges
The biggest problem I have encountered working full time from home is that there is no solid turn off point. It is all down to you to make that choice so discipline is everything. This is a weakness of mine personally. I have so much to do and I don’t have the ability to say “Okay 6pm I can go home now, I’ll get back to it tomorrow.” I have unlimited access to my work and that makes controlling times to step away from things much harder especially if you are a workaholic like me.

Learning Materials
There are more resources out there than ever before, from free YouTube tutorials to Unreal forums, to paid courses to full mentorships. Just start somewhere with a small challenge and try to solve it. Do this a hundred times even with 50 failures and you still know a lot more than when you started.
If you are curious and pay attention to how what you just learned is linked to that thing you learned last month you start moving from having knowledge of things, to understanding things. This is when you start connecting dots you never saw before and start having eureka moments. I wasn't a maths-whizz in high school or college but through shaders I learnt more than I ever learnt in school because with each challenge I wanted to overcome I had to go back and do some learning. Then come back later with new knowledge and tackle the issue again.
And realise that one thing I just learnt is applicable in many other areas. This is when you start to feel comfortable with shaders. Luckily there are a lot of resources to help you along the way so you don't need to fail as much anymore to reach those eureka moments.

Outro
The creation of this environment was a great opportunity to show what Dekogon is capable of in a short time frame, and to help some of the trainee artists grow their skills in a small production environment.
This environment marks one of the last projects I did for Dekogon and is a good sign off for the time I spent and experiences I had. It really was a pleasure working with such a talented group of individuals during my time there, and I feel the quality of the work reflects the dedication of the people that made it. I am proud to have my name behind environments like this and learnt a lot in the process that I will apply to my environment work moving forward.
If anyone has any more questions, you can reach me on Twitter and Artstation.