
Moon shiners Cabin - Stylized ue4 Environment
Explore the Moon Shiners Cabin Environment created by Christopher McNally in Unreal Engine 4. In this article he looks at composition, colour palettes, material breakdowns, and more.
Introduction
Hey guys! My name is Christopher McNally I am currently a student studying games development in Belfast. I have been studying for the past 4 years and I will be graduating in May! Since I have been doing 3D for a couple of years now, I have played around with many things such as props, animation, characters and environments.
After trying many different things, I decided I should focus my time on environment art as this is what I found I enjoyed the most. I also wanted to do stylized art because it was always more interesting to me. I think realism is awesome, but I was never interested in making it.

Composition
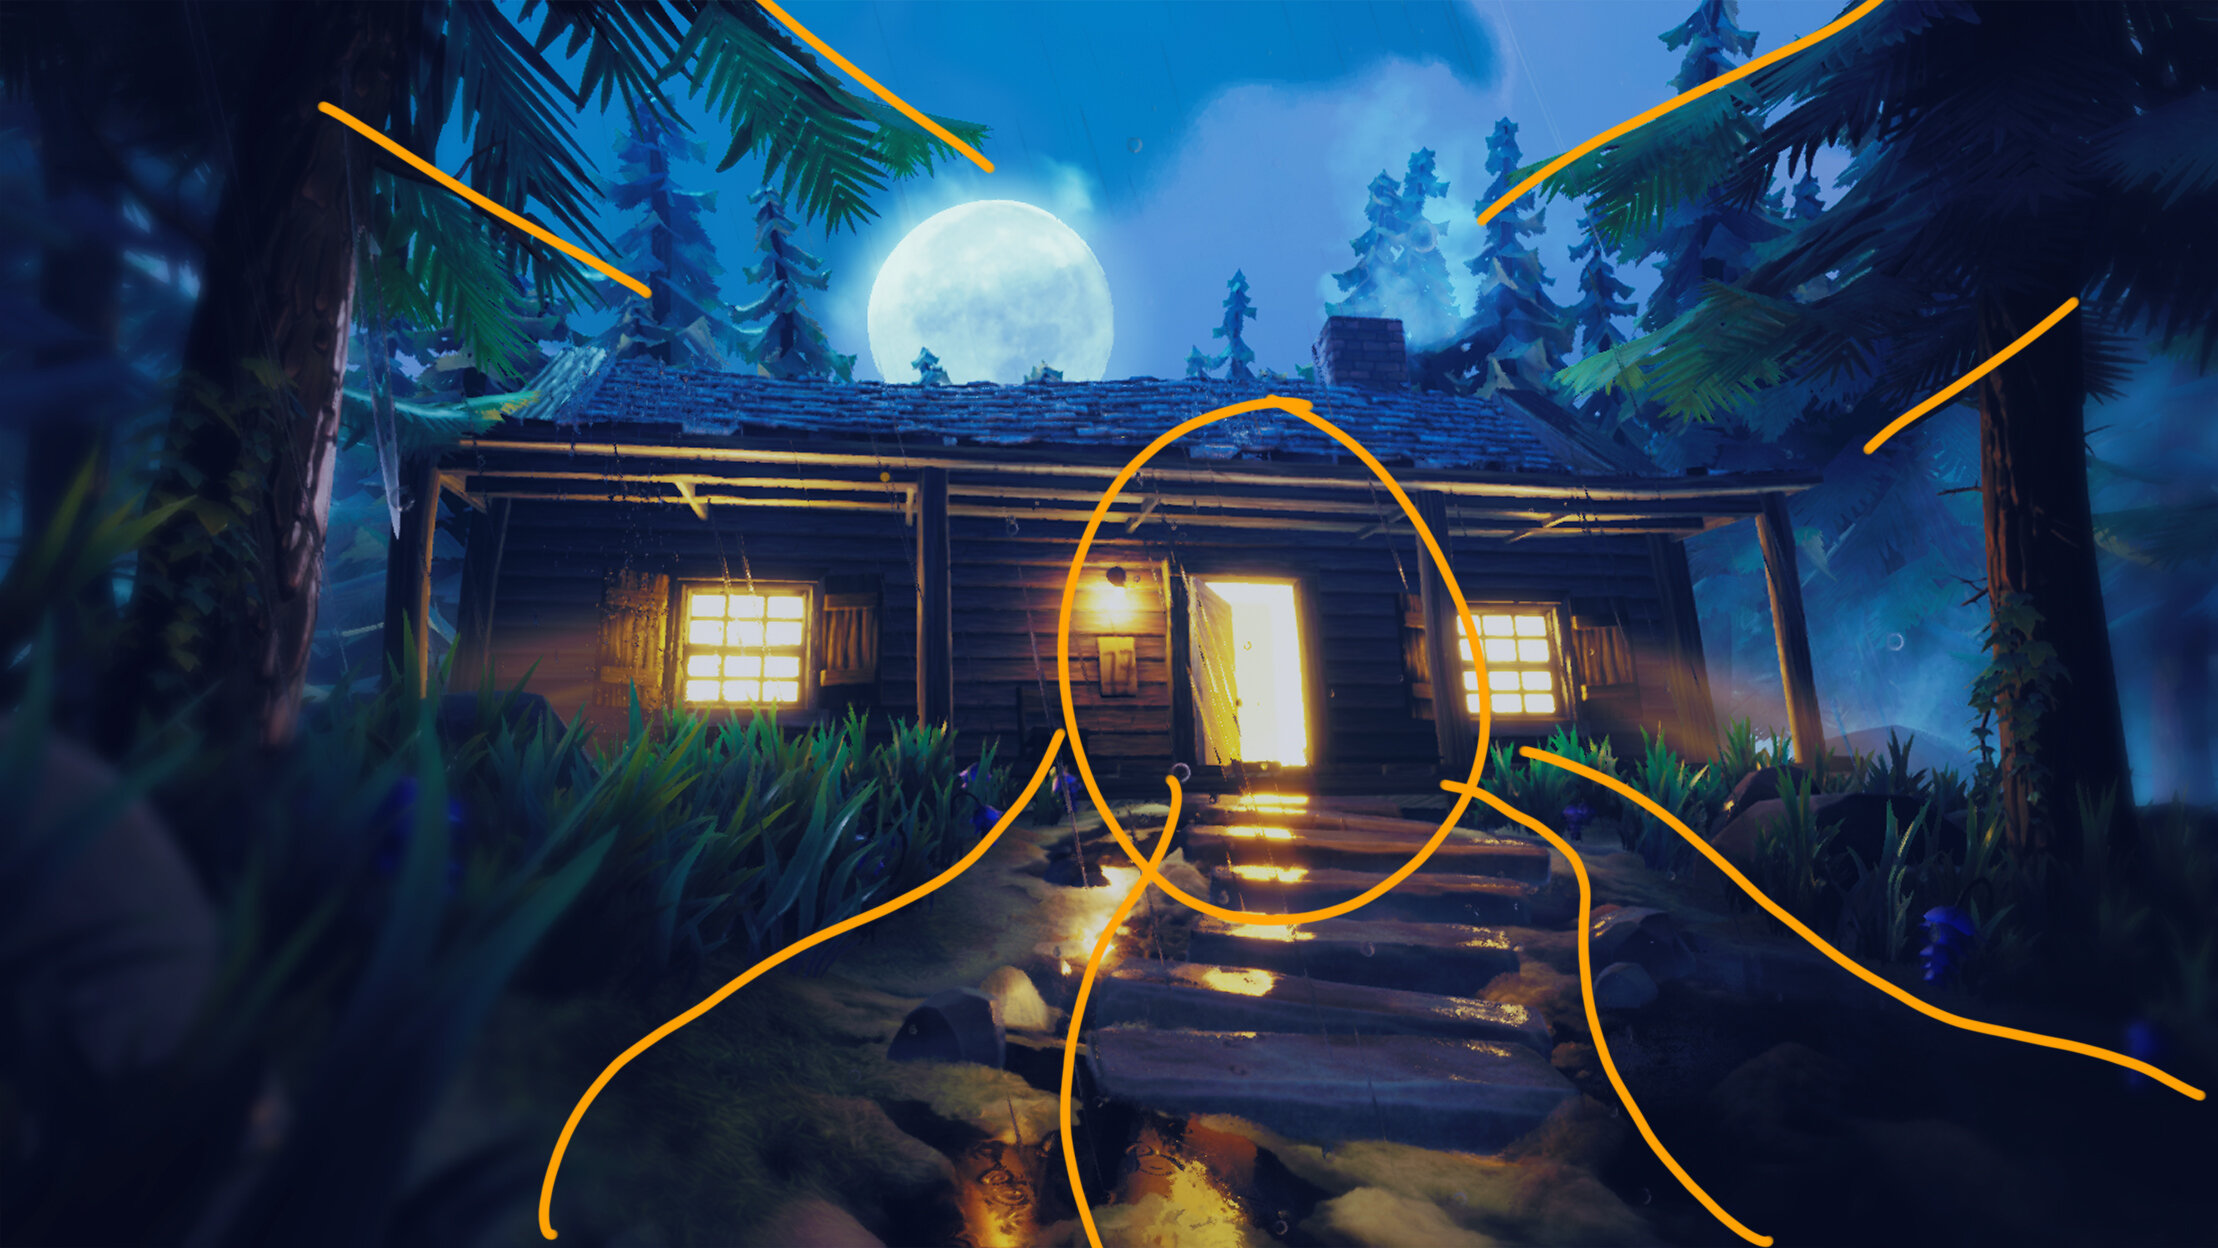
Leading Lines Paintover
For my composition I wanted the house to hold power over the viewer which is why the camera is looking up towards the house. The path leading to the house helps bring the viewers attention towards the house.
The composition was something I was really trying to get right, and you can see that being evident in the progress GIF. I made a lot of changes to the composition as well as the house, as the first couple of attempts at modelling the house didn’t look great and their design was off.

Progress GIF
Colour and Light

Colour Palette
The colour and the lighting were a big part of my scene, as I was trying to make the scene colours fit the mood and feeling I wanted the viewer to have. I was looking into Firewatch and how they did their night scenes as I think Firewatch has a good mood and tone to the game.
I colour picked from the above image and tested what colours worked well with the kind of mood and feeling I wanted to give the viewer. I went with more of a purple-blue colour as I wanted the scene to have a darker tone.
Here is an example of how the scenes colour can give you a much different feeling.

Purple and Blue Tones
This is the scene which uses the purple and blue tones which darkens the scene more and it plays well with the sky.

Green Tones
This image is using more green tones which gives it a sicklier feeling.

Emissive Plane Window and Rectangle Light
The window has an emissive plane inside of it and a simple rectangle light for some extra lighting boost, as using just emissive wasn’t giving me the effect that I wanted.
These are the settings I used for the rectangle light. I normally would make the light static, but I had a bug with Unreal 4.23.2; whenever I was baking static lights the lights emitted no colour. Making them stationary worked but caused some other issues down the line.

Rectangle Light Settings
You can see that the lighting is very simple and there are no fancy tricks with the light sources. I just played around with the settings until I was satisfied with how it was lit. I usually use temperature to pick the colour of my lights, but I wanted it to be the same colour as the emissive so I just colour picked it from the emissive material.
Fake light

Example of Fake Lights
I used some fake lights to give my environment a more interesting look and give the assets more shape and form. I used 2 directional lights, with one the same colour as the windows, so it looked like the light was coming from them. Another directional light simulated the moon light. It helps with contrast and it gives the trees more form.
This is the fake lighting disabled and you can see the difference that it makes. It’s not very realistic but it makes it look better. I always think game art should look more interesting than real life, faking lighting to make the image more interesting is always a good thing.

Fake Lighting On/Off Comparison
A neat little setting I found and decided to play around with is the lower hemisphere colour. This colour is default black and it makes the shadows very dark. I gave it a blueish grey colour as I wanted to give my shadows some colour as in real life shadows aren’t pure black.

Lower Hemisphere Colour
Be careful not to make the colour too bright as it will start to wash out your scene and it might not be the effect you’re looking for.
Storytelling
How the environment story was made up is quite a funny story… I was talking to a friend of mine in class about what kind of story would fit the scene. He went from super serious and dark to something more light-hearted. We both agreed that the light-hearted version was much better. So instead of making a super serious story we thought of making a sillier story and giving the environment a more serious tone.
The Environment’s Story
There is a lonely cabin in the woods with footprints leading up the house. You see bottles of moonshine on the porch and a muddy handprint on the door number, what happened? Well, that darn moonshiner got drunk, lost his shoes in the woods, and fell in some mud. So when he was going back home he got mud everywhere and then went to bed, but he left the door open, he's going to be chilly for the rest of his sleep.
The Difficulty of Storytelling
I found storytelling to be quite difficult as it is something that I’m not very good at and have been trying to practice more as it is an important part of environment art. I found it difficult to convey a story through props and assets as I was unsure of how I was meant to do it.
Foliage Workflow
When I was deciding what scene I wanted to make, I knew that foliage had to be a big part of it because it’s something I enjoy doing. I know that foliage plays a big part in the game art style.

Reference Board
I first started making the tree bark as I felt like doing some Substance Designer stuff at the time. I started by getting some reference on what type of bark I wanted to make.
I decided to get to work on the material and see what I could come up with using the reference. So, after doodling around in Substance Designer and getting some feedback I came out with this tree bark. I avoided using giants scars or noticeable details as I knew it would tile a lot and it would be very noticeable.
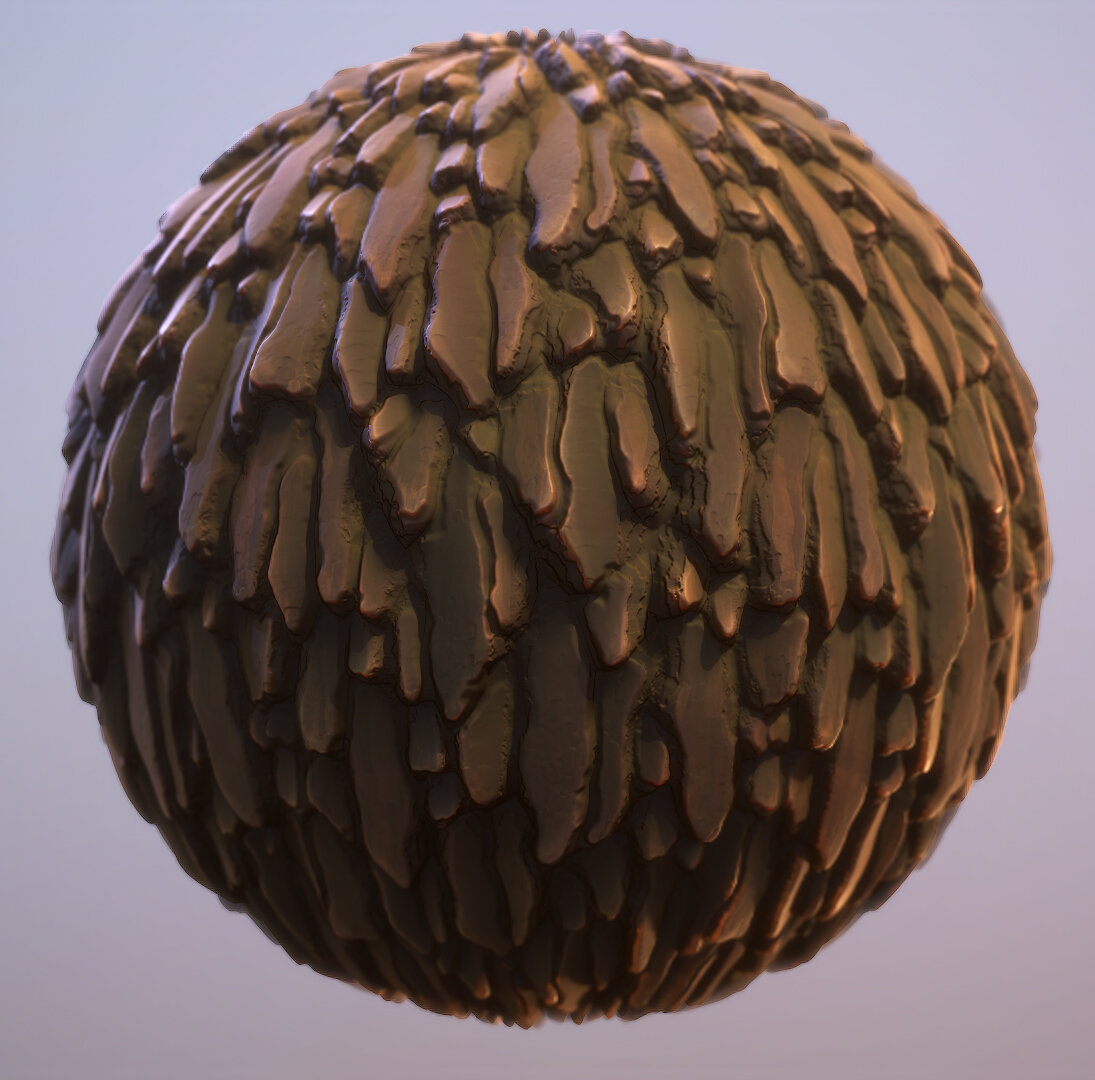
Tree Bark Material
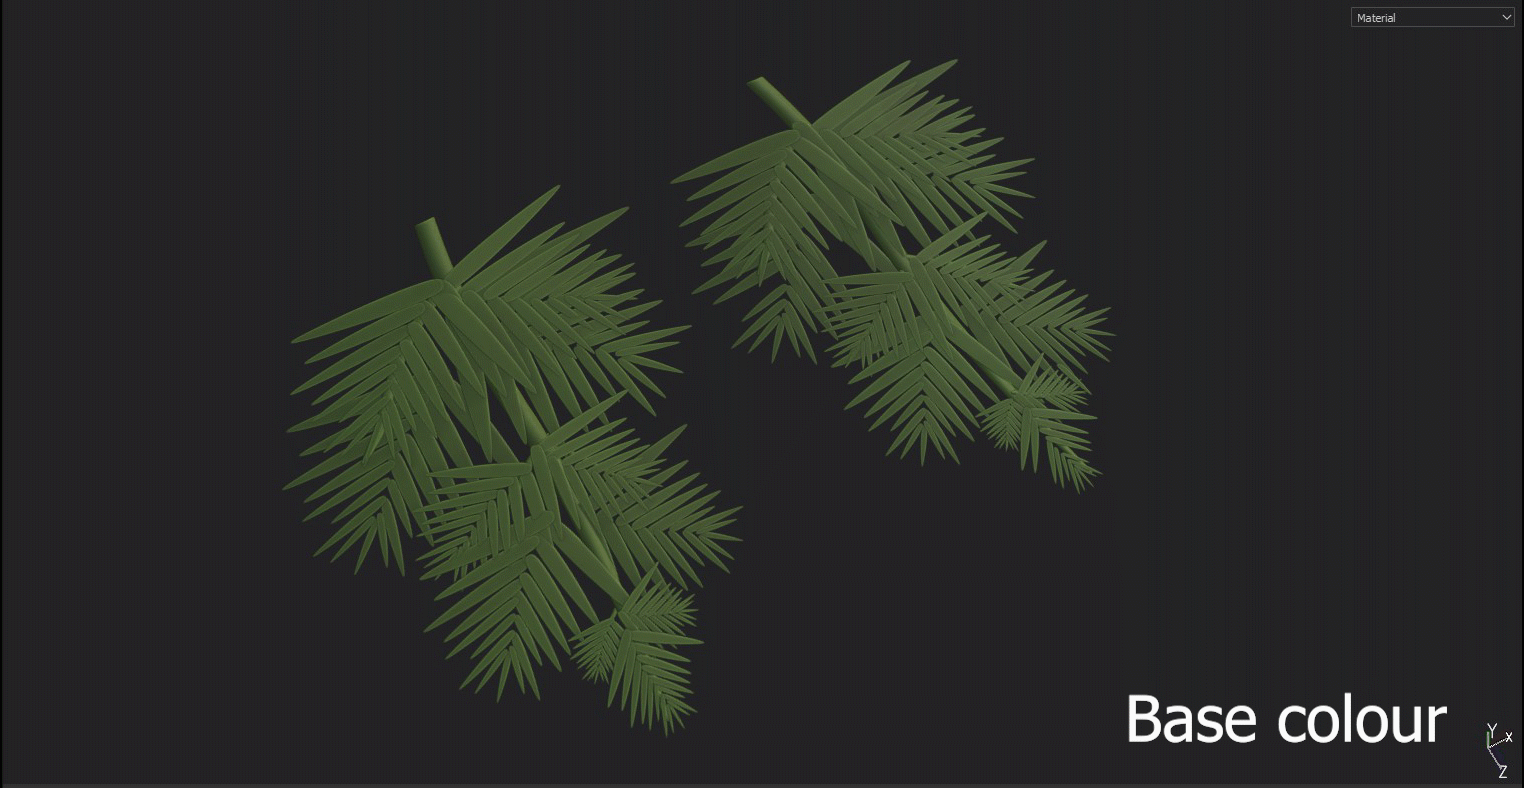
After the bark was all finished, I went on to blocking out the tree branches. I went with a simple approach as I didn’t want the foliage to be super complex, as it wasn’t the focal point of the scene.
This is the blockout of the foliage, and as you can see it is very simple it’s just a cylinder down the middle and some subdivided cubes as pine needles.

Tree Branch Blockout

Tree Branch Blockout
I then baked out a few of the masks in Substance Designer as I find that baking foliage is much easier in Substance Designer, especially for the opacity mask. But this just personal preference. Once the maps have been baked out, I bring them into Substance Painter to use for texturing.
The texturing process is simple. I can’t stress enough how important gradients are for foliage they really help it feel more natural and life like.
Branch Texturing Process
You can see from the gif that it’s a pretty simple process but an effective one. The heightmap multiply was something I was trying out, as I wasn’t getting enough separation in the needles before. For stylized assets I always do a curvature overlay at the very end of the texturing layers just to push the edge highlights more.

Tree Blockout Shape
Once I had the foliage made, I went into Blender and blocked out a very simple tree shape and then started placing the cut-out branches on top of the trees shape. This was my first pass on the trees and I was able to get them into the engine.
I later got some feedback on the trees saying I should add some branches at the bottom of the trees to show some life cycle to the trees as the branches at the bottom wouldn’t get as much water.

Lower Branches

Lattice Deform on the Tree
I got a bit more feedback for the trees saying that the shape was a bit boring and I could stylize that shape much more and make it look more interesting. This seemed like it was going to be a lot of work but then I remembered one of the best tools every artist should use, a lattice.
This tool is a real life-saver and it can save you from doing a lot of work. So once I was finished playing with the lattice and I got the shape I wanted, it was time to throw it in engine and since it was named the same it would automatically update throughout the world.
I applied the same workflow to the rest of the foliage but I had to sculpt some of the details for the grass and the flowers
Creating Rain and Clouds
I didn’t create the rain, I used a pack from Unreal called Soul: City. It has some nice particle effects in it which I highly recommend using. I did attempt to make my own rain but it just didn’t look great. I have no problem using VFX from packs as I’m not a VFX artist and making VFX is a very complicated and time-consuming skill to learn, it’s not the skill I want to focus on and develop.
So, if anyone is wondering “should I make my own VFX for my scene if I want to be Environment Artist?” No, as you could be focusing on other skills such as lighting and composition.
The clouds in my scene were something I had never done before and I was very unsure of how to go about. So, I was looking for some good resources on how to make clouds. I found an absolutely great tutorial by Tyler Smith.
I followed his tutorial and came out with some pretty decent looking clouds which I am happy with. I had to paint my own clouds as the ones he provided weren’t very stylized looking and were much more realistic.

Painted Cloud
I got a cloud texture from Textures.com, brought it in to Photoshop and repainted it. I took some details away as I didn’t want to have too much noisy detail and distract the viewer from the overall image.

Panning Cloud Texture
This is where the immersion breaks for my scene. I knew that I would never show my environment from any angle other my chosen ones, as I wanted to focus on the composition. The clouds are just one cloud texture panning across a card that was made in Blender.
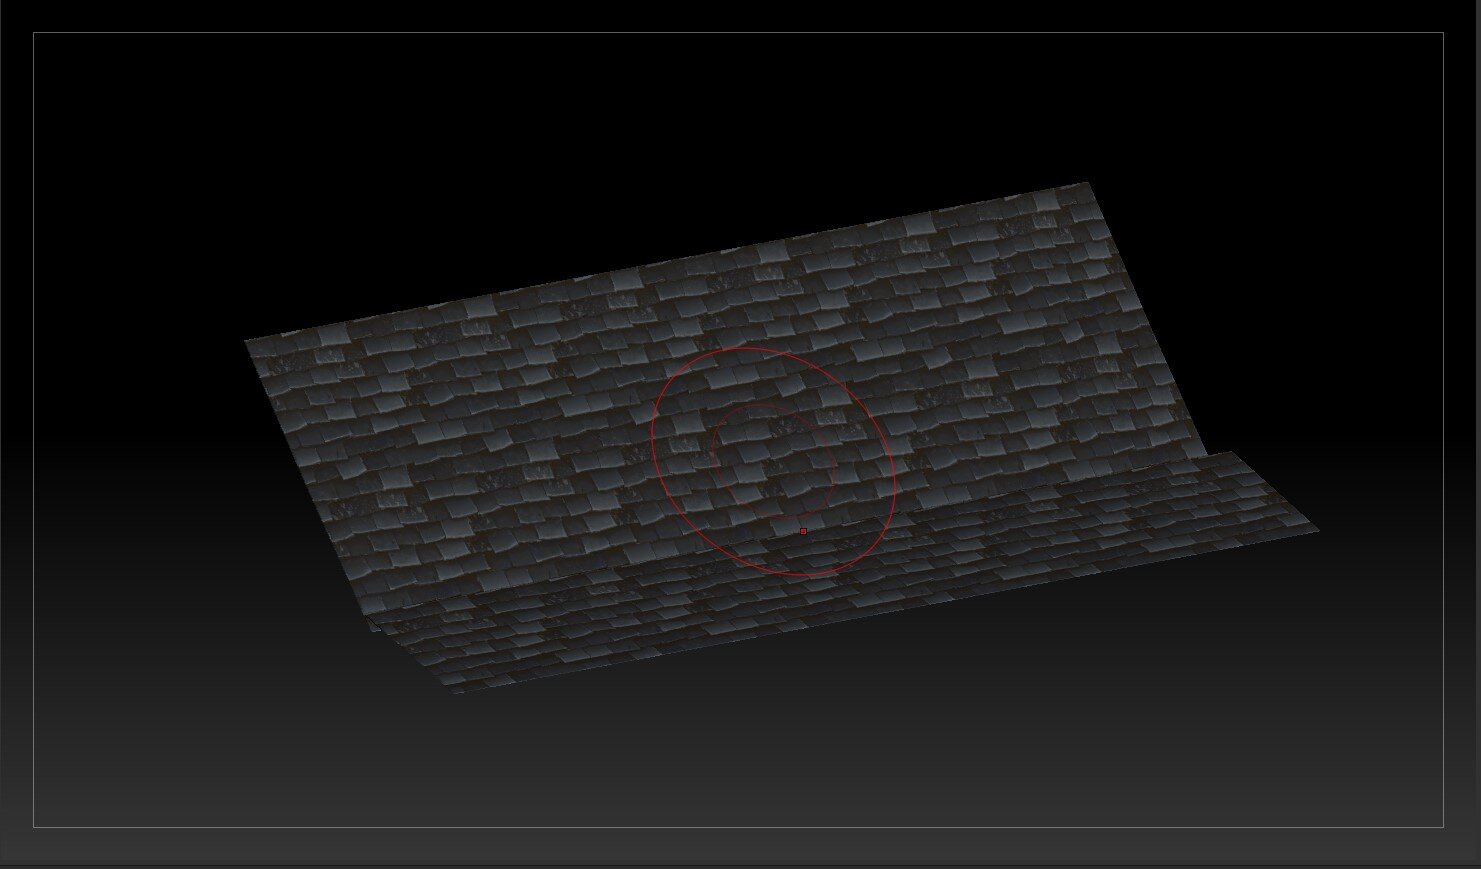
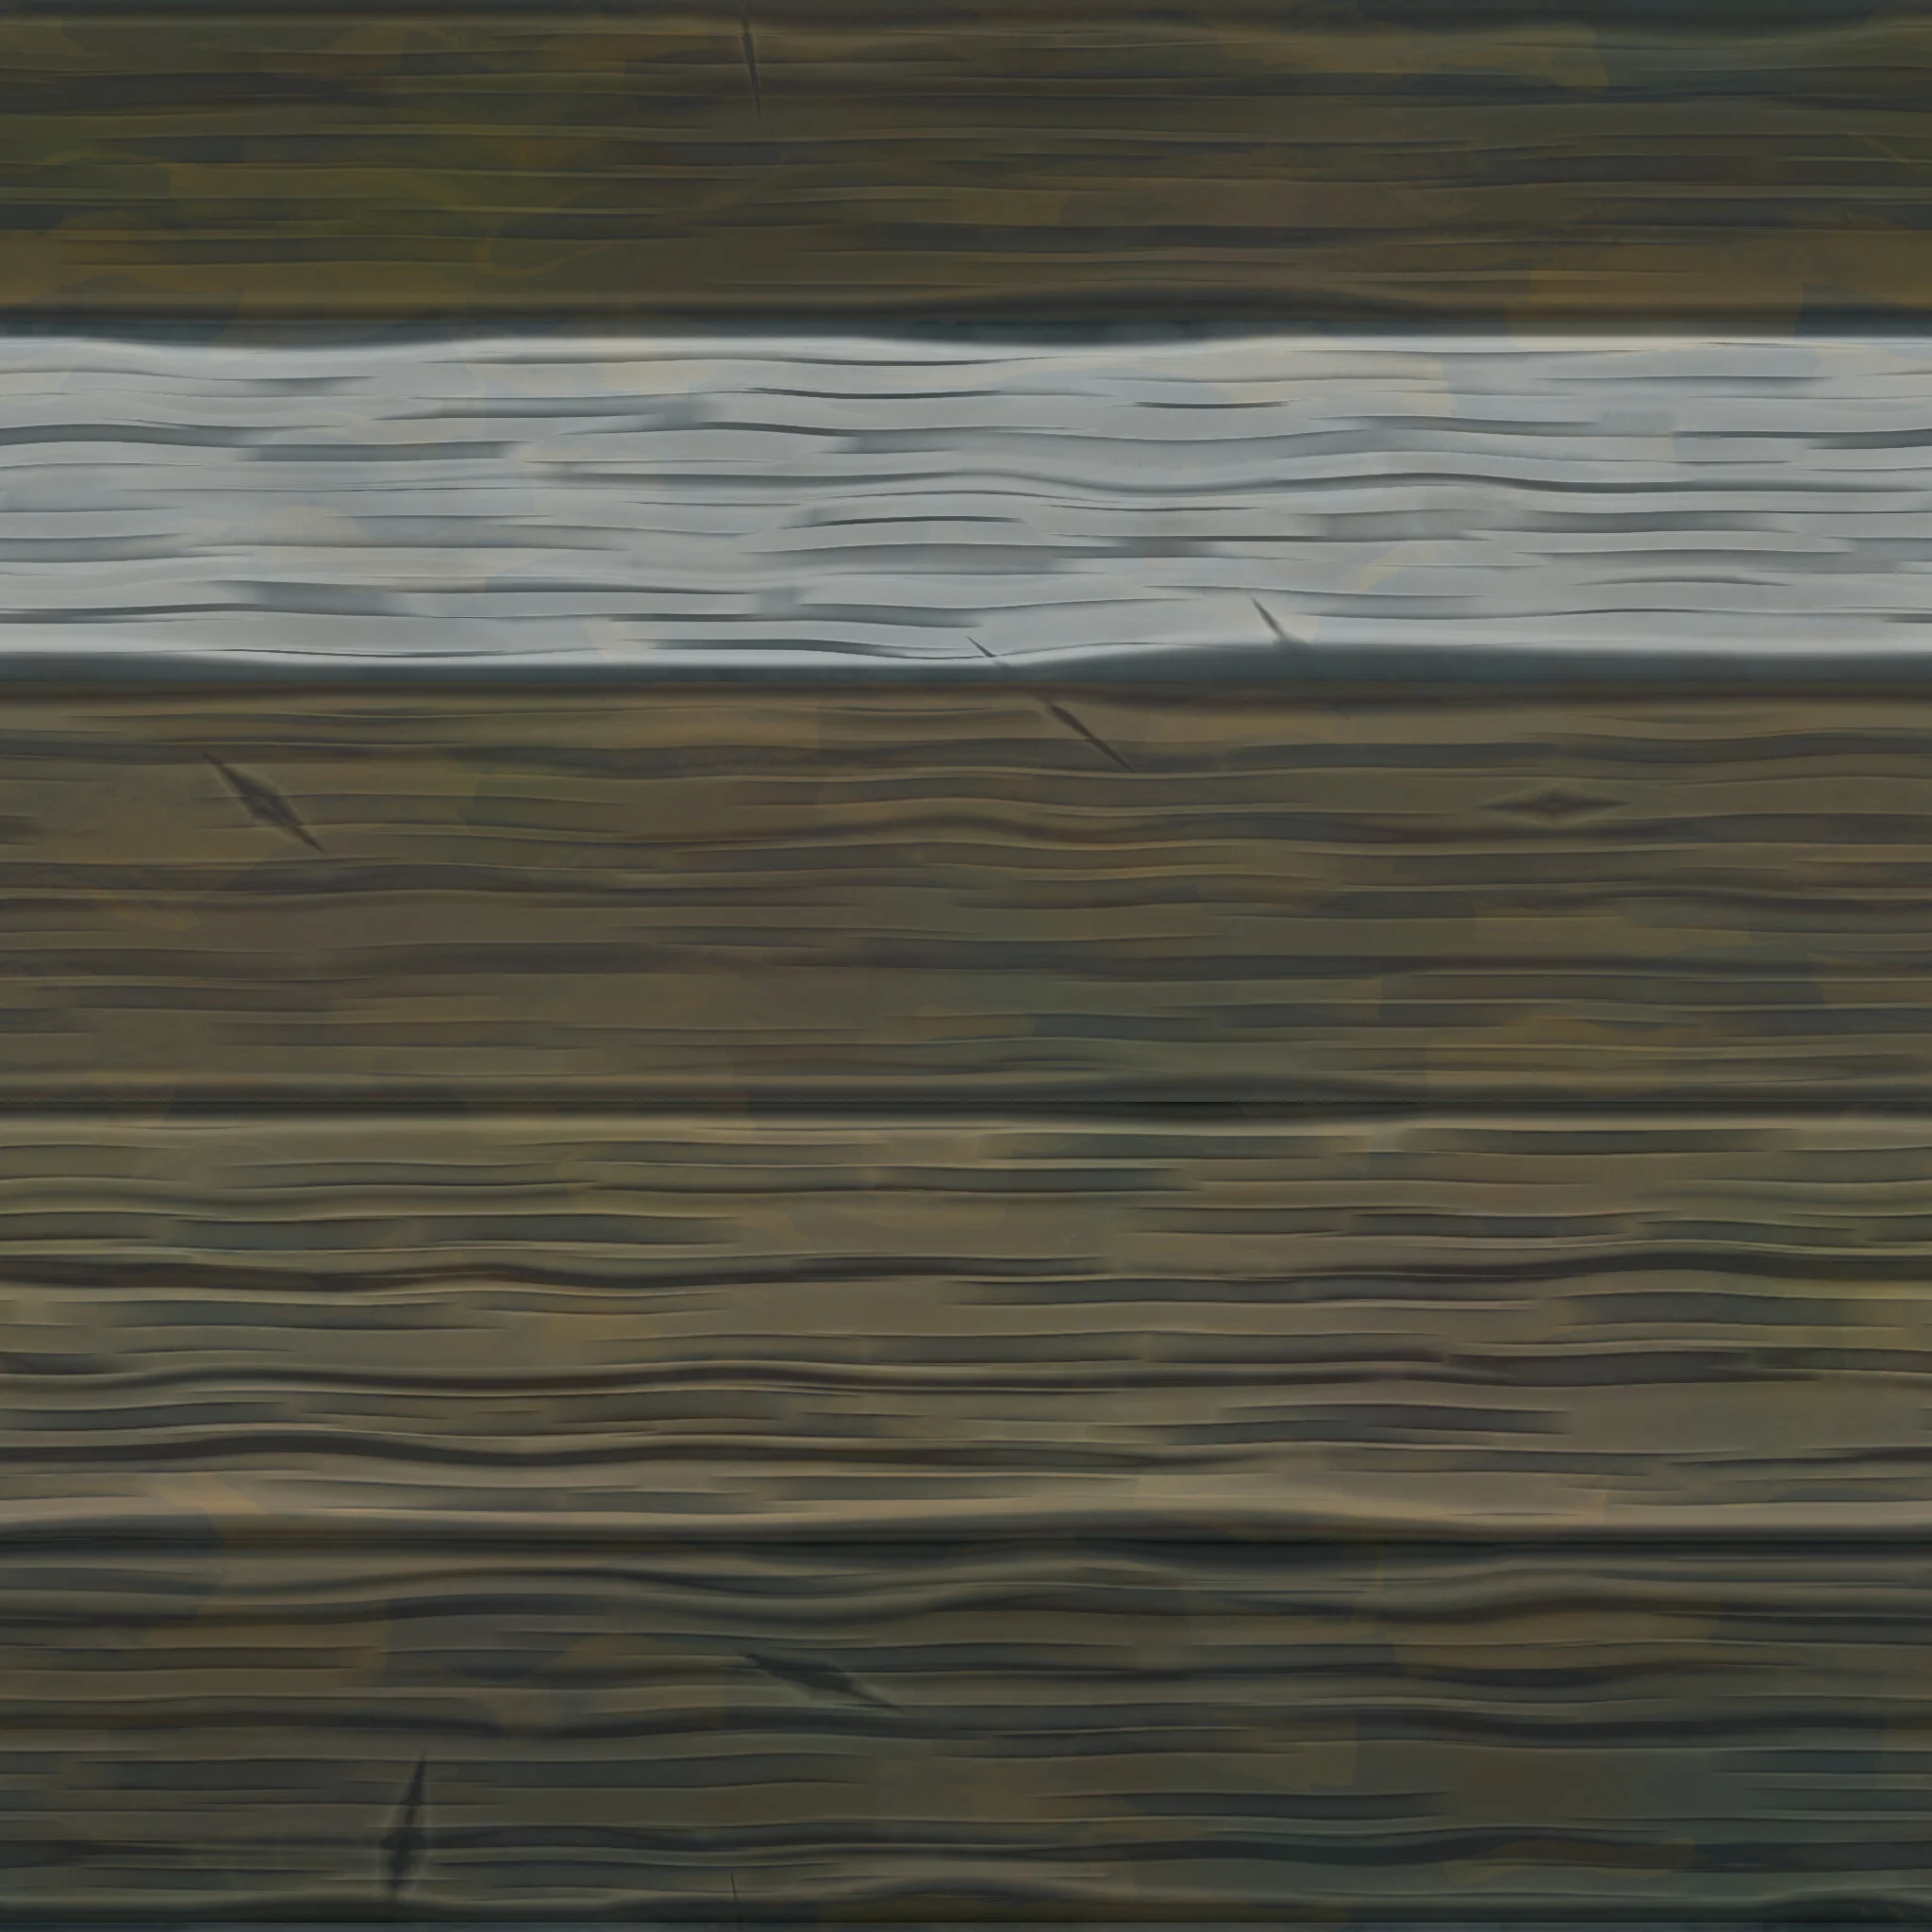
Creating Roof Tiles

Roof Tiles Material
I first created the roof tiles in Substance Designer as I prefer making tileable materials like this in Substance Designer rather than modelling them out and sculpting them as it saves a lot of time and it’s much quicker to change if I need to.
The big question was how do I use the roof tiles without tessellation? This was something I was trying to solve for a while as I know I definitely can’t use tessellation for a roof as it would kill my frame rate instantly. I went looking for an answer to my problem and I found it after a while of searching. I found from this YouTube channel it’s a great little tutorial if anyone needs to do something similar.
I’ll breakdown how it works quickly:

Tiling Roof Plane
For me I needed to tile a plane along the house where I wanted my roof to be. I made one plane and applied the texture, then used an array modifier to tile it more.
Subdividing in ZBrush
I then exported the mesh into ZBrush and the subdivided it with smoothing off a few times so that I can get enough geometry to push the tiles up.

Applying Texture

Flipping Texture
You then go and find your height map wherever you have it saved. Import it in to ZBrush and make sure you flip it vertically because for some weird reason ZBrush flips texture maps. You then go to texture map and apply the height map.

Masking Settings
You then go to masking and mask by colour intensity. This will by mask by your greyscale map so the whites will be the highest and the blacks will be deepest

Displacing Mesh
Once you’ve done the masking bit all you have to do is use the move tool and bring it up as much as you want the mesh’s height to be and it’s been displaced. Make sure you add a polish on after it as it sometimes leaves weird artefacts (Deformation - Polish).

Keep UV’s option for Decimation
Once you have the mesh as you want it, you decimate it and making sure “Keep UV’s” Is on and lower the tri count to something reasonable you can export back into your scene.

Final Roof Mesh
The polycount is high but after all the research I’ve been doing and looking into game optimisation, the polycount doesn’t matter too much. LOD’s will also help with the high poly count and it won’t decrease your frame rate.
So, don’t be afraid to use more polys if you need to, polys aren’t as expensive as you think. Obviously don’t go overboard and give it 1 million polys.

Final Roof Tiles
This is the result in engine and as you can see the roof has a nice chunky feeling to it rather than just being a flat plane.
Creating Materials
I made all my materials using Substance Designer as part of the reason I wanted to make this environment was so that I could use Substance Designer more as it is quickly becoming my favourite software.

Materials Overview
These are all the materials that I made for the scene and as you can see there’s not a crazy amount of materials here. I always strive for quality rather than quantity.

I also made a trim sheet so I could build a lot of parts of the house. I used it a lot throughout the environment. It’s not a very conventional trim sheet where it has small strips and big strips. Instead I went with an evenly sized trim sheet so I could use it to get more colour variation into my assets as having something that is just one colour isn’t very interesting or realistic.

This is it in use in the environment and as you can see, the colour variation helps as it makes it look more interesting and less bland.
Custom Shaders
Running Water Shader
This first shader isn’t completely mine as I kind of jerry rigged a shader from the Soul: City pack that had water running off of the assets. I jerry rigged it into a master material in which I could just make the texture samples a parameter and switch out the maps. The shader was also customisable to turn running water on or off. The running water shader is quite expensive so I made sure to use sparingly as I didn’t want my frame rate to die.
I decided to use mostly their graph rather than building it from scratch because it would have taken me twice as long to do so and I wanted to work smarter not harder!

Running Water Master Material
I also added a dither option so that if needed an object could blend into the ground better. This could also be toggled as it costs performance. I mainly just used it for the slabs of the house as I was having trouble making them look less floaty because of the parallax occlusion.
This is what the shader does when it has the running water disabled and enabled. It gives quite a realistic effect to wet surfaces and I was happy enough to use it!

Running Water Disabled

Running Water Enabled
Landscape Material
The landscape material proved to be the most bothersome part of the environment because every time I updated it, shaders would compile, and it would take a while. I was also having issues getting the parallax occlusion to work with it as, from asking around, people couldn’t really get parallax to work with landscapes.
I was also going to use tessellation in case the parallax didn’t work out, but the tessellation wasn’t giving me the kind of effect I wanted. I eventually got the material working. If anyone else has any issues with parallax and landscape materials message me and I might be able to help you out!

Landscape Material
Inspiration

I find inspiration in, wait for it... Games! I know shocking twist there. Yes, I find a lot of my inspiration comes from games. When I first wanted to make this scene, I was really into a game called Rime and it had this amazing rain level and I’m a sucker for rain. This was one of my original inspirations for the scene

Of course, I had more than just one inspiration. A few of my other inspirations were Firewatch, Alex Beddows Cerberus scene and Jay Cummings Slaughterhouse. The reason they gave me a lot of inspiration is because I get a lot of mood and feeling just by looking at the images. I wanted to have something that is close to the quality bar that these guys set!
Feedback
I seek feedback from Discord communities such as Experience Points, Dinusty Empire and JRO Tools. Jonas (from JRO Tools) is always around in his Discord and more than likely if you post a WIP he is likely to give you feedback on it. He gave me a lot of feedback for my environment and I am very thankful to him! The same goes for Kem and Kryca (from Experience Points)!
There are loads of people in these Discords that have great feedback to offer. I recommend joining them all and putting your work in the critique sections. You will get some honest and good feedback.
I want to give special thanks to 2 people:
Jacob is someone I’ve had the pleasure of speaking to many times. He is always ready to bust out the pen and give you some help. He helped me figure out the design of my house as when I first asked him about the scene, he thought that the house design was lacking and it could be improved upon.

He was also great at spotting stuff that I overlooked or I had not thought of beforehand.
Alex was kind enough to do a paint over for me when I was getting close to finishing the environment. He really helped me fix some of the major issues that were going on with my environment and helped make it high quality.

Alex is one of the nicest people I’ve ever met and if he can help you out somehow, he will!
Advice and Tips
Don’t be afraid using VFX and more polygons to your advantage and if something is going to take you 20 hours to make like a rain particle system or a running water shader and there’s one for free then just use the free one because it will save you so much time and headache done the line. Game development is all about using your time effectively.
I’ve been in the situation before where you think in your head that the environment needs to be a game level. Then you start to over think that it needs so many props and assets and it will deter you from doing the environment.

Minimal Detail outside of View
You can see on the sides of my house there’s no detail or windows here and that’s because there doesn’t need to be, I was never going to show it so it would have been a waste of time to put details here. This will save you time and save you from doing a lot of unnecessary work.
Just worry about getting the main composition to work and then you can decide what you need to do from there and what else you want to show in the environment.
Lookout for the Future
Well my next planned personal project is a diorama and this is because I want to focus on the quality of my assets more and get better before Artstation announce their next challenge which I can’t wait to enter! So stay tuned for that!
Outro
Thanks for reading everyone and I hope I have shared some useful information to you. I also hope that I haven’t rambled on too much. See you later!